Gasboy Lamp Kit User Manual
Page 2
032121 Rev. 7297
Page 2
1. Remove front and rear doors.
2. Remove front and rear bezels by unfastening 4 bezel screws (2 per side).
3. Remove 4 nuts that secure the top cover and remove cover.
4. Remove the 6 nuts that secure the top frame and remove the top frame.
5. Install lamp assembly to top frame with 2 new Z09273 nuts.
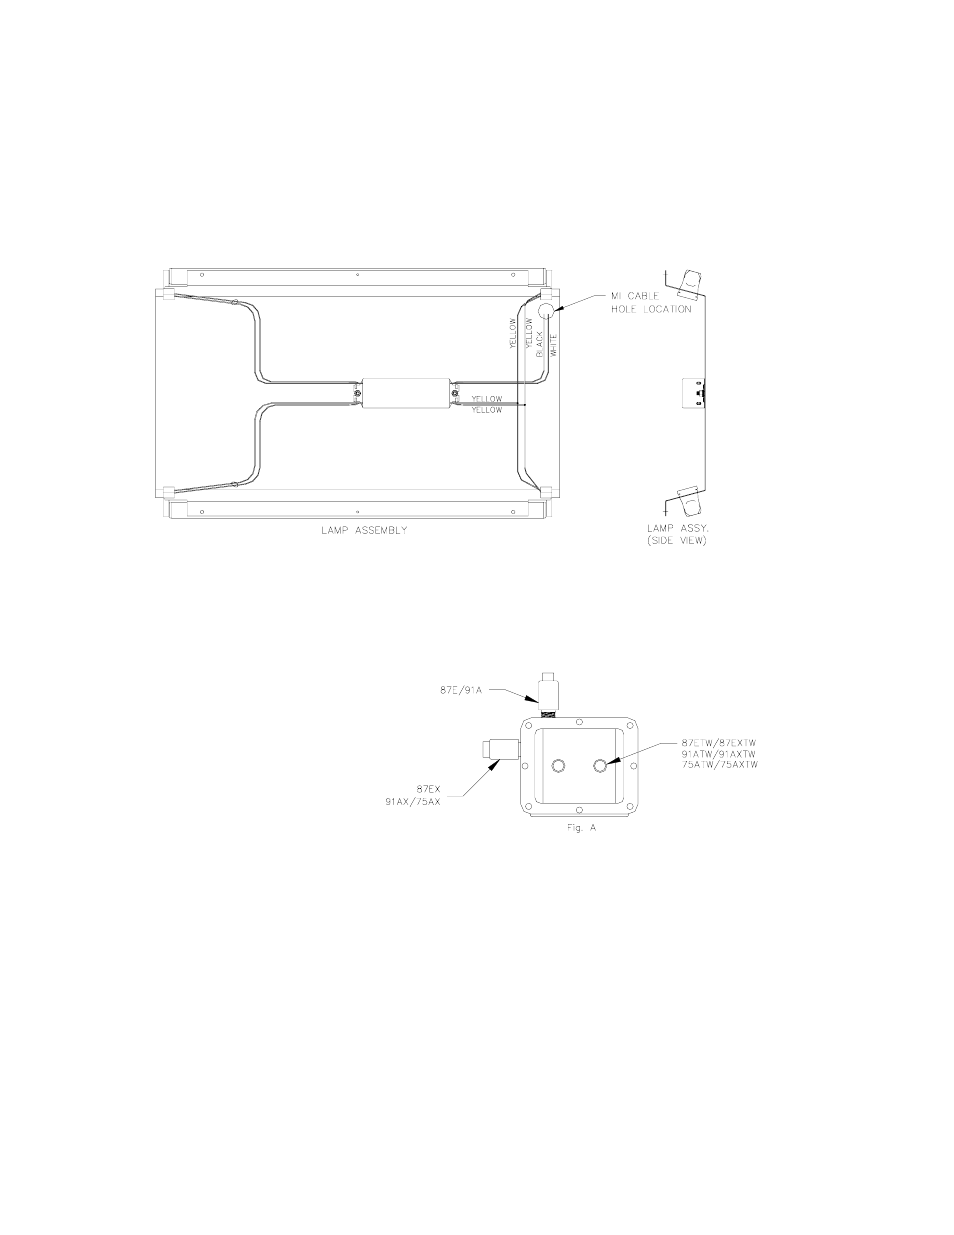
6. Using 6 existing nuts, reinstall top frame/lamp assembly. NOTE: MI cable hole location should be on AC J-box
side.
7. Install flexible MI cable to AC J-box
with 066400 union. See Figure A for
the appropriate location for your
application.
8. Install other end of MI cable to lamp
assembly with 068816 washer and
039130 nut. Assemble nut and
washer on both top and bottom of
lamp assembly.
9. Connect wires from MI cable to lamp bracket assembly with wire connectors (white to white, black to black).
10. Connect wires from MI cable to hot and neutral feed in AC J-box. Installer must ensure that electrical rating of
the lamp assembly corresponds to the electrical supply. Refer to the Installation/Operation Manual for your
model pump for other pertinent wiring information.
11. Verify that lights work.
12. Reinstall top cover with existing 4 nuts.
13. Reinstall bezels and doors.