Removing the face panel, Figure 19: removing the face panel, 2 removing the face panel – Daktronics KE-1010-7.6-RG User Manual
Page 27
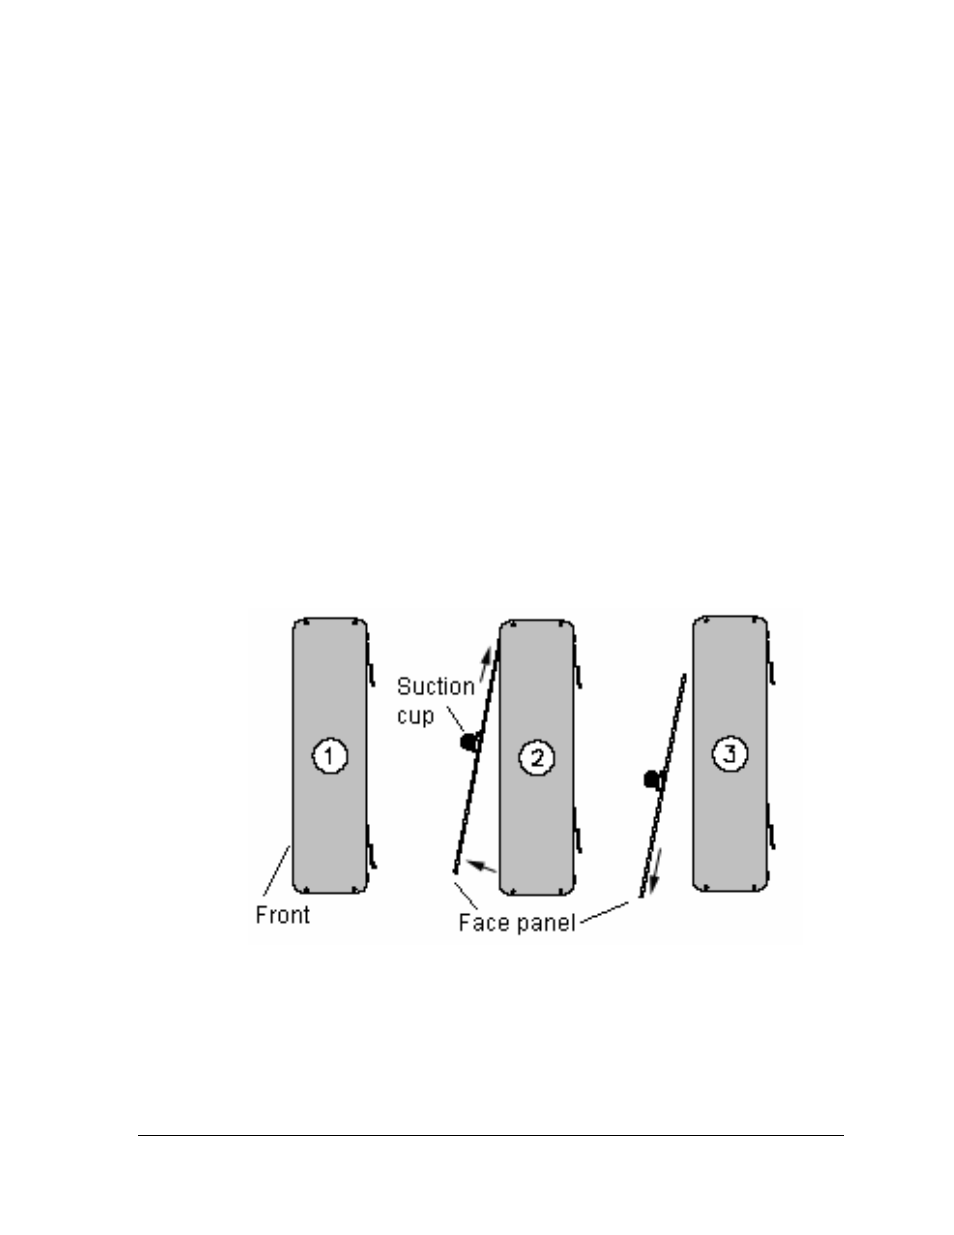
6.2 Removing the Face Panel
The internal components of the KE-1010 displays may be accessed after the face panel and
modules are removed. Refer to Figure 19 for a visual diagram of the steps involved in
removing the face panel. Never attempt to lift the entire display or carry the face panel using
the suction cups.
To remove the face panel:
1. Disconnect power to the display.
2. Using the suction cups provided with the display, slide the face panel up toward the
top of the display (Figure 19).
3. Pivot the bottom edge of the panel out of the support groove. The face panel should
now be free of the display cabinet.
4. Carefully remove the face panel. The LED modules will now be accessible.
5. Remove the appropriate module to access the internal electronic components.
To replace the face panel, follow the previous steps in reverse order.
Note: When replacing the face panel, it may be slightly wavy and not slide neatly down into
the groove. If the face panel is not easily reinserted, then start at one end of the display and
gently press your hand against the bottom edge of face panel to slide it into the bottom
support groove.
Figure 19: Removing the Face Panel
Parts Replacement
21