Display mounting, Ceiling mount, Wall mount – Daktronics KE-1010-7.6-RG User Manual
Page 10: Figure 6: ceiling mount, Figure 7: wall mount, 2 display mounting
2.2 Display
Mounting
• It is the customer’s responsibility to ensure that the installation will meet local
standards.
• The mounting hardware must be capable of supporting all components to be
mounted.
Daktronics recommends either a wall mount or hanging mount method (Figure 5).
Remember to have all mounted displays inspected by a qualified structural engineer.
Ceiling Mount
Splice bars, provided by Daktronics, have 3/8"-16 UNC holes that can be used
to secure the ticker displays from a ceiling or other overhead structure. Use the
middle hole only when using the splice bars for mounting. Daktronics does
not provide the ceiling mounting supports. To hang a ticker, refer to Drawing
A-118572 and the following instructions:
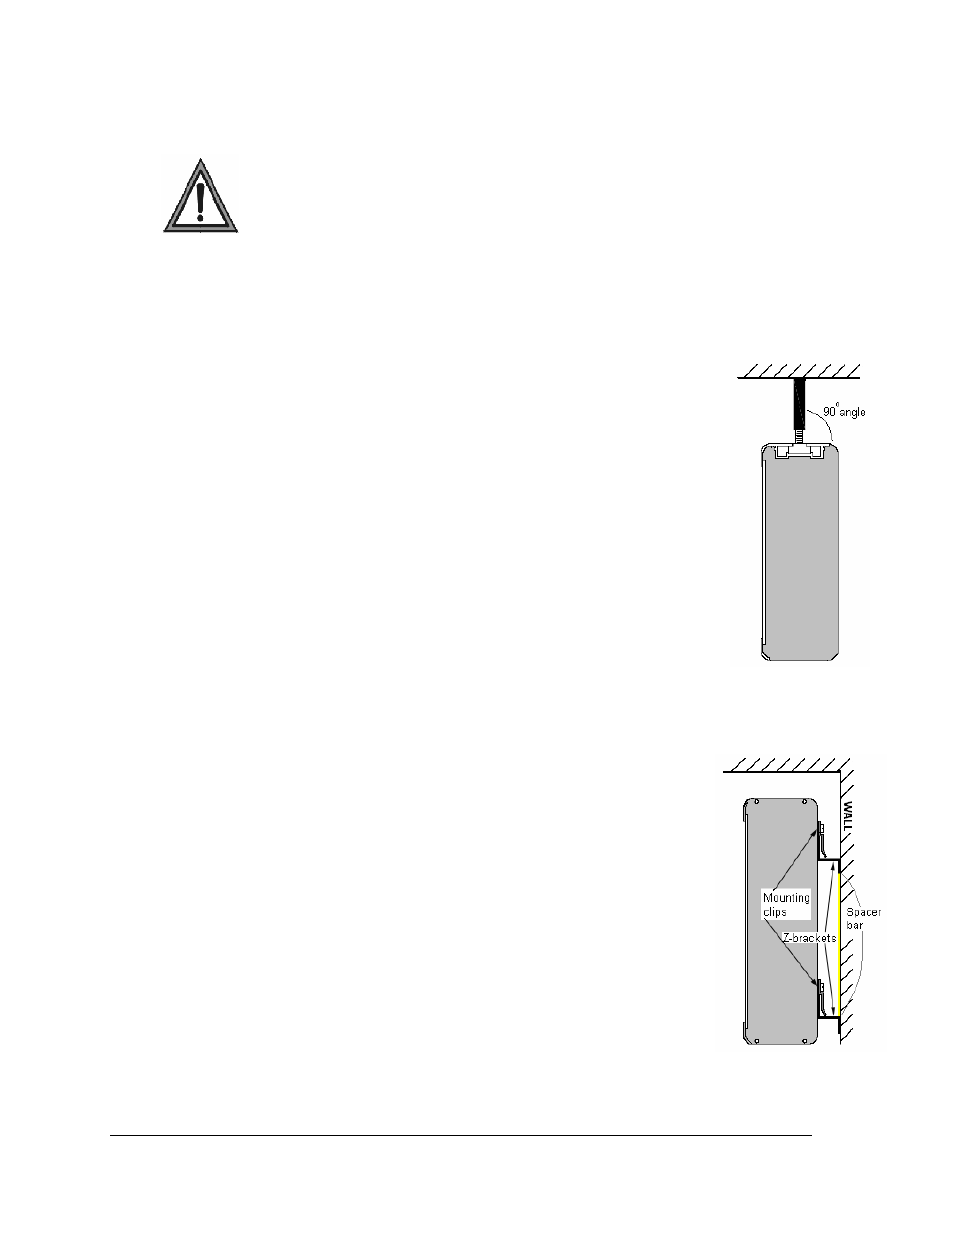
Figure 6: Ceiling Mount
1. Determine and mark the locations where the ceiling mounting
supports will attach to the overhead structure. The supports, when
installed, should form a 90-degree angle with the top of the display
(Figure 6).
2.
Install the supports. Qualified personnel must approve the ceiling
mounting supports. Daktronics is not responsible for ceiling mounting.
3. Secure the splice bars to the supports.
4. Carefully hang each display by fitting the channel on the top of the
display over the splice plates and slide it into place (refer to Drawing
A-118572). When multiple sections are used, each joint between
displays must have hanging support.
Wall Mount
The wall mount method includes the installation of Z-brackets to hold the
mounting clips attached to the back of the displays. Refer to Figure 7.
Figure 7: Wall Mount
1. Determine the desired location of the top of the ticker display. Refer
to Drawing A-234483.
2. From the desired location for the top of the display, measure down
the distance listed in the chart following or Drawing A-234483. This
is the height location where the bottom Z-bracket is going to be
attached to the wall.
3. Determine the desired location of the end of the ticker display.
Measure from this point 3/4” in toward the display body if the
display has an endcap, or 1/2” if an endcap is not present.
4. Mount the bottom Z-bracket at this location.
5. Once the bottom Z-bracket is mounted place the metal spacers
(provided by Daktronics) on top of the bottom Z-bracket. Be sure the
arrow points up.
6. Mount the top Z-bracket so that the bottom of the bracket touches the
top of the spacer and the ends align with the bottom bracket.
Mechanical Installation
4