Adding & editing a shape, Online campus manager, Blue alert – Code Blue BLUE ALERT MNS MASS NOTIFICATION SOFTWARE User Manual
Page 34: Shapes on a map, Adding/editing a shape, User guide
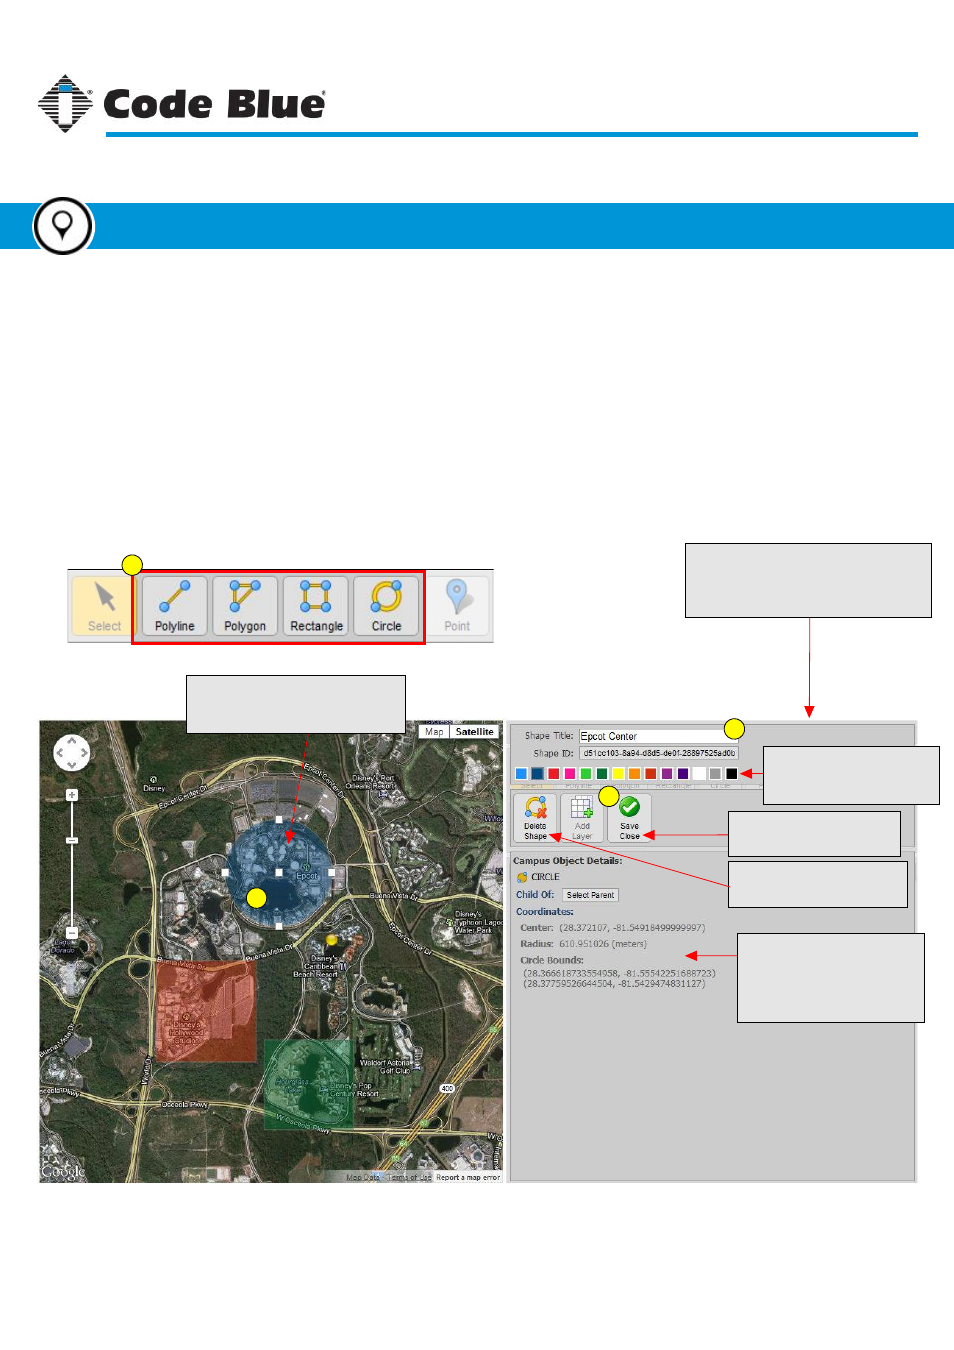
Shapes on a Map
Shapes in Campus Manager are used to highlight specific areas on the map. These highlighted areas
can be assigned names, colors and other properties. The purpose of shapes and points (see page 36)
will become clearer in relation to creating events and alerts (see page 54).
1. Click on the desired shape button (shown below).
2. Using the mouse cursor, click or drag over the map to create the shape.
o
For Circles and Rectangles, click and hold over the map and drag the cursor.
o
For Polylines and Polygons, click and release over the map to set a node. Repeat until your shape is complete.
3. After your shape is drawn, click into the “Shape Title” box and give it a unique name.
4. Click the “Save/Close” button.
Circle Added
Below shows a circle shape added
to the current map.
Shape/Point Editor Window
Below is the shape editor window. This
window opens as soon as a shape or
point has been added to the map.
Shape Color
Shape fills can be colored
using these color swatches.
Delete Shape Button
Deletes the selected shape.
Shape Details
This area shows the details
of a given shape. This infor-
mation changes depending
on the type of shape.
Save Shape Button
Saves the selected shape.
1
1
2
3
4
Code Blue
●
259 Hedcor Street
●
Holland, MI
●
4923 USA
●
800.205.7186
●
www.codeblue.com
Rev 1/2015
page 34
User Guide
Blue Alert
®
MNS
Adding/Editing a Shape
Online Campus Manager
GU-141-C