Besa Lighting 3-Light Linear (12V Quick Connect Canopies) User Manual
Fixture installation guide
FIXTURE INSTALLATION GUIDE
All electrical connections and the installation of this fixture must be in agreement with local codes,
ordinances or the NEC (National Electric Code) or CEC (Canadian Electrical Code).
Do not connect this fixture to an electrical system that does not provide a means for equipment grounding.
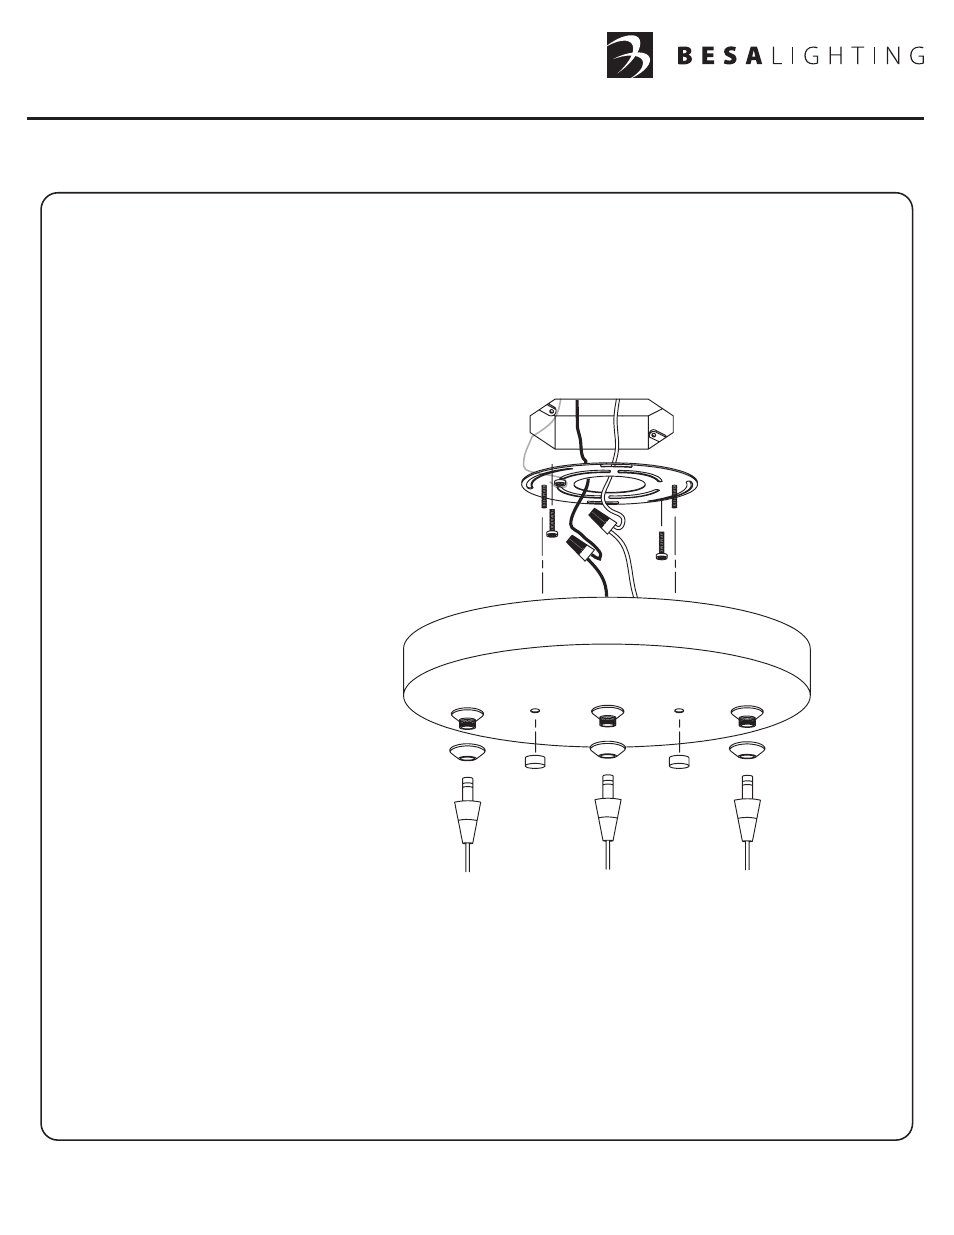
Model T23BQ (Low Voltage Quick-Connect Canopy)
T23BQ, Rev.2 2-09
6695 Taylor Rd. Blacklick, OH 43004
www.besalighting.com
Caution: Turn off power to electrical box before installing
7. Restore power.
A
B
1. Carefully unpack parts. Remove existing
Screws (C) from the Supply Box (A), then
secure the Mounting Bracket (B) to the
Supply Box with same Screws.
Screws are provided if necessary.
2. Secure the house ground wire to the
Mounting Bracket using the green screw (F).
3. To install the Canopy, connect the electrical
leads from the fixture to the house supply
wires, black to black and white to white,
and secure with wirenuts provided (E).
4. Align the two circular openings of the Canopy
with the Threaded Posts (D) on the Mounting
Bracket. Push the canopy up over the post
until tight to ceiling, then secure with the
decorative Cap Nuts (G).
6. For assembly of the glass shade, please refer to the
GLASS SHADE INSTALLATION GUIDE
that is included in with the pendant cord sets.
C
5. Place the Decorative Cap (H) over the threaded nipple on the canopy, then attach the
Besa Quick Connect Element (I). The Besa Quick Connect Element is furnished separately.
IMPORTANT: If using skyhooks with pendant elements,
remember to factor the additional cord length required prior to cutting cord.
G
D
E
F
H
I