Besa Lighting Tamburo 11 (Sconces) User Manual
Fixture installation guide
FIXTURE INSTALLATION GUIDE
All electrical connections and the installation of this fixture must be in agreement with local codes,
ordinances or the NEC (National Electric Code) or CEC (Canadian Electrical Code).
Do not connect this fixture to an electrical system that does not provide a means for equipment grounding.
Models using B0043 Backplate
(Medium Base Lamps, Wall Mount 120V)
B0043, Rev.3 3-09
CAUTION: Turn off power to electrical box before installing
6695 Taylor Rd. Blacklick, OH 43004
www.besalighting.com
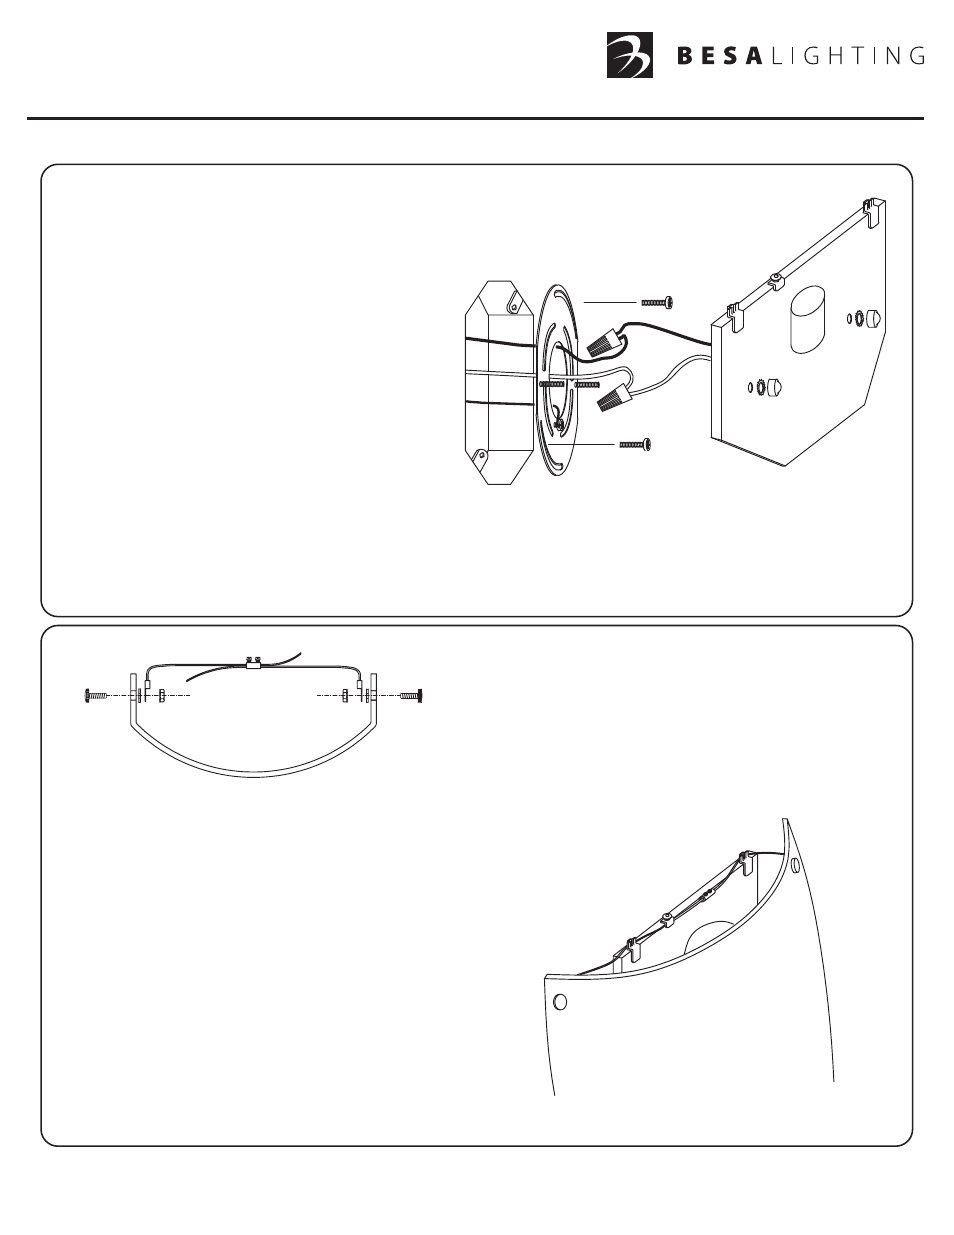
1. Carefully remove parts from package.
2. Remove the two Cap Nuts (A) to release the
Backplate from the Mounting Bracket (B).
3. Attach the Mounting Bracket to the Outlet Box (C)
with two Machine Screws (D).
4. Connect the electrical leads from the fixture to
the house supply wires, black to black and white
to white, and secure with wirenuts provided (E).
Connect the House Ground Wire to the Green
Ground Screw on the Mounting Bracket (F).
5. Align the circular openings on the Backplate with
the Threaded Posts (G) on the Mounting Bracket.
Push the Backplate over the Threaded Posts
until the Backplate is flush with the wall, then
secure with the Cap Nuts and Star Washers provided.
6. With the power still off, insert bulb of not more than the
labeled wattage. Proceed to next page to install glass diffuser.
NOTE: Backplate is for
instructional purposes.
Actual backplate may
vary slightly
A
B
C
D
E
F
G
9. Hold the Glass Diffuser close to the Backplate as shown,
then positon the Cable over the two Cable Clips (K) and
under the Cable Retainer (L). Allow the glass to hang from
the Backplate and confirm that the glass seats closely to
the wall. The glass can be adjusted slightly by tightening
the Cable Retainer with the Allen Wrench provided.
If the Glass Diffuser does not seat close to the wall, then
the cable must be shortened using Cable Clamp (M).
Loosen the two screws and carefully shorten cable,
then retighten the screws.
10. Restore power.
I
H
J
7. Remove Cable Kit from bag, then release Cable
Assembly (H) by removing the Decorative Fastener (I).
8. Secure the Cable Assembly to the Glass as shown above.
IMPORTANT: Do not overtighten the Hex Nut (J),
overtightening could cause damage to glass.
K
L
M
NOTE: Glass shown is for
instructional purposes. Actual
Glass may vary in shape or size