Besa Lighting Remote Canopy (Monorail Component) User Manual
Installation guide, Installation of canopy, Installation of monorail
6695 Taylor Rd. Blacklick, OH 43004
www.besalighting.com
INSTALLATION GUIDE
Model REMFC Remote Feed Canopy
(For use with Besa low voltage lighting systems only)
REMFC, Rev.4 2-09
Caution: Turn off power to electrical box before installing
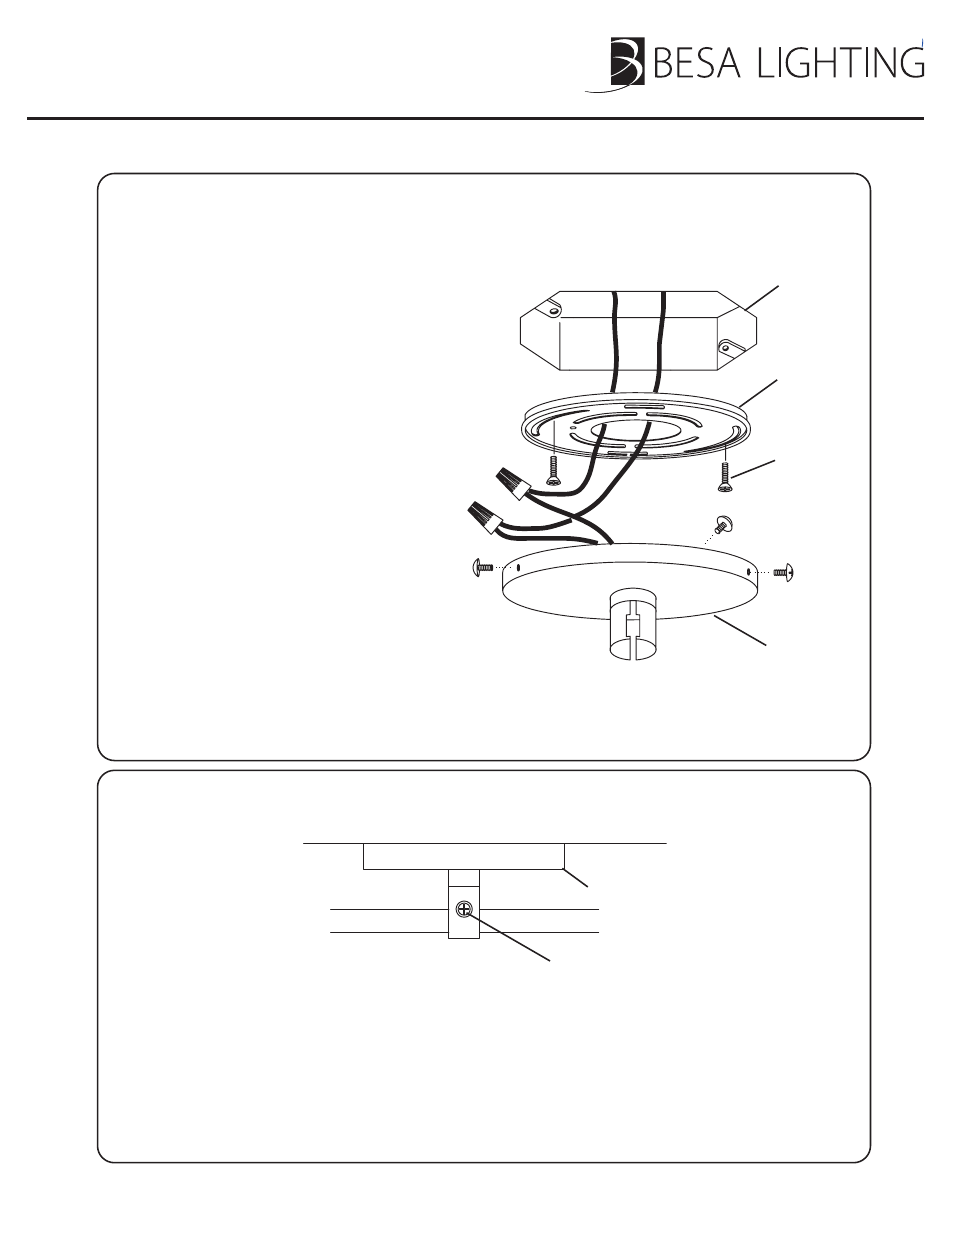
Mounting
Plate
Electrical
Supply Box
Canopy
Set Screws
1. Loosen Canopy Set Screws to
release Mounting Plate.
2. Secure Mounting Plate to the electrical
Supply Box using Machine Screws.
3. Connect the Low Voltage Wires from the
Supply Box to the Canopy Low Voltage
Wires, then secure with wirenuts.
4. Carefully push the wirenuts and
Low Voltage Wiring back into the
Supply Box, then position the Canopy
up to the ceiling.
5. Tighten the three (3) Set screws until
the Canopy is secure to the ceiling.
6. The monorail can now be connected
to the canopy.
NOTE:
For applications where the monorail
is not directly below the canopy,
utilize the flexible feed provided.
Installation of Canopy:
1. Loosen Set Screw on the Rail Adapter of the Canopy.
2. Raise the Monorail into the Rail Adapter, then tighten Set Screw.
3. Turn on power to system.
Operate system for 5 minutes, then verify that the connections are running cool to the touch.
Installation of Monorail:
Machine
Screws
Canopy
Low Voltage
Wiring
Canopy
Monorail
Rail Adapter