1kx_rev7_back, Polarity instructions, Installation guide – Besa Lighting Jordo (120V Pendants) User Manual
Page 2
INSTALLATION GUIDE
All electrical connections and the installation of this fixture must be in agreement with local codes,
ordinances or the NEC (National Electric Code) or CEC (Canadian Electrical Code).
Do not connect this fixture to an electrical system that does not provide a means for equipment grounding.
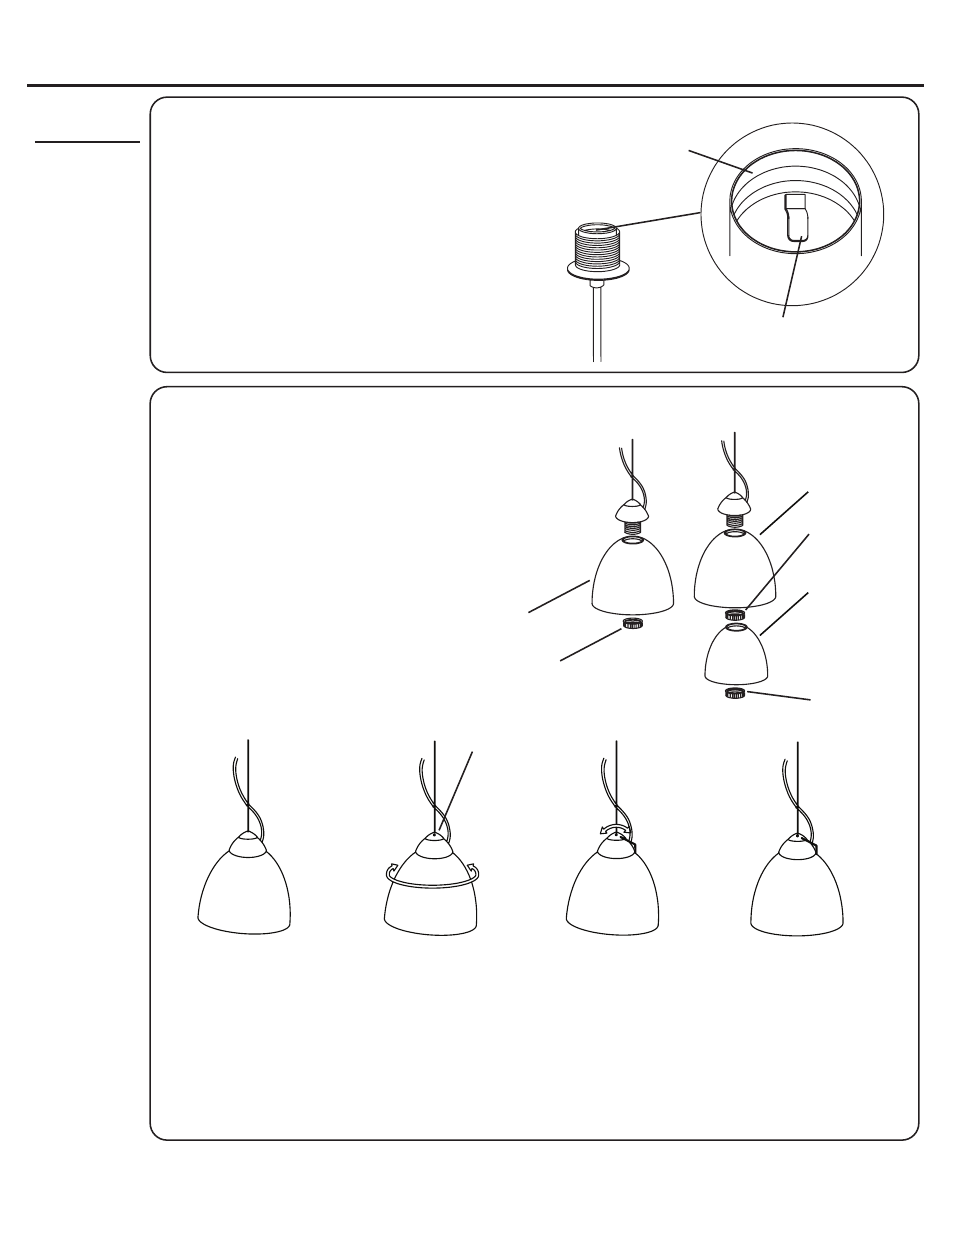
Using a Continuity Tester or Multimeter,
confirm the following connections:
• Clear Conductor with White Stripe (Neutral/White)
is connected to the Socket Screwshell. This wire is
to be connected to house supply white conductor.
• Clear Conductor (Hot/Black) is connected
to the Socket Center Contact. This wire is
to be connected to house supply black wire.
SOCKET
SCREWSHELL
SOCKET
CENTER CONTACT
POLARITY INSTRUCTIONS
7. The installation method for the glass shade as shown,
either with single glass or double glass. Install bulb per
the labeling on the fixture. To adjust the balancing of the
glass, if necessary, see the instructions below.
8. Restore power.
Visually inspect the
shade to determine if
repositioning is
necessary.
Slightly loosen the
shade and rotate so
that the unbalanced
portion is parallel with
the allen screw.
Loosen the allen
screw, then rotate
assembly into a new
position that will level
the glass shade.
Hold the shade in
it’s new position,
then tighten the allen
screw firmly. Release
the glass shade and
visually confirm that it
is now level.
Outside
Glass Shade
Glass Shade
Inside
Glass Shade
Check Ring
Check Ring
Check Ring
Allen Screw
Use With
these Models:
• Porto
(4202xx)
• Pape
(4913xx)
• Lucia
(1697xx)
• Luna
(4776xx)
• Tessa
(4201xx)