1kz.04, Installation guide – Besa Lighting Callisto (120V Pendants) User Manual
Page 2
INSTALLATION GUIDE
All electrical connections and the installation of this fixture must be in agreement with local codes,
ordinances or the NEC (National Electric Code) or CEC (Canadian Electrical Code).
Do not connect this fixture to an electrical system that does not provide a means for equipment grounding.
J
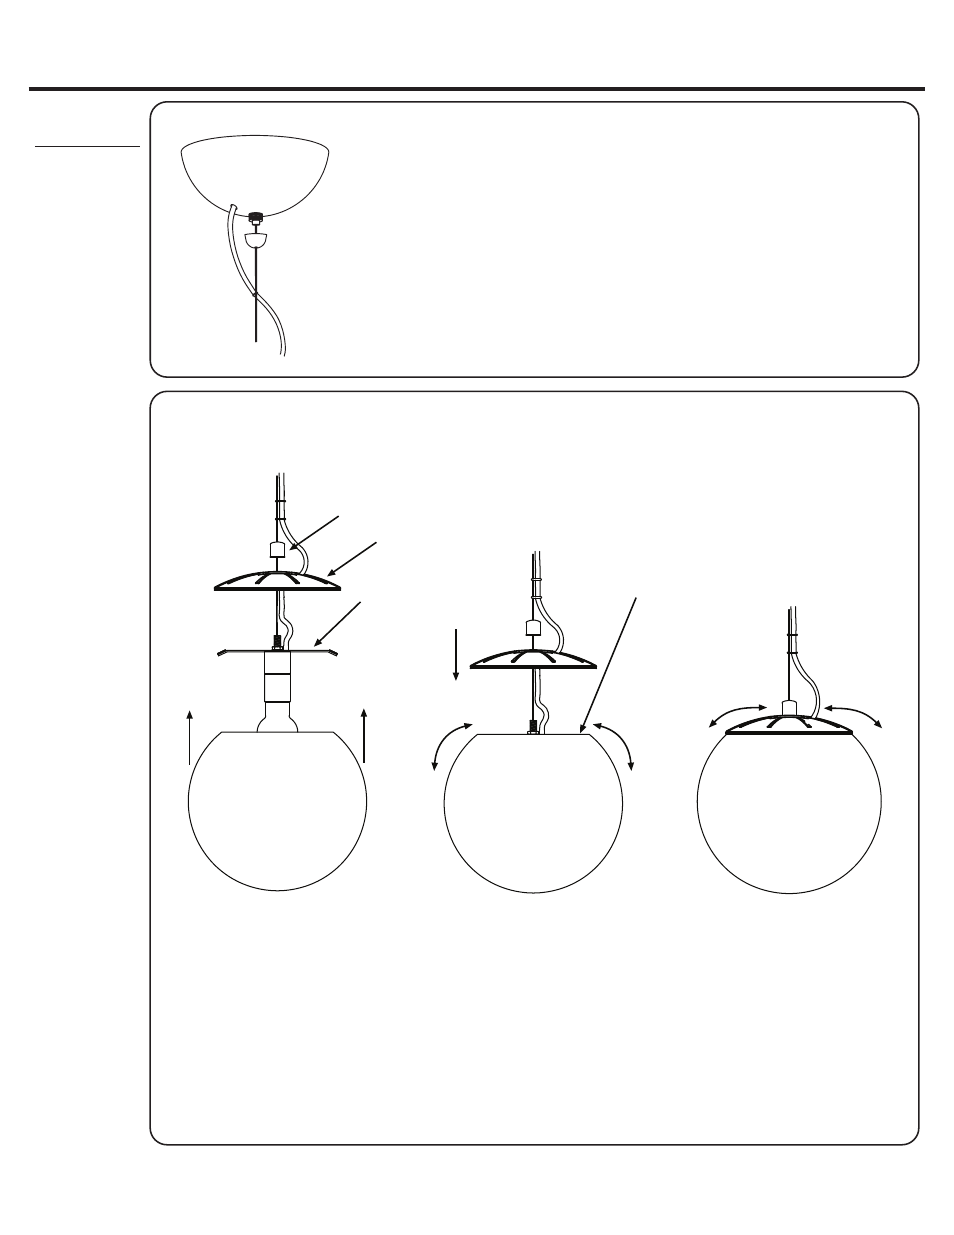
6. Replace the Canopy as shown and secure with the Retainer. Tighten the
Retainer enough to hold the Canopy to the ceiling but do not overtighten.
The cord can now be shaped by positioning the Cord Rings (J) along the
cable as desired.
Overtightening can cause the Retainer to be difficult to unscrew.
If this occurs, usually rotating the canopy counter-clockwise will
help to unlock the Retainer.
7. Install bulb per label on luminaire.
8. Secure the Glass Shade by carefully tilting the Support Bracket assembly so that it fits inside the
Glass Shade opening. Minimal adjustment can be made by shifting the Glass Shade on the
Support Bracket, so that the Glass Shade appears level.
9. Lower Decorative Cap onto Glass Shade top and center for best appearance.
Secure entire assembly by tightening with Decorative Fastener.
10. Restore power.
NOTE:
Glass Shade is for instructional purposes.
Actual Glass Shade may vary in size and shape.
Decorative Fastener
Decorative Cap
Support Bracket
IMPORTANT:
Make sure that the Glass Shade remains
securely on the Support Bracket while
making any adjustments.
Use With
these Models:
• Callisto 12
(4328xx)
• Callisto 14
(4329xx)
- Tondo 12 (120V Pendants) Tondo 18 (120V Pendants) Tara (120V Pendants) Copa 3 (Linear Pendants) Pahu 4 (Linear Pendants) Brella (Linear Pendants) Divi (Linear Pendants) Kani (Linear Pendants) Lasso (Linear Pendants) Mia (Linear Pendants) Palla 5 (Linear Pendants) Sabrina (Linear Pendants) Tay Tay (Linear Pendants) Canto 5 (Linear Pendants) Nico 4 (Linear Pendants) Silhouette 28 (Linear Pendants) Silhouette 36 (Linear Pendants) Groove (Linear Pendants)