Installing the cutter, Filling the gear box, Installing the motor – Belshaw Adamatic Type F Cake Donut Depositor User Manual
Page 20
Belshaw Adamatic Bakery Group
Phone 206-322-5474 Fax 206-322-5425
Donut Cutter Type F TS
MN-1533EN
5
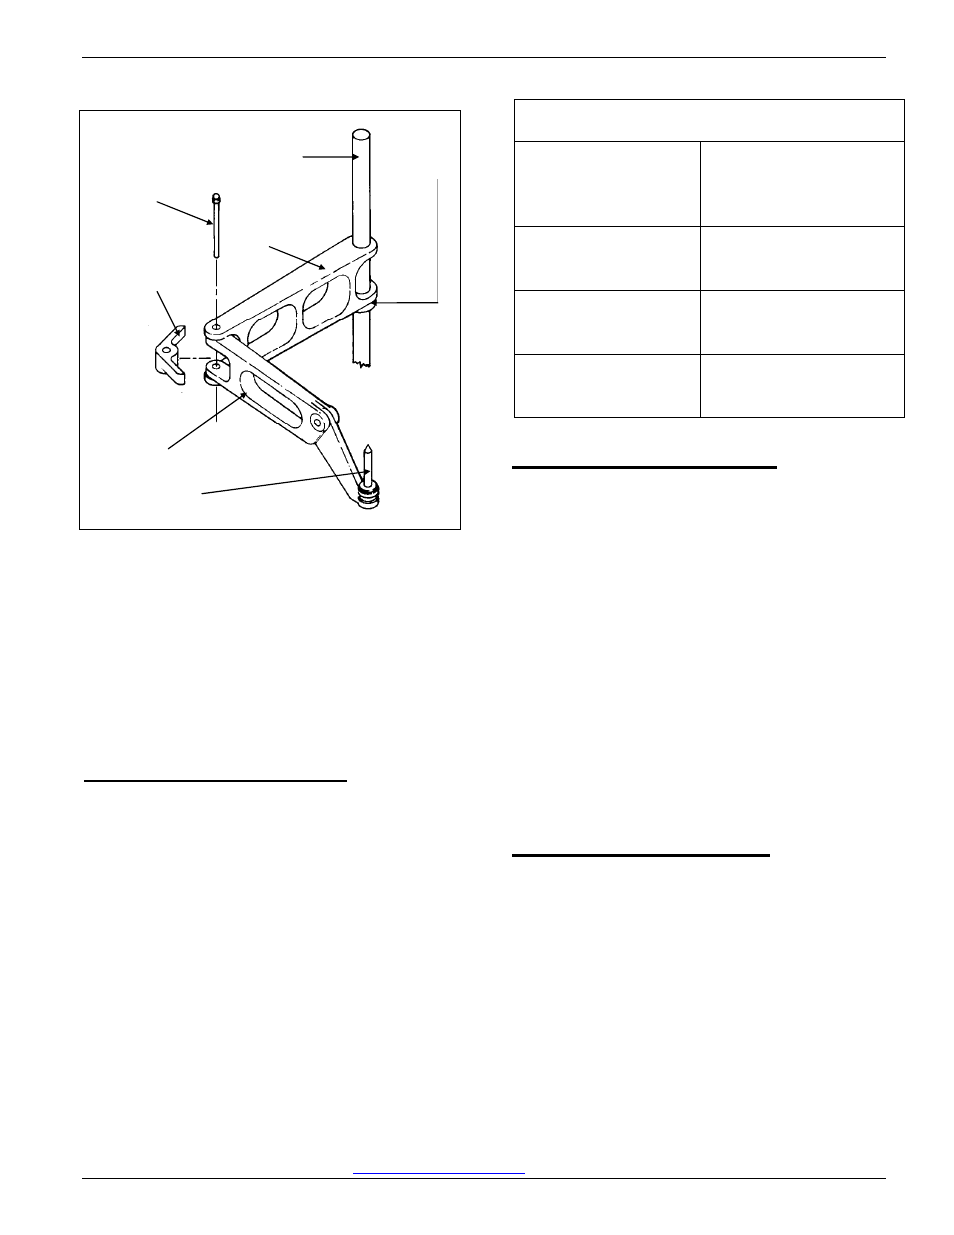
Figure 1-2. Installing the Swing Arm on the
Column.
6. Slide the straight arm up the column far
enough for the cutter to clear the fryer when
it is mounted. (The exact height does not
matter at this point.) To hold the straight
arm in place, slide the set collar up the
column and tighten the setscrew.
Installing the Cutter
1. Mount the cutter by sliding the frame
assembly onto the pivot arm pin.
2. Adjust the height of the cutter as follows:
a. Loosen the setscrew in the set collar.
b. Slide the straight arm up the bushing, or
column as far as needed, for the hopper
cylinder to be the proper distance above
the shortening in the fryer. (See Figure
1-3.)
c. Slide the set collar up the bushing, or
column, so it is right under the straight
arm. Secure it by tightening the
setscrew.
Figure 1-3 - Setting the Cutter Height
Plunger Type and
Size
Distance between
Cylinder and
Shortening
Cake plungers,
7/8”-1”
1”/2.5 cm
Cake plungers,
1-1/8”-2-1/4”
1-1/4”-1-3/8”/
3.2 cm-3.5 cm
French cruller
plungers, all sizes
1-1/2”/3.8 cm
Filling the Gear Box
Before you use the Type F Donut Cutter, you
must fill the gearbox with oil. Follow these
steps:
1. Make sure the F machine is mounted in the
upright operating position.
2. Remove the plug from the fill hole. The fill
hole is in the lower part of the gearbox.
3. Pump 90-weight oil into the gearbox until it
begins to overflow.
4. Allow the excess oil to drain out of the hole.
5. Replace the plug.
6. Wipe the oil off of the gearbox exterior.
Installing the Motor
1. Place motor (with spacers) onto motor
mounting plate, on top of gearbox.
2. Hand tighten ¼-20 hex nuts.
3. Check that there is a slight clearance
between the “worm shaft & coupling
assembly” (motor set collar), and the motor
mounting plate. Insert the blade of a
flathead screwdriver under the set collar.
Rotate shaft, so flat of shaft, is under set
screw. Tighten setscrew, being careful not
to overtighten.
Arm pin
Extension
arm limiting
bracket
Pivot arm
Pivot arm pin
Column set
collar
Straight
arm