Avalon ashpan installation instructions – Avalon Firestyles Ashpan User Manual
Page 3
Avalon Ashpan Installation Instructions
Part # 99200125
Page 3 of 7
Printed September 4, 2008
4
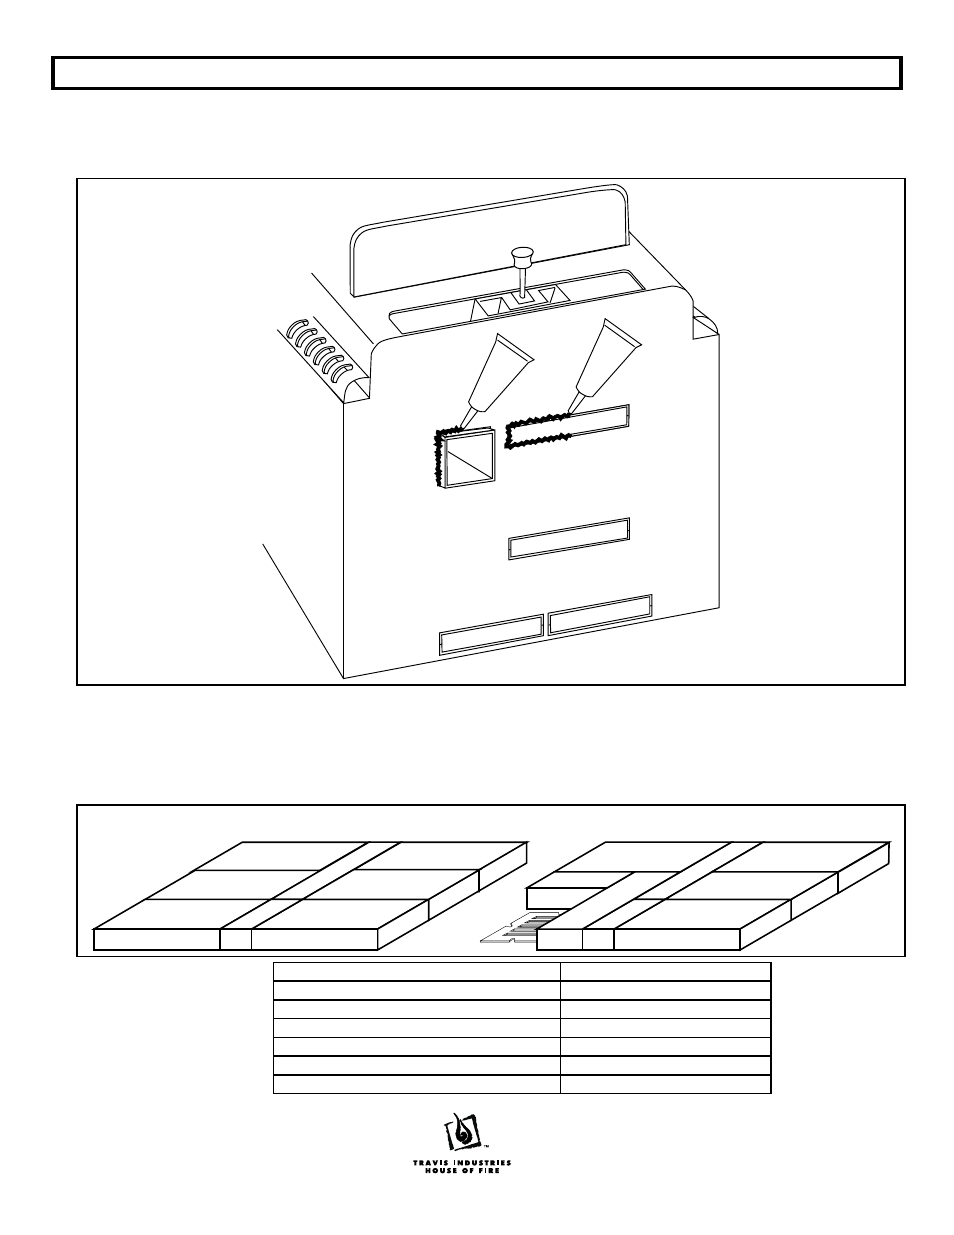
Seal the area around the knock-out for outside air on standard pedestals (the 2" x 7" forward center
knockout - see the illustration below) with stove gasket cement (knead the cement inside the tube
prior to applying). Smooth the cement so it is flush with the baseplate. Seal the area around the
drop chute in the same manner.
STOVE GASKET
CEMENT
STOVE GASKET
CEMENT
Seal the gap around the
bottom of the drop chute
Seal the gap around
this knock-out
Do not seal this
knock-out.
5
For the Rainier (990), follow step 5a. For the Olympic (1190), follow step 5b.
5 a
This kit includes four bricks. Locate the 6" x 2-1/8" and 2-7/8" x 8-1/4" bricks, they are used for the
Rainier (990). The other two bricks may be discarded. Use the bricks inside the firebox, along with
the two bricks for the Rainier (990), to form the brick pattern shown below (NOTE: you will have
two extra bricks - these bricks may be discarded).
Standard Rainier (990) Floor Brick Pattern
F
F
F
D
A
B
C
Ashpan Pedestal Rainier (990) Floor Brick Pattern
F
A
B
B
C
E
F
F
F
B r i c k
S i z e
A
9" x 1-5/8"
B
9" x 3-15/16"
C
1-3/4" x 3-15/16"
D (included with ashpan pedestal)
6" x 2-1/8"
E (included with ashpan pedestal)
2-7/8" x 8-1/4"
F
Full (9" x 4-1/2")