Woodhaven 3400-3440: Scarfing Sleds User Manual
Page 6
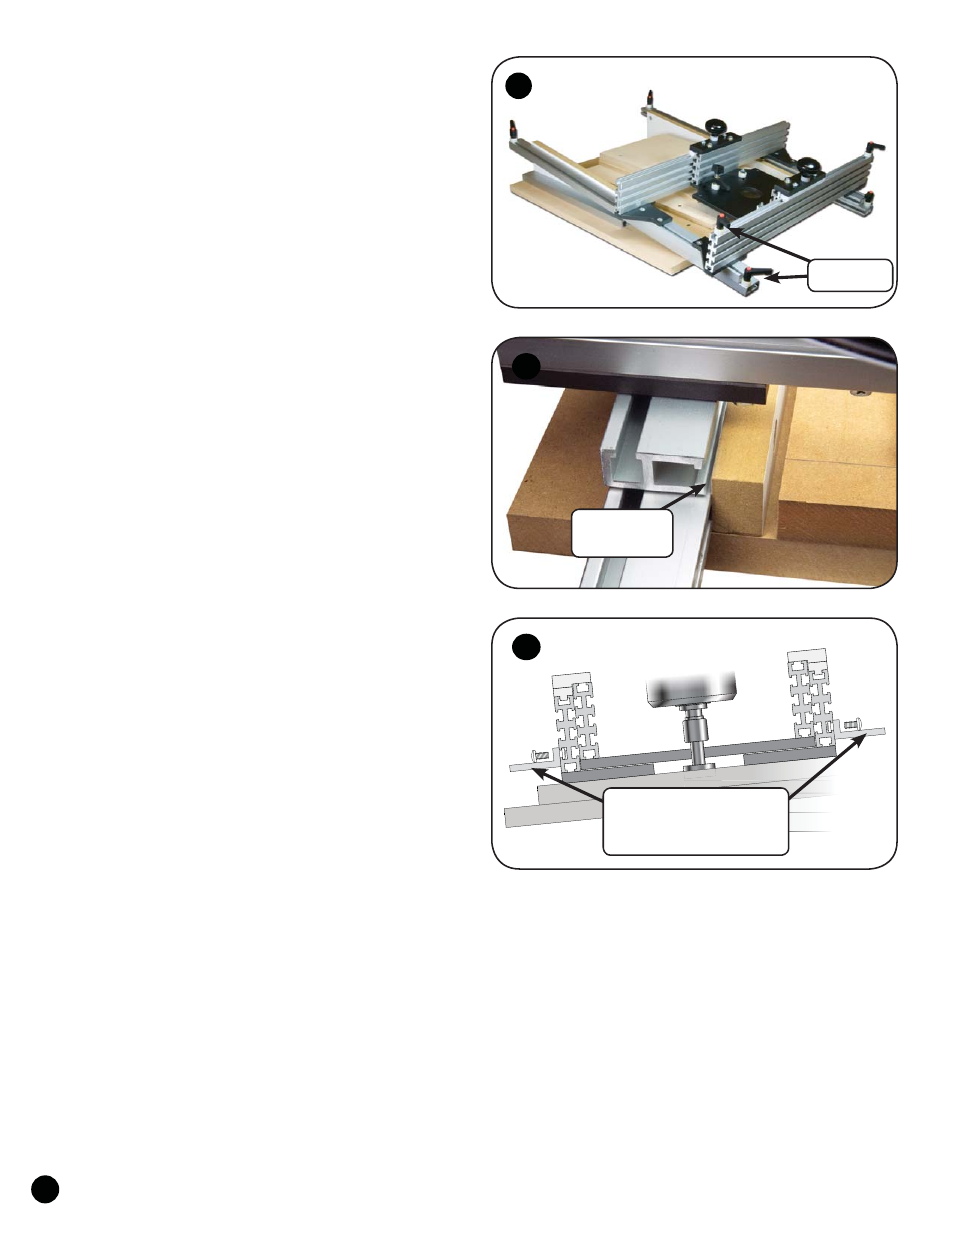
PREPARE TO CUT SCARF JOINT
Make sure the base is on a flat solid support when per-
forming these operations.
Install a 3/8" spacer (BUSH050), a washer (WB002) and
a ratchet handle (5860) on six of the 3/4" bolts (HB020). These
are the Stops. Slide the bolt head of two of the Stops into the
T-slot of each 32" Double Track on each Angle Guide, position
them at each end of each track and tighten. The front Stops (at
the narrow ends of the Angle Guides) control the forward posi-
tion and angle of the Sled Assembly. The rear Stops prevent you
from running the Sled Assembly off the 32" Double Tracks. See
fig. 12.
Install the bolt head of the remaining two Stops in the
top T-slot of the front Ultra Track of the Sled Assembly. These
Stops control the left-to-right range of the Router Sled. They
should be adjusted to prevent the router bit from cutting into the
Angle Guides or the 12" Double Tracks. See fig. 12.
Set the 12" Double Tracks of the Sled Assembly on the 32"
Double Tracks of the Angle Guides. Position the Sled Assembly
so the overhanging ends of the 12" Double Tracks are at the
front and against the Stops on the 32" Double Tracks. Adjust
one 12" Double Track so there is a 1/32" to 1/16" gap between
the inside of it and vertical face of the Angle Guide, with the
opposite 12" Double Track snug against the opposite Angle
Guide. See fig. 12 & 13.
If your Scarfing Sled included a Brace (model 3430 or
3440 only), install 1/2" screws (5770B) through the holes in
the brace and start an oval nut (5760B - flat side first) on the
ends of the screws. Slide the oval nuts of the Brace in the lower
outside T-slot of either the front or rear Ultra Track of the Track
Sled. Center it side-to-side on the Ultra Track and tighten the
screws. See fig. 14.
12
13
14
5
Attach brace (if included)
to front or rear Ultra
Track of the Track Sled.
Gap of 1/32"
to 1/16"
Stops - x6