Woodhaven 3400-3440: Scarfing Sleds User Manual
Page 3
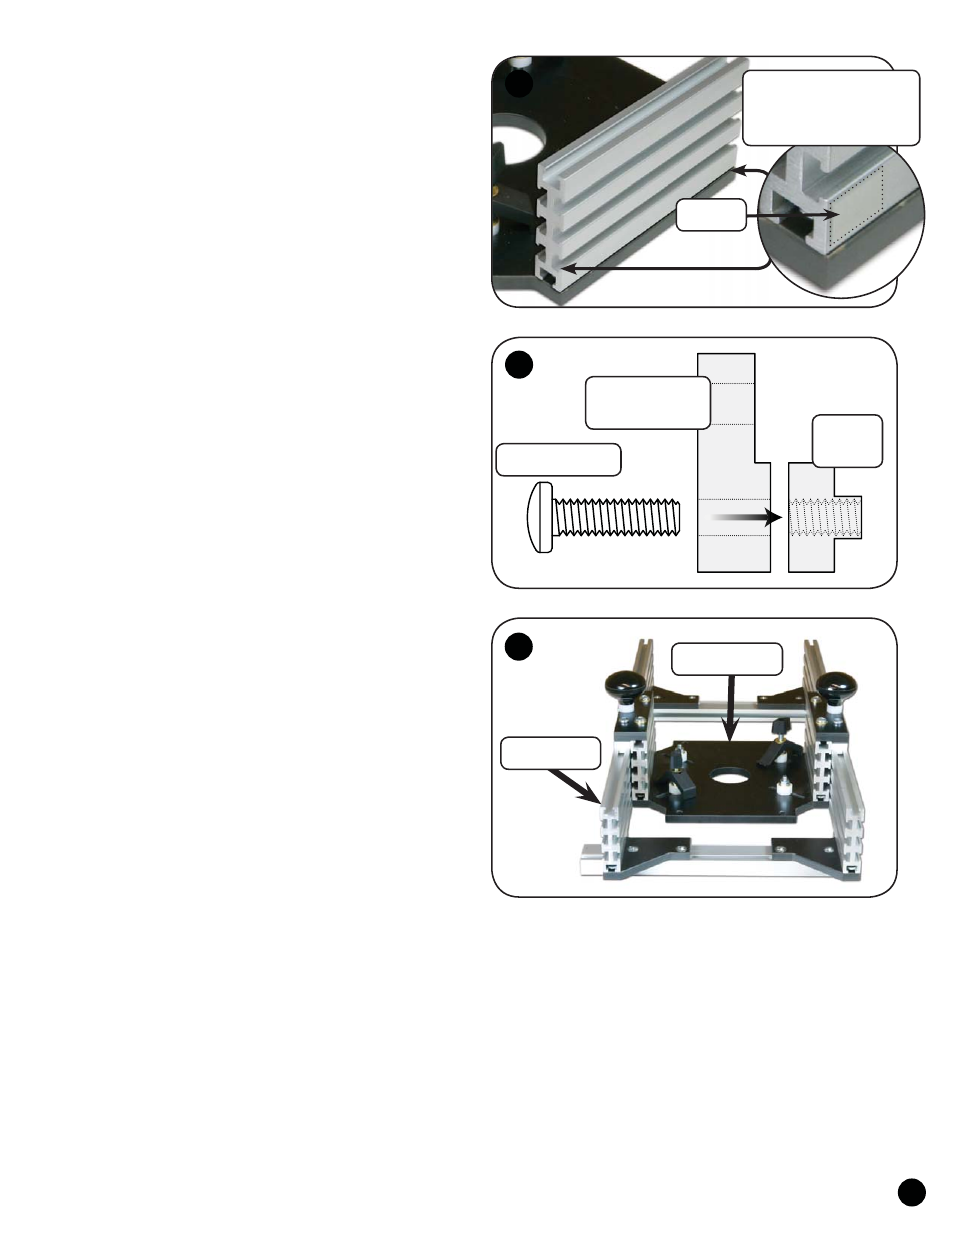
Remove the paper backing and install the glide pads
(PAD1 - 2 on each track, extras included) where shown on
the outside corner of each Ultra Track, near to where the plate
meets the track. Set the Router Sled aside for now. See fig. 5.
ASSEMBLY - ROUTER SLED
Insert a 1-1/4" flat head screw (MF020) through the coun-
tersunk hole in each Guide Bracket (3400C). Place a 3/8" spacer
(BUSH050) on each screw, attach a knob (5590) to each screw
and tighten. See fig. 6 & 7.
Attach each Guide (3400G) to a Guide Bracket using two
7/8" screws (MP087). Insert the screws through the two holes
in the thickest part of the Guide Bracket. Be careful not to over-
tighten the screws and strip the threads in the Guide. See fig. 6.
Insert a washer (WB002) on each 3/4" screw (5771B),
insert two screws through the holes in each Guide Bracket and
start an oval nut (5760B - flat side first) on the end of each
screw. Slide each Guide Bracket on to the top of each 6" Ultra
Track (4406), with the oval nuts engaged in the T-slot of the
track. Center the Guide Bracket on the length of the track and
tighten. This completes what will now be referred as the Router
Sled. See fig. 5 to 7.
ADJUST - ROUTER SLED & TRACK SLED
On the Track Sled, loosen the four screws (two at each
end) that hold just one of the Ultra Tracks/Brackets to the two
12" Double Tracks. Place the Router Sled between the two
Ultra Tracks of the Track Sled. Position it so the ribs in the two
Guides (one on each Guide Bracket) are engaged in the top
T-slot of the two Ultra Tracks and resting on them. See fig. 7.
Loosen one pair of screws holding one Guide Bracket to a
6" Ultra Track, lightly squeeze the 6" Ultra Track (at the bottom
near the router plate) against the Ultra Track of the Track Sled
and retighten the screws. Repeat on the opposite side. Check
that the Router Sled glides smoothly the length of the Track
Sled. See fig. 7.
Position the Router Sled at one end of the Ultra Tracks of
the Track Sled and retighten the two screws that fasten them to
the 12" Double Track. Repeat at the opposite end of the Track
Sled. Check that the Router Sled glides smoothly the length of
the Track Sled. Remove the Router Sled from the Track Sled for
now. See fig. 7.
2
3400C Guide
Bracket
MP087 Screw
3400G
Glide
5
Place a glide pad on
the lower corners of
each 6" track.
6
7
Router Sled
Track Sled
PAD1