Woodhaven 3400-3440: Scarfing Sleds User Manual
Page 4
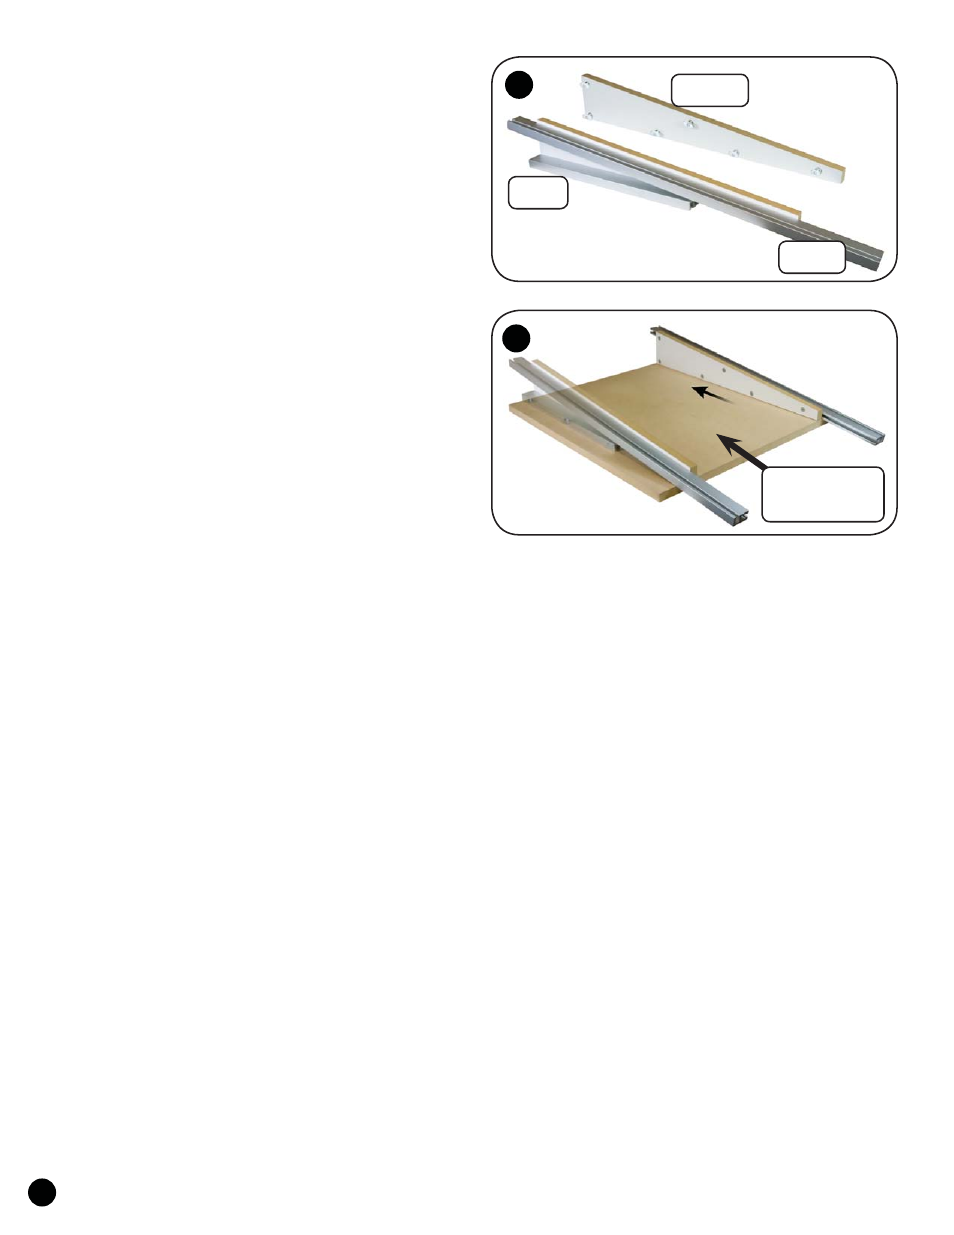
ASSEMBLY - TRACKS TO ANGLE GUIDES
Select the pair of Angle Guides (3400A, in ratios of:
8-1, 10-1 or 12-1) you wish to use. You may also make your
own custom angle guides, using our guides to assist. Insert the
1-1/4" flat head screws (MF020) in the countersunk holes in the
Angle Guides and start an oval nut (5760B - flat side first) on
the end of each screw. Slide a 16" Double Track (4016) on to
the oval nuts along the bottom of both Angle Guides. Position
the Double Track so it's flush with the wide end and the bottom
edge of the Angle Guide, then tighten the screws. Slide a 32"
Double Track (4032) on to the oval nuts along the slanted top
edge of both Angle Guides. Position the Double Track so it's
end protrudes 6" past the narrow end of the of the Angle Guide
and 1/4" below the top edge of the Angle Guide, then tighten
the screws. See fig. 8.
ASSEMBLY - ANGLE GUIDES TO BASE
Cut a base to mount the Angle Guides to. The base should
be made out of 3/4" thick flat sheet stock such as MDF or par-
ticle board. The base should measure 24" wide by the length of
the Ultra Tracks (24", 36", 48", 60" or 72").
After cutting the base to size, place it bottom side up on
a bench. Draw two lines on center (19-3/4", 31-3/4", 43-3/4",
55-3/4" or 67-3/4" on center - depending on length of Ultra
Tracks) across the 24" width of the base and centered on the
length of the base. Measuring from a long edge, draw an inter-
secting line on both previously made lines at 1", 8" and 15"
from the long edge. Drill and countersink holes at these six
locations to accept the 1-1/4" flat head screws (MF020). Insert
the screws and start an oval nut (5760B- flat side first) on the
end of each screw. Flip the base over and mount the 16" Double
Track/Angle Guide to the oval nuts. Position them so the taller/
wider end is flush and square to a long edge of the base. Check
that they're parallel to each other and tighten the screws. See
fig. 9.
3
9
8
3400A
4032
4016
User supplied
base