Vortech 2003-2004 Mustang Mach 1 User Manual
Page 15
P/N: 4FR020-010
©2004 Vortech Engineering, LLC
All Rights Reserved, Intl. Copr. Secured
23AUG04 86-93 4V Mus. Cobra(4FR v3.1)
P/N: 4FR020-010
©2004 Vortech Engineering, LLC
All Rights Reserved, Intl. Copr. Secured
23AUG04 86-93 4V Mus. Cobra(4FR v3.1)
3
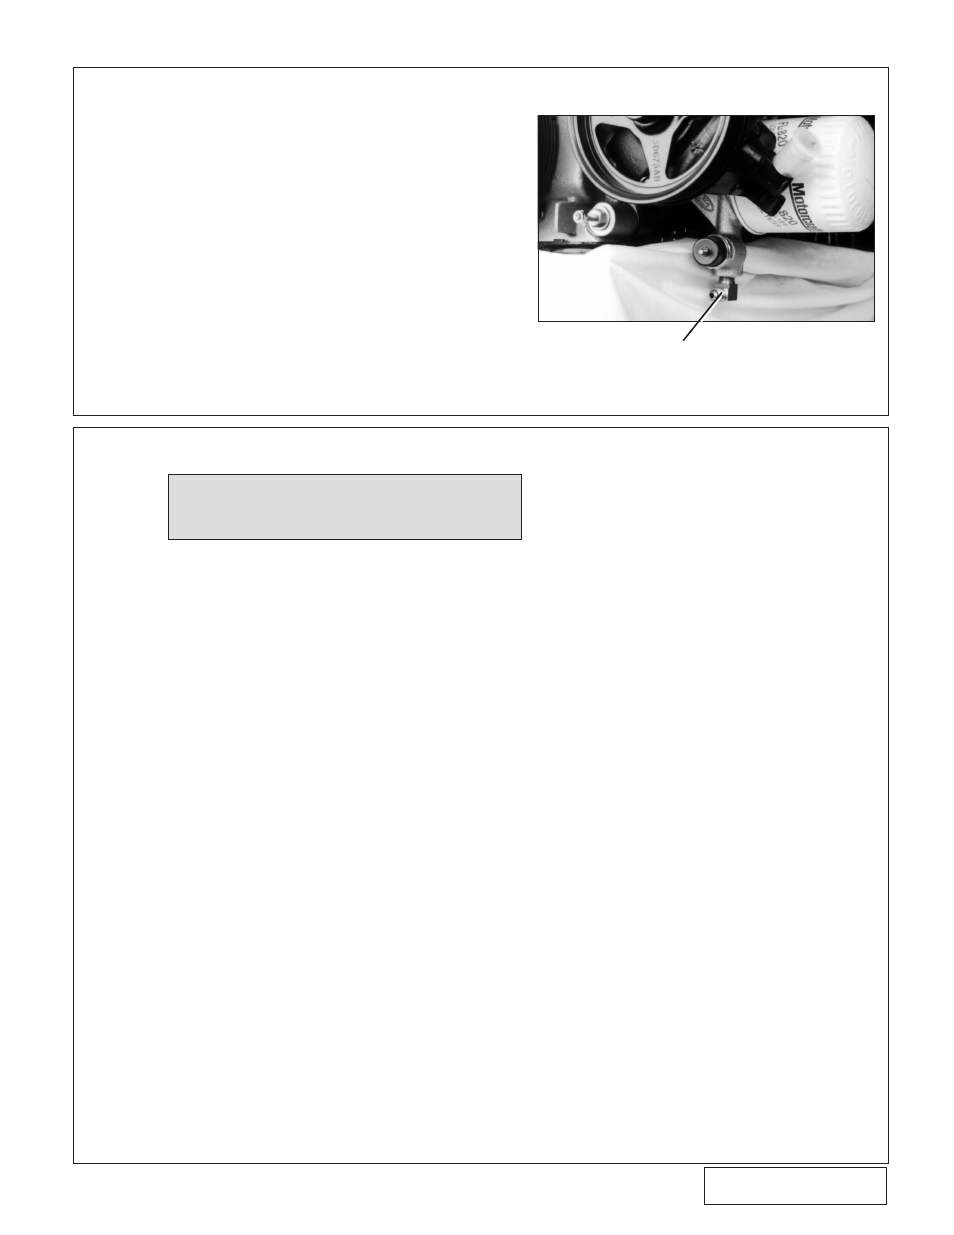
3. OIL FEED
A. Remove the 1/4" NPT socket head plug located
perpendicular to and directly beneath the factory
oil pressure sending unit. This is found on the
engine's driver's side below the oil filter.
B. Thread the supplied 1/4" NPT #4 flare x 90° fitting
into the pressure sending unit mount using engine
oil on the pipe threads (see Fig. 3-a). The use of
Teflon tape or other sealants is not recommended
as a small piece of either may break loose and
cause blockage of the oil feed orifice, resulting
in supercharger failure. Rotate the fitting so that
the flare points toward the front of the vehicle.
C. Temporarily cap off the flare fitting to prevent dirt
from entering. The oil feed will be connected at
a later time.
1/4" NPT x 90° FITTING
Fig. 3-a
A. Raise the rear of the car and support it with jack-
stands.
B. Open the fuel door and remove the fuel-cap
and the three filler neck screws using a 10mm
socket.
C. Remove the fuel filter inlet line with a 3/8 sprin-
glock tool.
D. With the weight of the fuel tank supported with a
jack, remove the bolts securing the two fuel tank
straps.
E. Slowly lower the fuel tank, allowing it to lean over
with the filler side up, until the electrical connec-
tions leading to the center mounted fuel pump
are revealed. Disconnect these two electrical
connections.
F. Remove the six bolts securing the fuel pump
access cover (on top of the fuel tank) with an
8mm wrench. Depress the two clips securing the
plastic fuel pump enclosure and slide it out of the
tank. The fuel sender float is attached to the fuel
pump enclosure and must be handled with care.
Ensure that the tank has been lowered enough
to remove the fuel pump enclosure.
G. Remove the two screws securing the plastic fuel
pump outlet manifold to the enclosure cap. Pull
the manifold up and away from the fuel pump.
H. Remove the three screws securing the fuel pump
enclosure’s cover using a 3/16 nut-driver and re-
move the cover.
I. Remove the stock fuel pump from its enclosure.
Separate the rubber pump support from beneath
the filter and install it on the supplied pump. Se-
cure the support with the new filter provided.
4. FUEL PUMP INSTALLATION
NOTE: It is recommended when performing this
step that the fuel level in the tank be below
1/4 tank.