28 operation, Operation 1, User controls – Hatteland Display 20 inch - HM 20T07 CMD User Manual
Page 28: Osd menu - introduction
28
Operation
IND100064-22
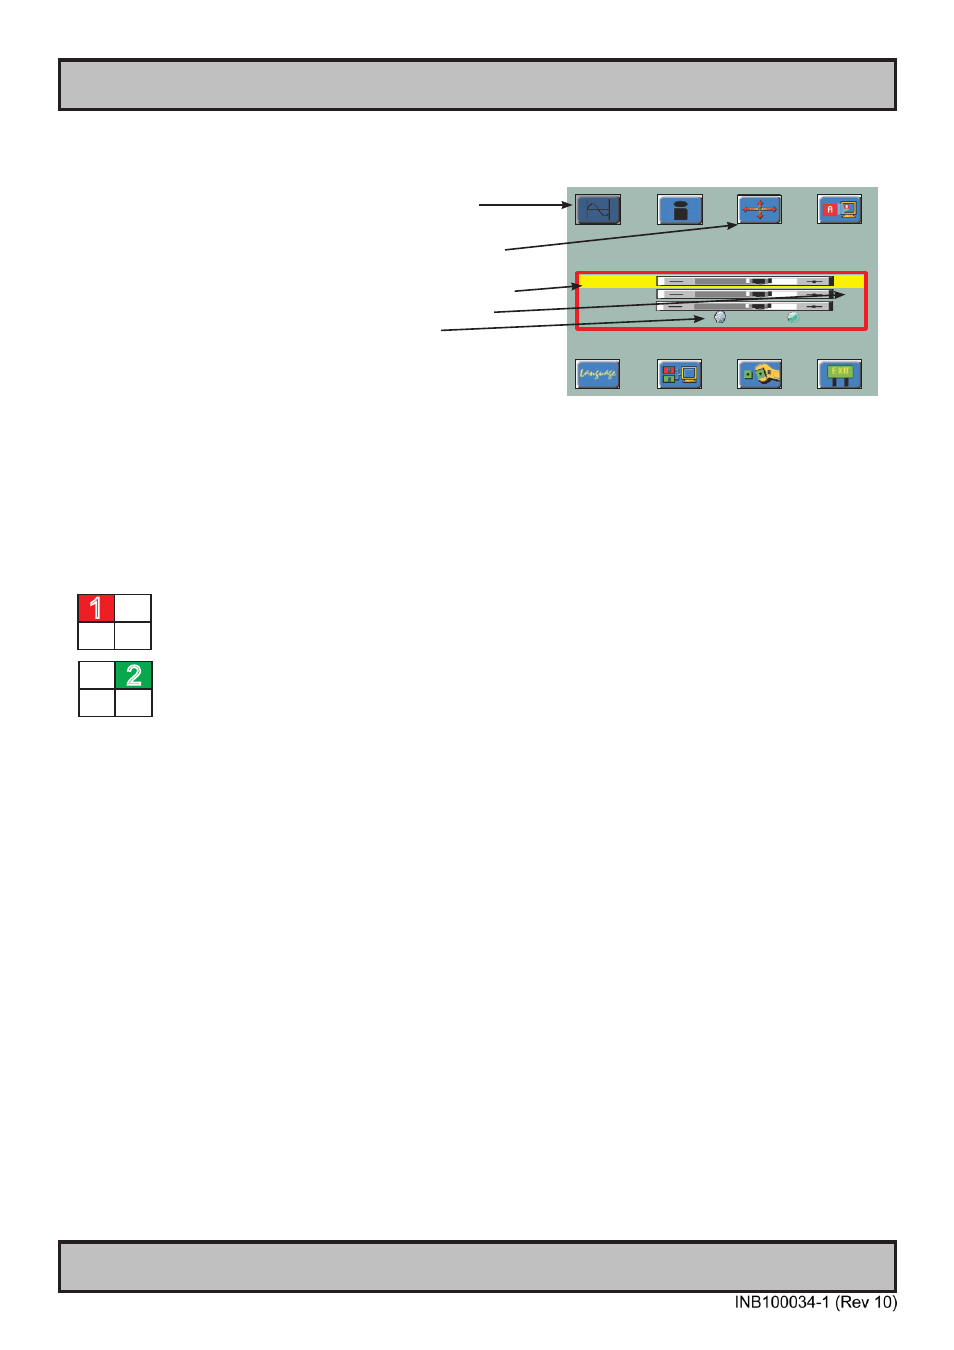
USER CONTROLS:
The On Screen Display (OSD menu) controls are located in the right bottom side of the unit. To begin understanding
the workflow of the menu, follow these steps for a quick start.
1: Press the “MENU” button. The OSD menu will show all
the available functions you can adjust or control.
2: You can move to the next icon by pressing “MENU”.
3: Select options within icon menu by pressing “UP” or
“DOWN” buttons. The selected option will turn yellow.
4: Use “+” or “-” buttons to increase/decrease values.
5: Move the selection left or right by using “+”
or “-” buttons. The selected option will turn green.
6: To confirm the selection, press “+” button.
To abort press “-” button.
OSD MENU - Introduction:
The On Screen Display (OSD menu) contains several functions that will let the user to adjust or setup the display
to their preferred setting. There are two variants of the OSD MENU, one is for regular use and one is for Advanced
use.The functions are shown as easy understandable icons. Some of the menus have sub-menus. The OSD menu
consists of 2 modes: (Icon beside function indicates if it’s available in that mode). RGB/DVI MODE = When RGB/DVI
signal (i.e OS or radar / charts) are displayed full screen.
Mode 1 - Available functions in RGB / DVI* MODE Simplified OSD Menu
User can adjust the most common functions needed to operate the display.
*Some functions are not available in DVI mode.
Mode 2 - Available functions in RGB / DVI* MODE Advanced OSD Menu
User can access more advanced functions. (Service menu).
*Some functions are not available in DVI mode.
Operation
1
2
Frequency
0
Phase
15
Sharpness
1
Picture Type
Motion
Still
Frequency and Phase
Up/Down [select]
+/- [modify]