General installation recommendations installation – Hatteland Display 20 inch - HM 20T07 CMD User Manual
Page 17
17
IND100078-16
General Installation Recommendations
Installation
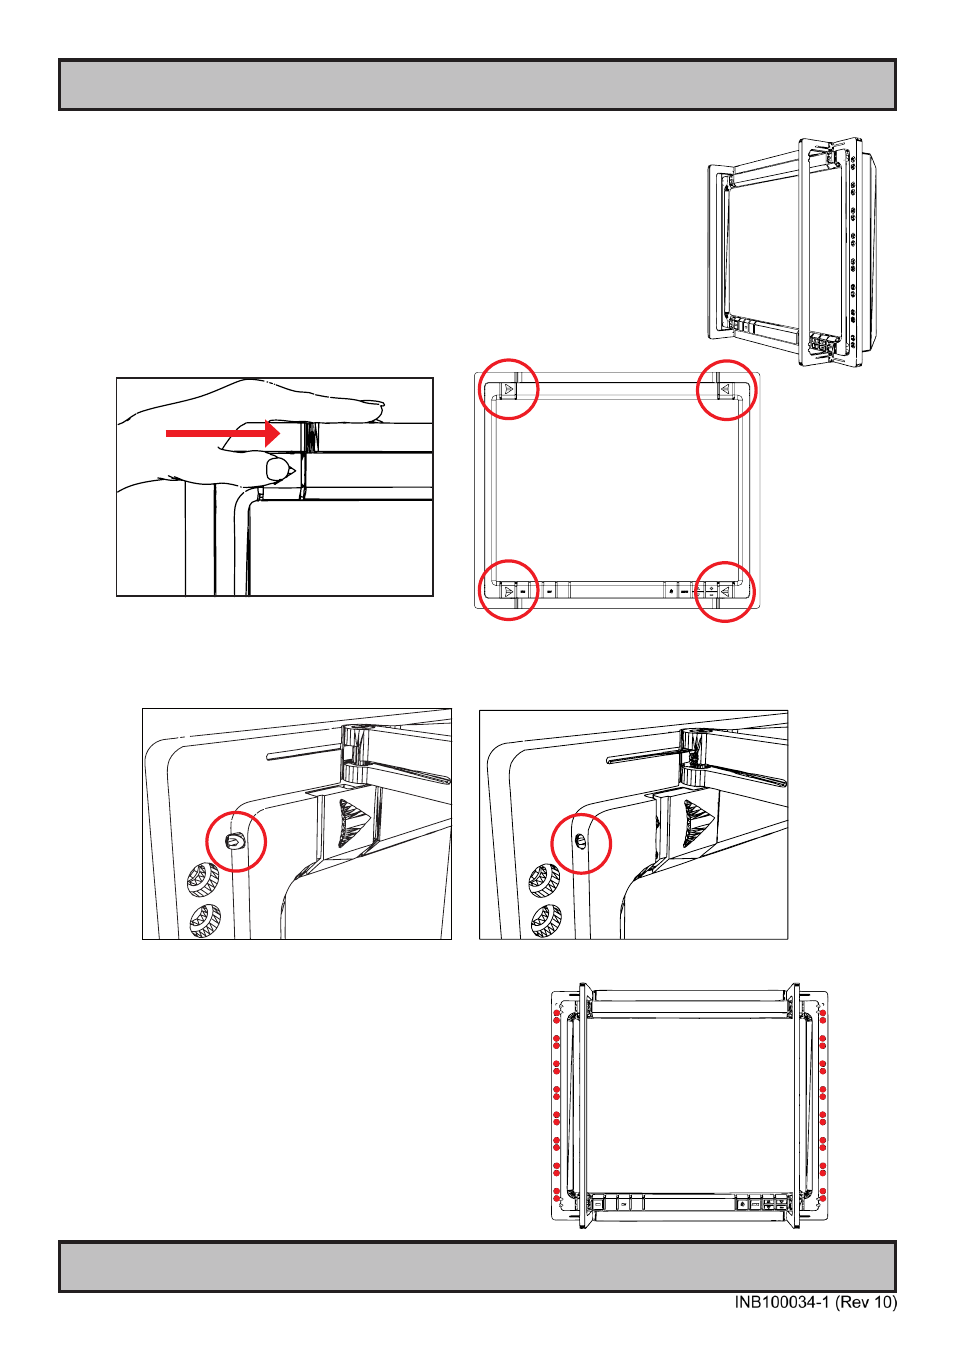
Handle Release & Console Mounting
The NMD unit features two handles which makes console installation and de-installation
easier. These handles are locked by spring mounted pins at the top and bottom of the
unit on each handle. To release the handles from its locking position and mount the unit,
review the quick guide below.
1: With your thumbs on the upper and lower reliever pads (FIG 1),
press and push forward simultaneously until the handle is released.
Apply the same procedure to the left and right side of the unit. (FIG 2).
FIG 1
FIG 2
2: Observe that the handles are locked in place by the spring mounted locking pin which retracts
into the frame when the reliever pad is pushed to the left or right.
3: FIG 3 shows the units mounting holes. The NMD supports
a wide range of mounting possibilites for your console needs.
Use minimum 4 screws to fasten it, preferably one in each
corner. The unit is fasten from the front. Please use the
specificed screws as described in the Content of Package
chapter.
After mounting, push the handles back into the frame.
You will hear a clicking sound which ensures that the
handles have been properly locked.
Additionally, you may use the “Mounting Hole IP Gasket” to
make the front frame drip-proof.
FIG 3