Experiment #19: the finger touch lamp – Elenco Electronic Playground 50-in-1 Experiments User Manual
Page 33
-33-
Take a look at the schematic. You’re probably wondering
how it can work, since nothing is connected to the
transistor base. It can’t, but there is another component
that isn’t shown in the schematic. That component is you.
Connect the wires according to the Wiring Checklist.
Now touch spring 27 (the battery) with one finger and
spring 18 (transistor base) with another. The LED may be
dimly lit. The problem is your fingers aren’t making good
enough electrical contact with the springs. Wet your
fingers with water or saliva and touch the springs again.
The LED should be very bright now. You saw in
Experiment 6 how water can conduct electricity and since
your body is mostly water it shouldn’t surprise you that
your body can also conduct. Your body’s resistance
varies a lot, but is typically a few hundred kilohms. Think
of this circuit as a touch lamp since when you touch it the
LED lights. You may have seen such a lamp in the store
or already have one in your home.
Actually, the touch lamps you see in stores only need to
be touched by one finger to light, not two. So let’s see if
we can improve our circuit to only need one finger.
Connect a wire from spring 27 to spring 54, and another
from spring 18 to spring 52. Wet a large area of one of
your fingers and touch it to springs 52 and 54 at the same
time; the LED lights. To make it easier for one finger to
touch the two contacts, touch lamps or other touch
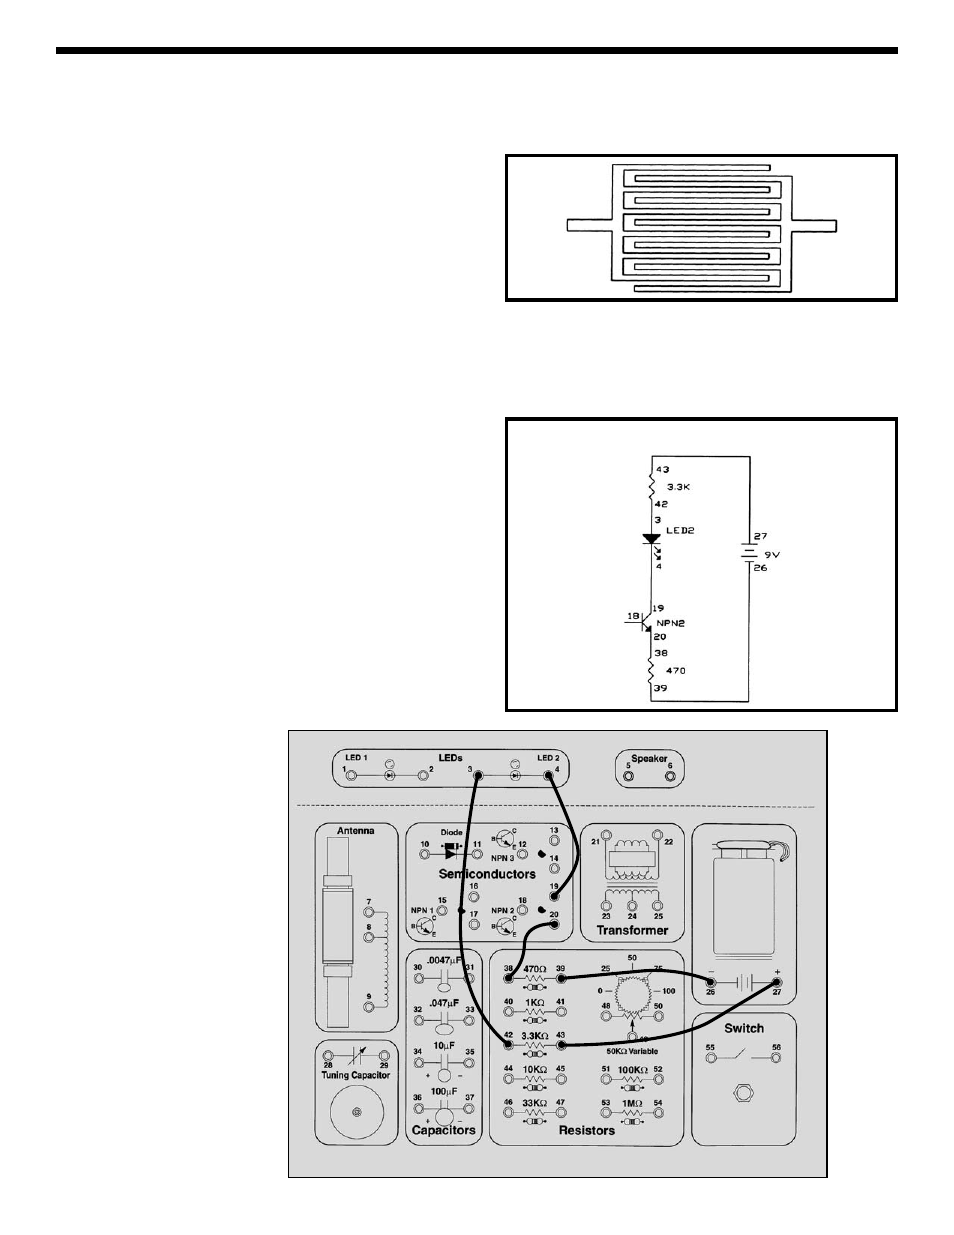
devices will have the metal contacts interweaved as
shown below and will also be more sensitive so that you
don’t have to wet your finger to make good contact.
This circuit is still different from the touch lamps sold in
stores because the LED goes dark if you remove your
finger from it. We need a way of remembering when
you’ve touched the lamp to turn it on or off - we need a
memory, and we’ll show you one in Experiment 46
.
EXPERIMENT #19: The Finger Touch Lamp
Wiring Checklist:
o 27-to-43
o 42-to-3
o 4-to-19
o 20-to-38
o 39-to-26
Schematic
Battery
Connection
Transistor
Connection