Experiment #2: the brightness control – Elenco Electronic Playground 50-in-1 Experiments User Manual
Page 11
-11-
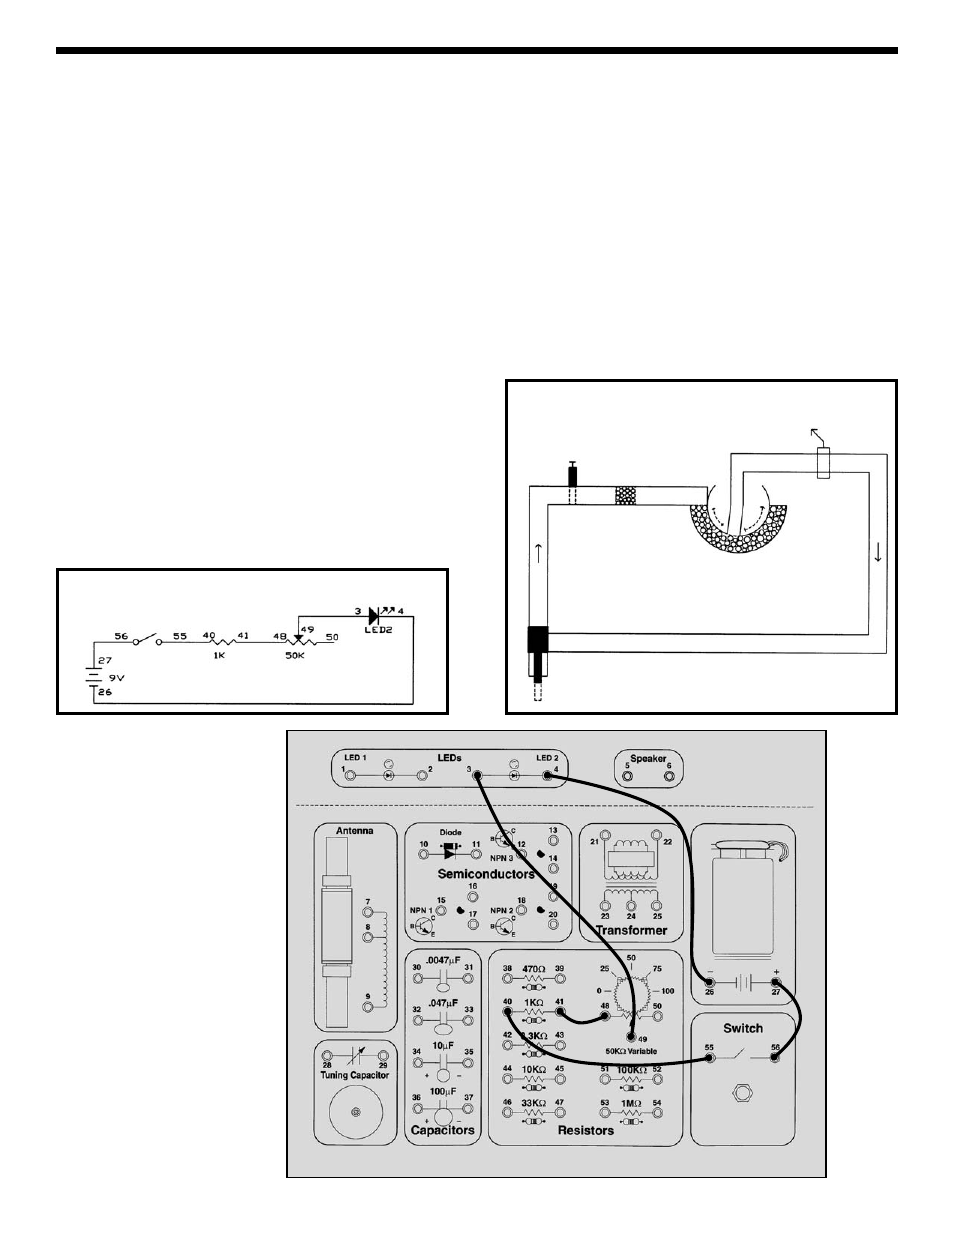
Connect the wires according to the Wiring Checklist.
Press the switch and the LED lights up. Now hold the
switch closed with one hand and turn the dial on the
variable resistor with the other. When the dial setting is
high, the resistance in the circuit is low and the LED is
bright because a large current flows. As you turn the dial
lower the resistance increases and the LED will become
dim, just as forcing the water through a section of rocks
would slow the water flow and lower the reading on your
water meter.
You may be wondering what the 1K
Ω resistor is doing in
the circuit. If you set the dial on the variable resistor for
minimum resistance (0
Ω) then Ohm’s Law tells us the
current will be very large - and it might damage the LED
(think of this as a very powerful water pump overloading
a water meter). So the 1K
Ω was put in to limit the current
while having little effect on the brightness of the LED.
Now remove the wire from spring 48 and connect it to
spring 50 (use a longer wire if necessary). Do you know
what will happen now? Close the switch and you will see
that as you turn the dial from 0 to 100 the LED goes from
very bright to very dim, because you are increasing the
resistance between springs 49 and 50.
Now remove the wire from spring 49 and connect it to
spring 48. What do you think will happen? Close the
switch and turn the dial. The LED is dim and turning the
resistor dial won’t make it any brighter. As discussed
above, the resistance between 48 and 50 is always 50K
Ω
and the part acts just like one of the other resistors in
your Electronic Playground.
Variable resistors like this one are used in the light
dimmers you may have in your house, and are also used
to control the volume in your radio, your TV, and many
electronic devices.
EXPERIMENT #2: The Brightness Control
Wiring Checklist:
o 27-to-56
o 55-to-40
o 41-to-48
o 49-to-3
o 4-to-26
Water Diagram
On/Off
Valve
Water
Meter
Rocks
Pump
Schematic
Rock Arm