Experiment #10: make your own battery – Elenco Electronic Playground 50-in-1 Experiments User Manual
Page 22
-22-
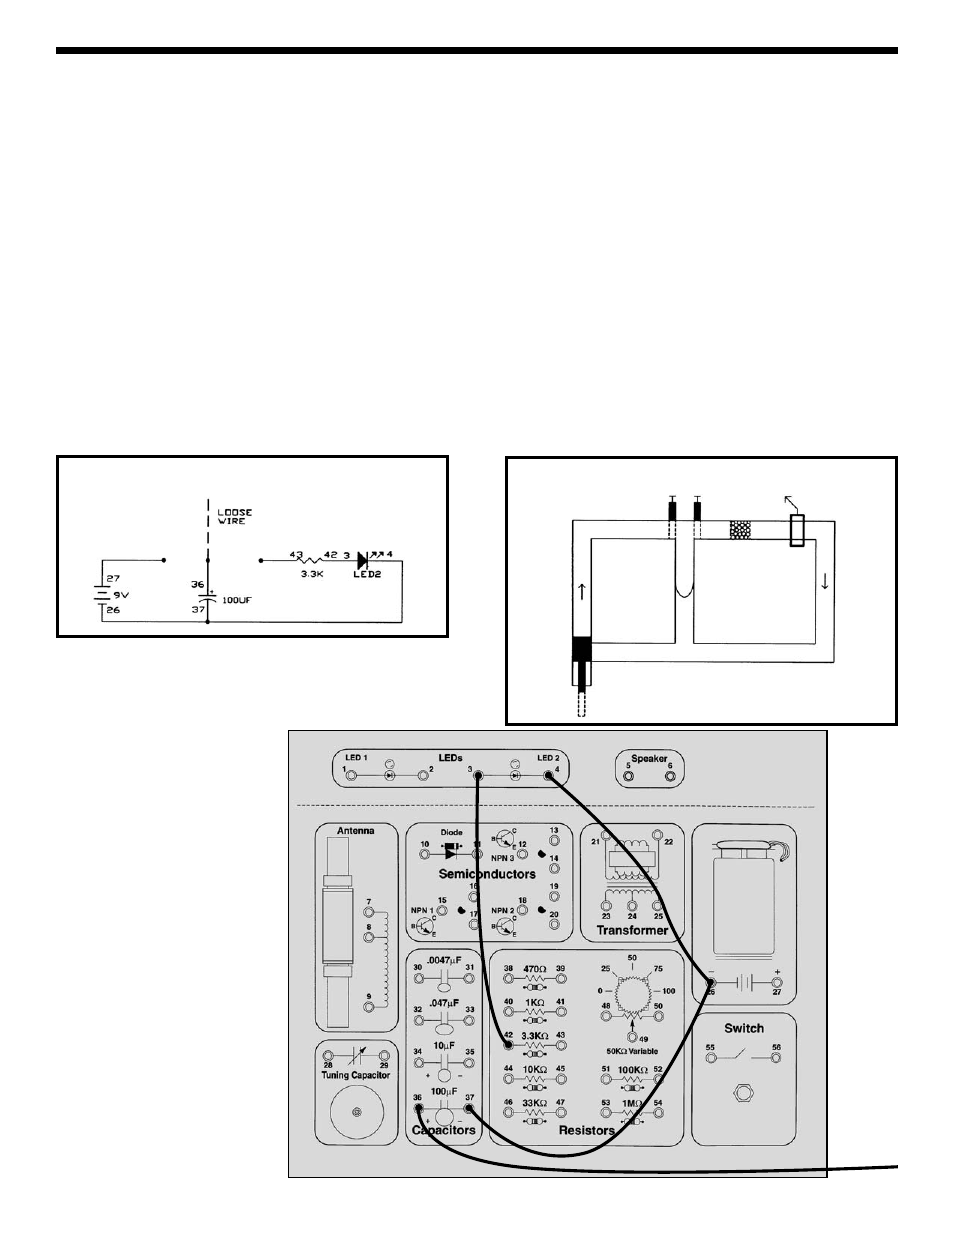
Connect the wires according to the Wiring Checklist,
noting that there is no switch and a long wire with one
end connected to the 100
μF capacitor and the other end
unconnected. At this time no current will flow because
nothing is connected to the battery. Now hold the loose
wire and touch it to battery spring 27 and then remove it,
the battery will instantly charge the capacitor since there
is no resistance (actually there is some internal
resistance in the battery and some in the wires but these
are very small). The capacitor is now charged and is
storing the electricity it received from the battery. It will
remain charged as long as the loose wire is kept away
from any metal. Now touch the loose wire to spring 43 on
the 3.3K
Ω resistor and watch the LED. It will initially be
very bright but diminishes quickly as the capacitor
discharges. Repeat charging and discharging the
capacitor several times. You can also discharge the
100
μF in small bursts by only briefly touching the 3.3KΩ.
If you like you can experiment with using different values
in place of the 3.3K
Ω; lower values will make the LED
brighter but it will dim faster while with higher resistor
values the LED won’t be as bright but it will stay on
longer. You can also put a resistor in series with the
battery when you charge the capacitor, then it will take
time to fully charge the capacitor. What do you think
would happen if you used a smaller capacitor value?
When the capacitor is charged up it is storing electricity
which could be used elsewhere at a later time - it is like a
battery! However, an electrolytic capacitor is not a very
efficient battery. Storing electric charge between the
plates of a capacitor uses much more space than storing
the same amount of charge chemically within a battery -
compare how long the 100
μF lit the LED above with how
your 9V battery runs all of your experiments!
Now is a good time to take notes for yourself on how
capacitors work, since next we introduce the diode.
EXPERIMENT #10: Make Your Own Battery
Wiring Checklist:
o 37-to-26-to-4
o 42-to-3
o 36-to-unconnected
(use a long wire)
Water Diagram
At least one valve
is always closed.
Rubber
Diaphragm
Rocks
Pump
Schematic
Water
Meter
Loose
Wire