Experiment #5: combined circuit – Elenco Electronic Playground 50-in-1 Experiments User Manual
Page 15
-15-
Let’s combine everything we’ve done so far. Connect the
wires according to the Wiring Checklist. Before pressing
the switch, take a look at the schematic and think about
what will happen as you turn the dial on the variable
resistor (we’ll abbreviate this to VR). Now press the
switch with one hand and turn the dial with the other to
see if you were right. As you turn the VR dial from right
to left LED1 will go from bright to very dim and LED2 will
go from visible to off.
What’s happening is this: With the dial turned all the way
to the right the VR is 0
Ω (much smaller than the 10KΩ)
so nearly all of the current passing through the 3.3K
Ω will
take the VR-LED1 path and very little will take the 10K
Ω-
LED2 path. When the VR dial is turned to 80% the VR is
10K
Ω (same as the other path) and the current flowing
through the 3.3K
Ω will divide equally between the two
LED paths (making them equally bright). As the VR dial
is turned to the left the VR becomes a 50K
Ω (much larger
than the 10K
Ω) and LED1 will become dim while LED2
gets brighter.
Now is a good time to take notes on how resistors work
in series and in parallel. All electronic circuits are much
larger combinations of series and parallel circuits such as
these. It’s important to understand these ideas because
soon we’ll apply them to capacitors and inductors!
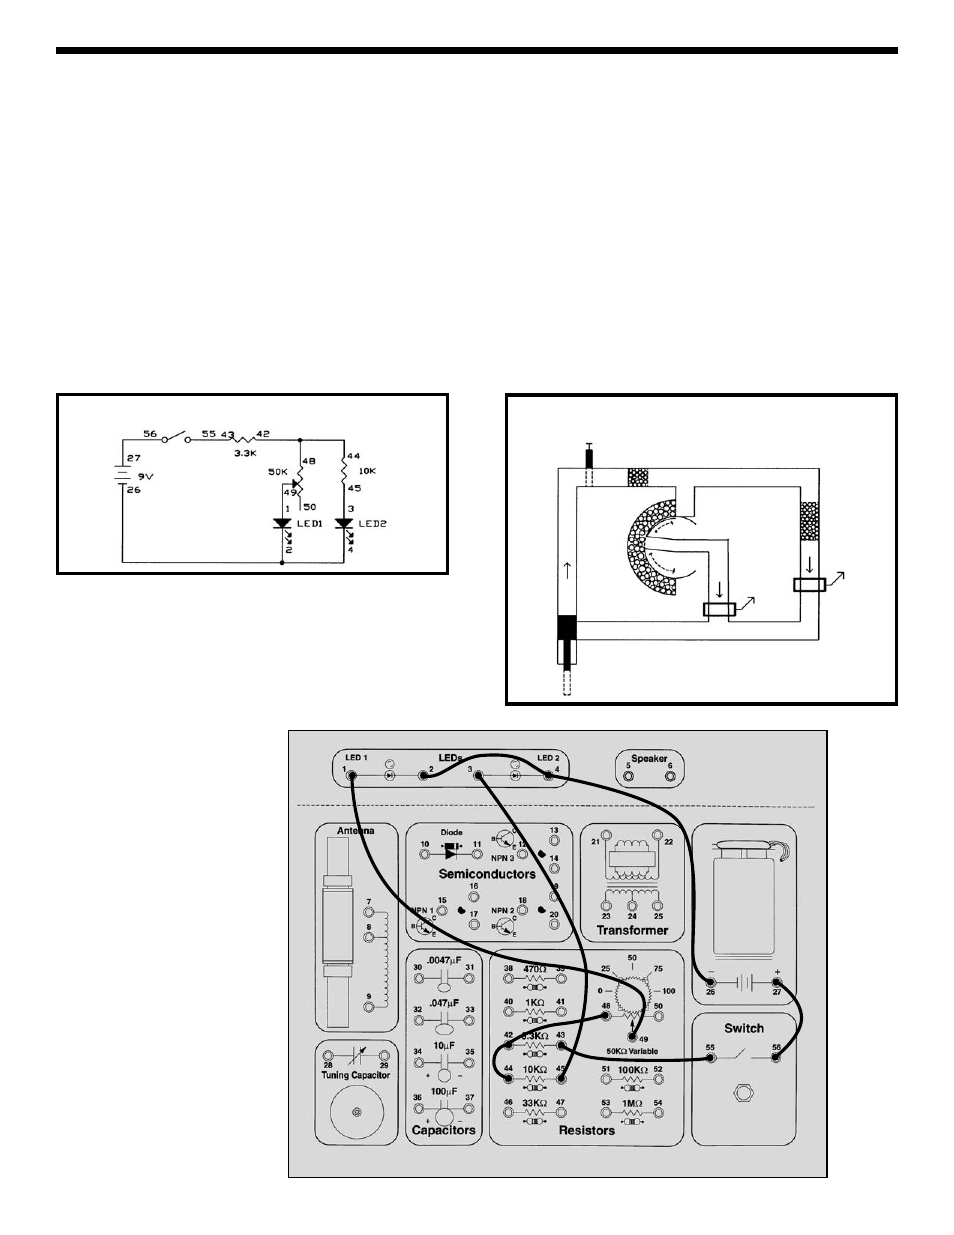
EXPERIMENT #5: Combined Circuit
Wiring Checklist:
o 27-to-56
o 55-to-43
o 44-to-42-to-48
o 49-to-1
o 45-to-3
o 2-to-4-to-26
Water Diagram
On/Off
Valve
Water
Meter
Rocks
Pump
Schematic
Rocks
Water
Meter