Experiment #18: the darlington – Elenco Electronic Playground 50-in-1 Experiments User Manual
Page 32
-32-
This circuit is very similar to the last one. Connect the
wires according to the Wiring Checklist and press the
switch, hold it down for several seconds. The LED will
slowly light up. Release the switch and the LED stays lit.
Take a look at the schematic. All the current flowing
through the emitter of NPN1 will flow to the base of
NPN2. So the current flowing into the base of NPN1 will
be amplified twice, once by each transistor. This
configuration is called the Darlington configuration. It
has very high current gain and very high input resistance
at the base. Since there are now two transistors to turn
on, the capacitor voltage must exceed 1.4V before the
LED will start to light. And since the input current to the
base is so small it will take much longer to discharge the
capacitor.
But the circuit is functionally the same as Experiment 17
and the LED will eventually go dark, though it may take a
few minutes. You can experiment with changing some of
the component values if you like.
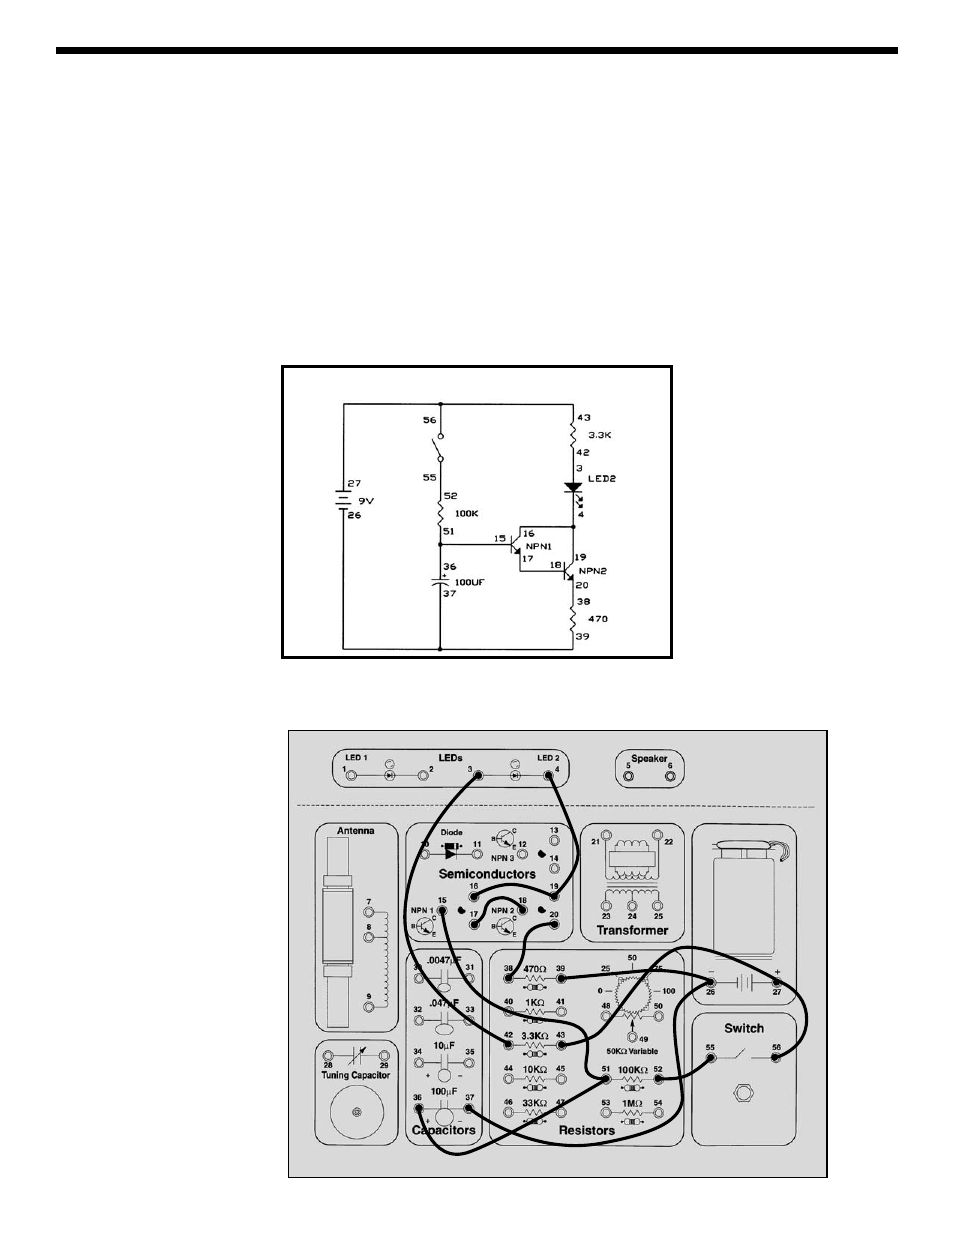
EXPERIMENT #18: The Darlington
Wiring Checklist:
o 43-to-27-to-56
o 55-to-52
o 36-to-51-to-15
o 42-to-3
o 4-to-19-to-16
o 17-to-18
o 20-to-38
o 39-to-26-to-37
Schematic