Network address translation (nat), Setting up an ip 852 channel with nat, Setting up an ip-852 channel with nat – Echelon IP-852 Channel User Manual
Page 40
32
Using NAT, DHCP, DNS on an IP-852 Channel
Network Address Translation (NAT)
Network address translation (NAT) allows multiple computers (hosts) to share a single
IP address. The address is normally set up at the gateway between a private network
and the Internet, allowing the computers on the private network to share a global, ISP
assigned address. This is achieved by modifying the headers of each packet traveling
through the NAT gateway. At a minimum, an IP address in each packet header is
replaced (translated). For outbound packets (to the Internet), source addresses are
translated from private to public. For inbound packets, destination addresses are
translated from public to private.
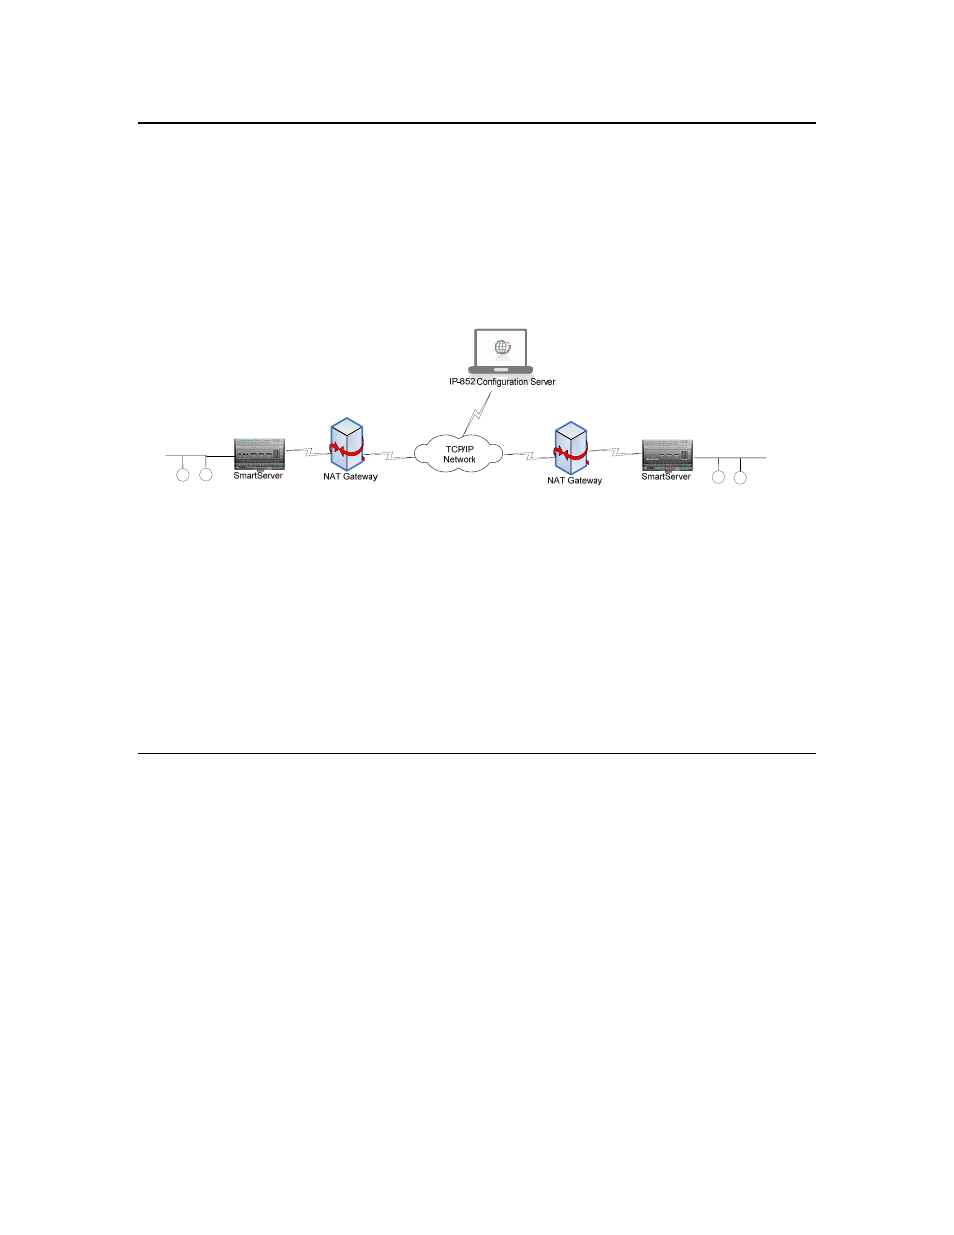
Figure 4.1 IP-852 Devices Communicating Through Two NAT Gateways
An IP-852 device may be placed behind an NAT gateway or firewall and can
communicate with another IP-852 device placed behind another NAT gateway, as shown
in Figure 4.1.
The port (1628 by default) that the IP-852 device uses to communicate with its peers and
the IP-852 Configuration Server must be opened, mapped, and properly forwarded to the
IP-852 device. See your NAT gateway’s user manual for details on how to setup port
forwarding (sometimes called static port mapping) on your particular NAT gateway.
Once the ports are mapped on the NAT gateway, setting up an IP-852 channel is much
like the procedure described in Chapter 2 with the exception that additional entries are
added to the IP-852 Configuration Server’s device tree for each of the NAT gateways.
Setting up an IP-852 Channel with NAT
To set up an IP-852 channel that spans NAT gateways, start the IP-852 Configuration
Server and perform the following steps:
1. Click Channel and then click New NAT Firewall.
2. Enter a descriptive name for your NAT firewall and then press ENTER.
3. Either double-click the new NAT firewall in the navigation pane or right-click it and
select NAT Firewall Properties, enter the IP address of the NAT gateway/firewall,
and then click OK.
4. Click the new NAT firewall in the navigation pane, click Channel, and then click
New Device. Configure the device’s IP address and other properties, as described in
Section 2. Use the device’s local IP address (typically a private, non-routable
address, such as 10.x.x.x or 192.168.x.x).
5. Repeat steps 1 through 4 to add another NAT firewall and device. The IP-852
Configuration Server should look like the one in Figure 4.2.