Using the seagull wireless dashboard (if included) – Eagle Tree Pro, Glide, Flight and Boat Seagull Wireless Telemetry and Data Recorder User Manual
Page 9
Copyright © 2003-2010 Eagle Tree Systems, LLC
Page 9
NOTE: Customers without the Seagull System should now proceed to the section
entitled “Advanced Installation and Setup Instructions”
Choose a location in your vehicle to install the transmitter. The transmitter is normally mounted with Velcro or double
sided tape. Ideally, the transmitter will be installed with its antenna and body as far away from your radio receiver (RX)
as possible, with the antenna protruding at right angles with your RX antenna, to reduce the possibility of interference.
For example, if you have a plane with the receiver mounted horizontally along the plane’s fuselage, mount the Seagull so
that the antenna is protruding from the vehicle vertically, as far forward of the RX antenna as possible. Best reception
will be obtained if the Seagull antenna is vertical.
Connecting the Seagull Transmitter to your Data Recorder (if included)
Ensure that the Recorder is not powered when connecting the transmitter, and ensure that the red wire of the transmitter
cable corresponds with the red dot on the port label (to the right of the connector). Plug the Seagull Transmitter cable
into the “Expansion” port on your Recorder, as shown in Figure 1. Install the transmitter in the upper row of pins, as
shown in the figure.
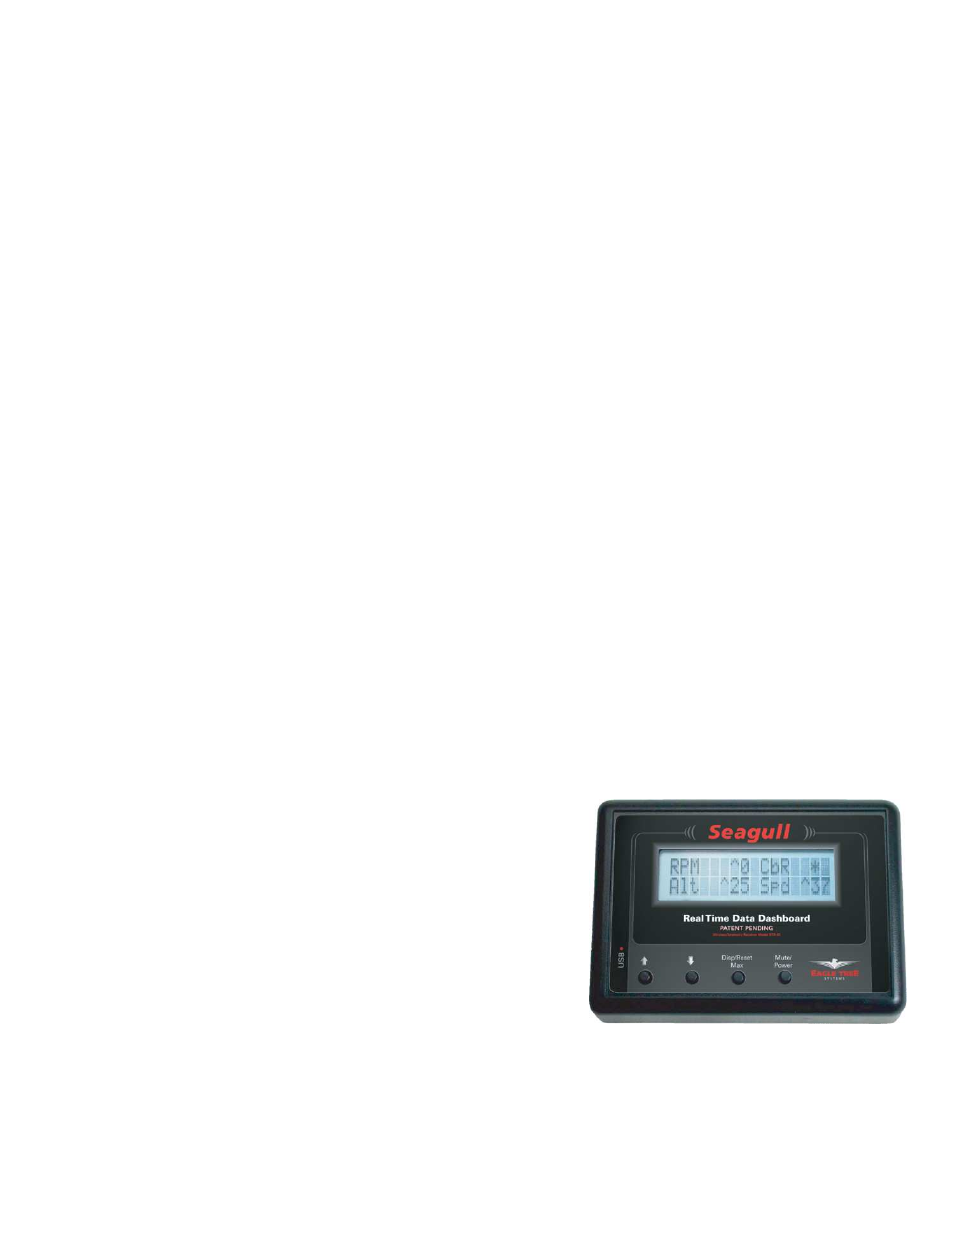
Using the Seagull Wireless Dashboard (if included)
The Seagull Dashboard Receiver (the Dashboard) operates from a standard 9V battery. The battery installs in the back
snap-off compartment of the Dashboard. Approximately 12-14 hours continuous use is typical with an alkaline battery
with the 900 MHz/200mW and 433 MHz versions. Approximately 3-4 hours of continuous use is typical with the 2.4
GHz and 900 MHz/1 Watt systems. Optionally, any battery of between 5-16 volts can be used to power the Dashboard.
Rechargeable 9V batteries will work, but the run time will be significantly reduced.
Note: If the Dashboard will be unused for long periods, it is a good idea to remove the battery
Note: When removing the battery clip, use your thumb to pop the clip off from the side without the wires. Pushing on
the wire side can break the battery clip or the wires.
Variometer Function (Pro and Glide systems only): Your Dashboard contains a sophisticated varying tone
Variometer, employing electronic Total Energy Compensation, based on changes in Airspeed. Basic variometers do not
support total energy, which means that “stick thermals” are reported by the variometer if you descend or ascend due to
elevator movement. Standard total energy variometers reduce the effects of moving the elevator by monitoring the pitch
of the aircraft, which requires an additional probe to be mounted. The Seagull Pro system uses the airspeed pitot tube for
total energy calculations, requiring no additional tube.
The variometer produces a varying tone, which changes as you ascend or
descend at different rates. When ascending, the tone will be broken, with
the tone frequency increasing as the rate of ascent increases. When
descending, the tone will be continuous, with the tone frequency
decreasing as your rate of descent increases.
Several parameters of the variometer are adjustable. See the
Configuration Menu section below for more information.
The Dashboard includes a small speaker, or a set of standard headphones
or ‘earbuds’ can be plugged into the dashboard for noisy areas. Note that
the headphone volume is fixed.
NOTE: the “Var” parameter must be displayed on the Dashboard for the variometer tones to work correctly. Please make
sure you add that parameter when you configure the Dashboard!
Stall Speed Function (Pro System only): Your dashboard can be used as an aid to maintaining correct landing speed.
See the Stall Speed section below for more information.