AMT Datasouth Fastmark 600 User Manual
Page 22
Fastmark 600 Series User's Guide
22
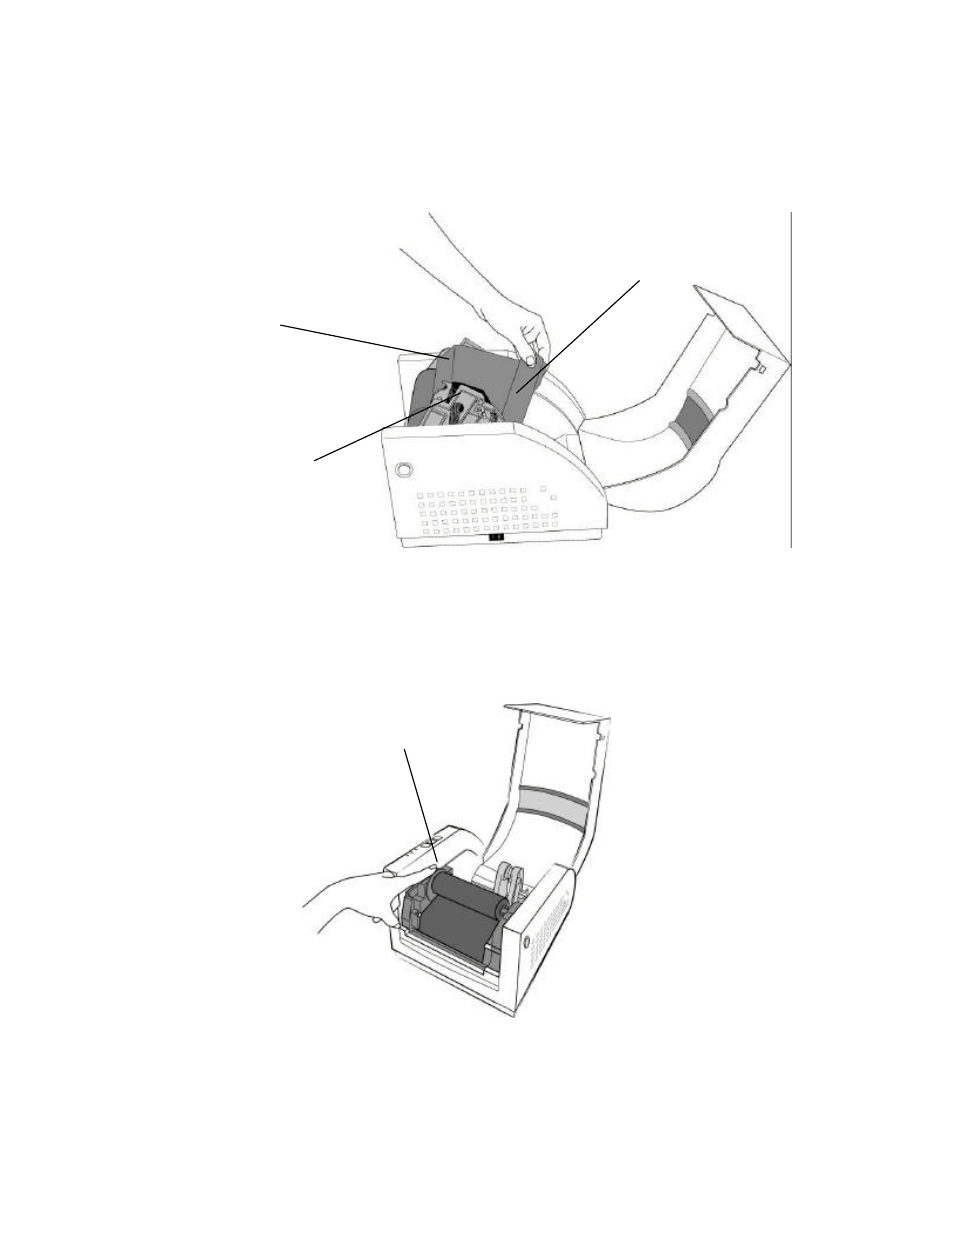
8. Loop the ribbon over the Print Head Module. Insert the Take-up Core into the Take-Up
Area by first compressing the right side spring and snapping the left side of take-up core
into the left side of the notched wheel. Make sure that the slots in left side of the core
mate with the notches on the left side ribbon drive wheel.
Figure 13 – Ribbon Take-Up Installation
9. To remove any slack in the ribbon, manually rotate the Take-up Core Wheel until the
ribbon from the Supply Holder is snug around the Print head Module and onto the Take-
up Core .
Figure 14 – Ribbon Installation
Ink Side of the Ribbon
Print Head Module
Take-Up Core
Take-Up Core Wheel
See also other documents in the category AMT Datasouth Printers:
- Fastmark 600 Series (2 pages)
- FM402DT (2 pages)
- Fastmark 4000 (79 pages)
- Sigma Data-7200 (2 pages)
- 4600 (83 pages)
- ACCEL-6300 (257 pages)
- MS1839AVCC (202 pages)
- Fastmark M5DT (2 pages)
- CodeWriter 4500 (94 pages)
- Fastmark 6000 (82 pages)
- SigmaData 7200 (72 pages)
- Fastmark M4 Series (2 pages)
- Fastmark 4600 PLUS (91 pages)
- M2 Series (2 pages)
- Documax 3300 Series (221 pages)
- Fastmark 600 (72 pages)
- Accel 5350 (255 pages)
- Fastmark 400 (78 pages)
- Fastmark 400 (76 pages)
- Fastmark 4000 (114 pages)
- PAL (207 pages)
- Journey II (126 pages)
- Performax (162 pages)
- CodeWriter 5106 (36 pages)
- Documax A6300 (180 pages)
- Fastmark 4600 PLUS (6 pages)
- Fastmark PT-1 (32 pages)
- FM 4600 plus (8 pages)
- Accel 7350 (47 pages)
- Accel 7450 (45 pages)
- Accel 7450 (18 pages)
- 2012 M6 Plus (83 pages)
- M1 (32 pages)
- M5DT Plus (40 pages)
- M5TT Plus (42 pages)
- M7 (73 pages)
- M7plus (19 pages)
- Documax 5380 (2 pages)
- Documax 5380 (38 pages)