Mounting, Mounting location, Mounting vy-5em or vy-10em panel – Aiphone VY-5EM User Manual
Page 11: Vy-rvu residential adaptor
Attention! The text in this document has been recognized automatically. To view the original document, you can use the "Original mode".
MOUNTING
Mounting location
VY-EM entrance call panel employs CCD camera with
infrared LEDs, and its performance can be affected with
the environmental lighting conditions.
For best results, observe the followings:
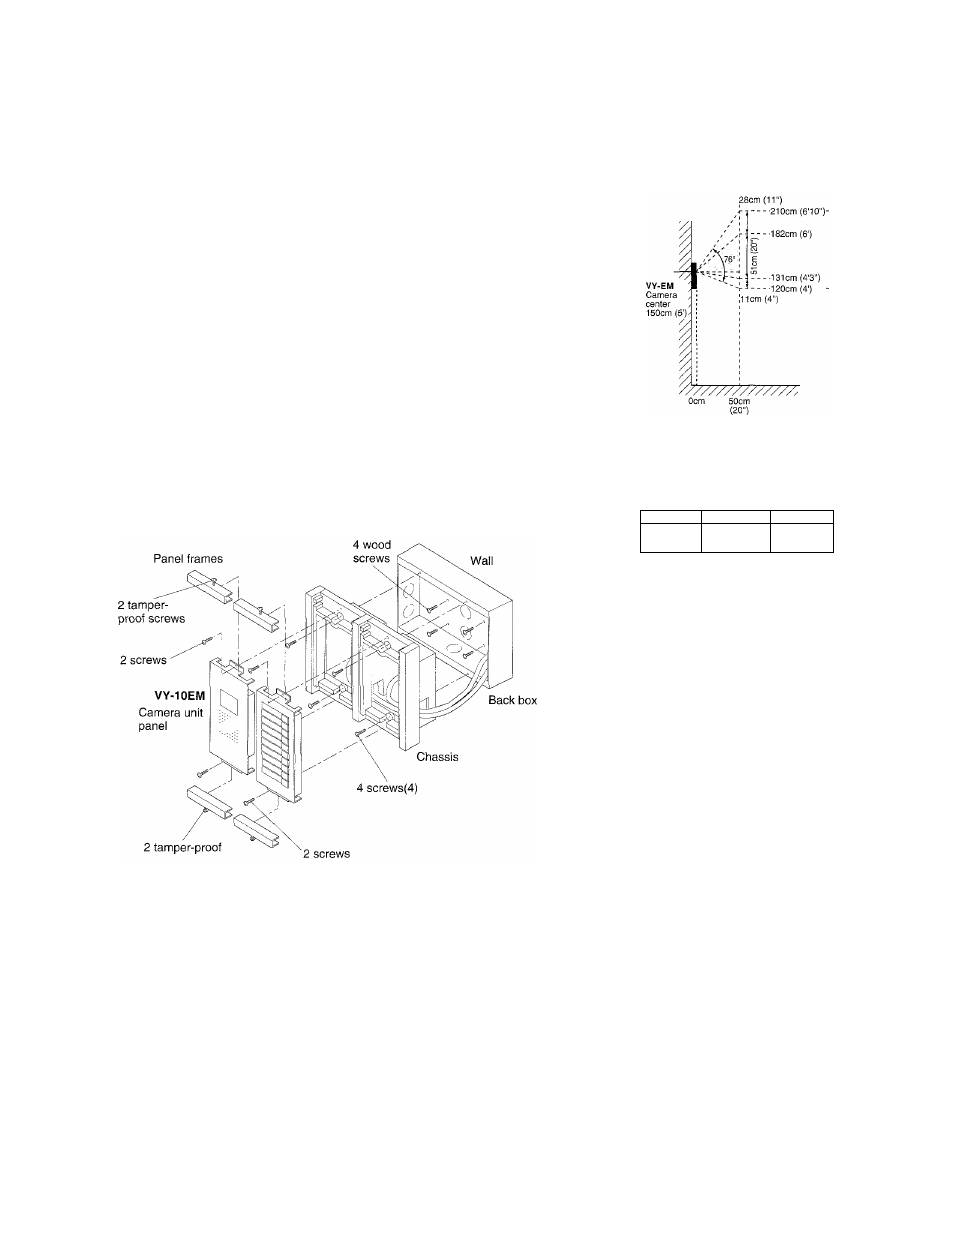
1. Decide the height of camera, referring to the image
viewing area, as shown right.
2. VY-EM panel does not face light-emitting sources or
direct sunlight, coming directly into camera lens.
3. VY-EM panel, while holding weather-resistency, should
not be exposed to direct rain, etc. (Protection with hood,
etc. should be considered).
Mounting VY-5EM or VY-10EM panel
VY-EM consists of 3 components: front panels, chassis &
back box. VY-EM panel flush-mounts on back box in the
wall.
Pan/tilt viewing area
shown by dotted line
1 34cm (13")
72cm (29")
34cm (13") 1
- 50cm
■ (
20
")
Viewing area of camera
remaining in still position.
Back box VY-5EM, VY-10EM is measured
(H
X
Wx D):
240
X
250
X
62 (mm)
9-7/16"
X
9-7/8"
X
2-7/16"
★ The hole should have a space of at least
3mm, 1/8" on both sides.
1. Disassemble 2 front panels, unscrewing 4 tamper screws on the panel frames.
2. Disconnect front panels, unplugging connectors from the chassis.
3. Mount the chassis on back box at 4 points, (screws are supplied)
4. Make wire terminations on the terminal block according to the wire color codes prearranged.
★ Plug off matching connector on all middle call button panels.
5. Reconnect front panels, and remount to the chassis.
■ VY-RVU residential adaptor
VY-RVU can be mounted with 83.5mm, 3-5/16" guide. The adaptor operates with its housing getting
warm, which is a normal occurrence.
^ When running intercom cables, maintain a distance of at least 2 feet (60cm) from any AC
wiring, fluorescent lighting, and dimmer switches.
-11 -