SINGER 201K User Manual
Page 26
Attention! The text in this document has been recognized automatically. To view the original document, you can use the "Original mode".
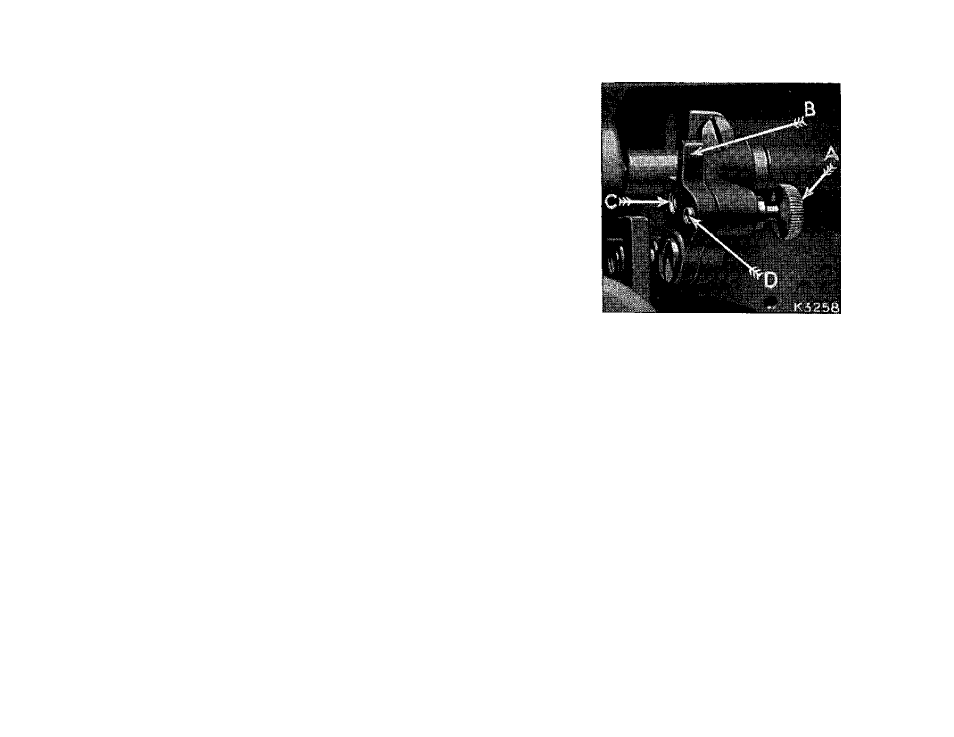
DARNING (See Fig. 26).
Raise needle to its highest point, turn machine
back on its hinges, unscrew knurled screw A,
as far as it will go, and move crank B down so
that the screw A will enter the upper hole C.
The screw should then be securely tightened. The
feed is now inactive and wOl not impede free
movement of the work. Restore machine to its
working position and raise the presser bar. Remove
the presser foot and fit Spring Darning Foot No.
121094, but do not tighten the thumb screw.
Stretch tightly the article to be repaired in an
embroidery hoop and place below the needle by
tilting the edge of the hoop. Then lower the presser
bar by means of its lifter, and adjust the height of
the darning foot to allow just sufficient space for the
free movement of the work in hand. After ad
justment, tighten the thumb screw securely. Now
move the hoop backward and forward by the hands
until the hole or damaged part is completely
covered with stitching in one direction. Then
turn the work and stitch across to complete the
darn. After darning, reinsert and firmly tighten
the screw A in the lower hole, and replace the
presser foot for ordinary sewing.
Fig. 26.
EMBROIDERY
For surface embroidery, remove the
presser foot to give a clear view of the
stitching. For lace embroidery, i.e.
open work, remove the ordinary
presser foot and fit Spring Foot No,
121094. For embroidery the feed
should be lowered and the work
handled as advised in the preceding
paragraph.
24