SINGER 7050 User Manual
Page 40
Attention! The text in this document has been recognized automatically. To view the original document, you can use the "Original mode".
Mli
WIDTH
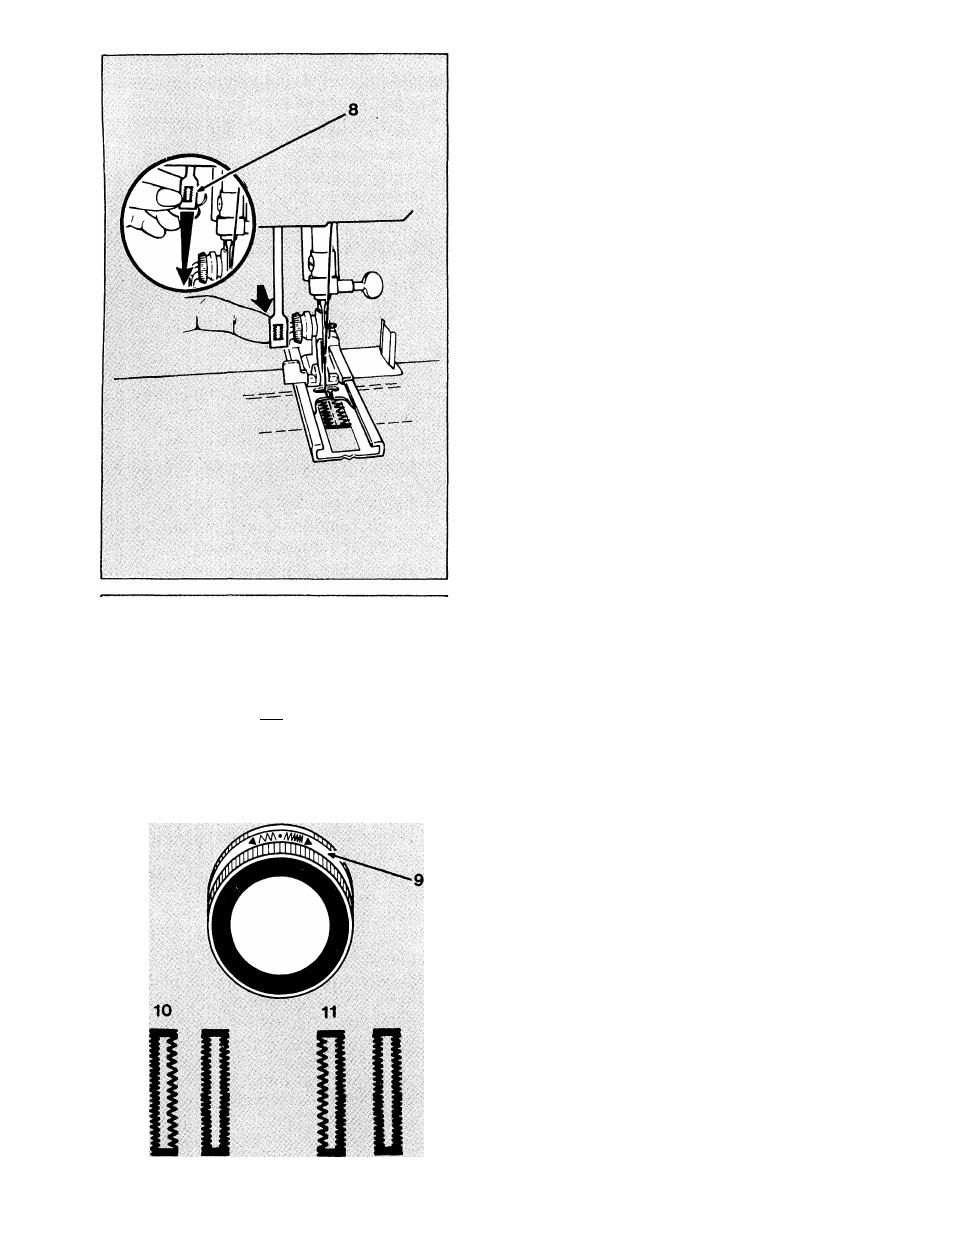
Pull buttonhole lever (8), located under
sewing light, straight down as far as it
will go.
Press it toward you.
Start running the machine.
The entire buttonhole will be stitched
in one operation.
Stop sewing when machine begins over
lapping starting stitches.
Raise foot lifter and remove work from
machine; clip thread ends; cut button
hole opening with scissors or seam
ripper.
(Adjust width and balance of test
buttonhole, if necessary.)
Press buttonhole lever toward you for
each buttonhole to be sewn.
When all buttonholes are completed,
push buttonhole lever (8) back up into
machine.
To remove buttonhole attachment, raise
presser foot lifter and press down on
both sides of button carrier near shank,
and slide off machine.
ADJUSTING WIDTH OF
BUTTONHOLE OPENING
If the width of the buttonhole opening is
too narrow or too wide, it can be adjusted
by the stitch width lever.
• Widen the buttonhole opening by mov
ing the stitch width lever slightly left.
• Narrow the buttonhole opening by mov
ing the stitch width lever slightly right.
ADJUSTING BALANCE OF
BUTTONHOLE
If the two stitching sides of your button
hole are unequal, turn stitch balance ring
(9) behind pattern selector dial.
• If the right side of stitching is too open
(10), turn stitch balance ring slightly left.
• If the left side of stitching is too open
(11), turn stitch balance ring slightly
right.
38