Section 5 one-step buttonholing, One-step buttonholing – SINGER 7050 User Manual
Page 39
Attention! The text in this document has been recognized automatically. To view the original document, you can use the "Original mode".
SECTION 5
ONE-STEP BUTTONHOLING
• Your machine automatically makes a buttonhole to the size of your button in one, easy
step. You never need to move the fabric or reposition the needle.
• Always make a practice buttonhole on a
sample of your fabric.
• Be sure bobbin contains enough thread.
• When making buttonholes on hard-to-
reach areas, convert machine bed to
free arm sewing.
• Mark buttonhole position on fabric as
indicated in pattern.
RECOMMENDED SETTINGS
Stitch Selection:
Buttonhole Stitch
Stitch Width:
Stitch Length: 4
Foot:
Buttonhole Attachment
(L)
Needle Plate:
General Purpose
(A)
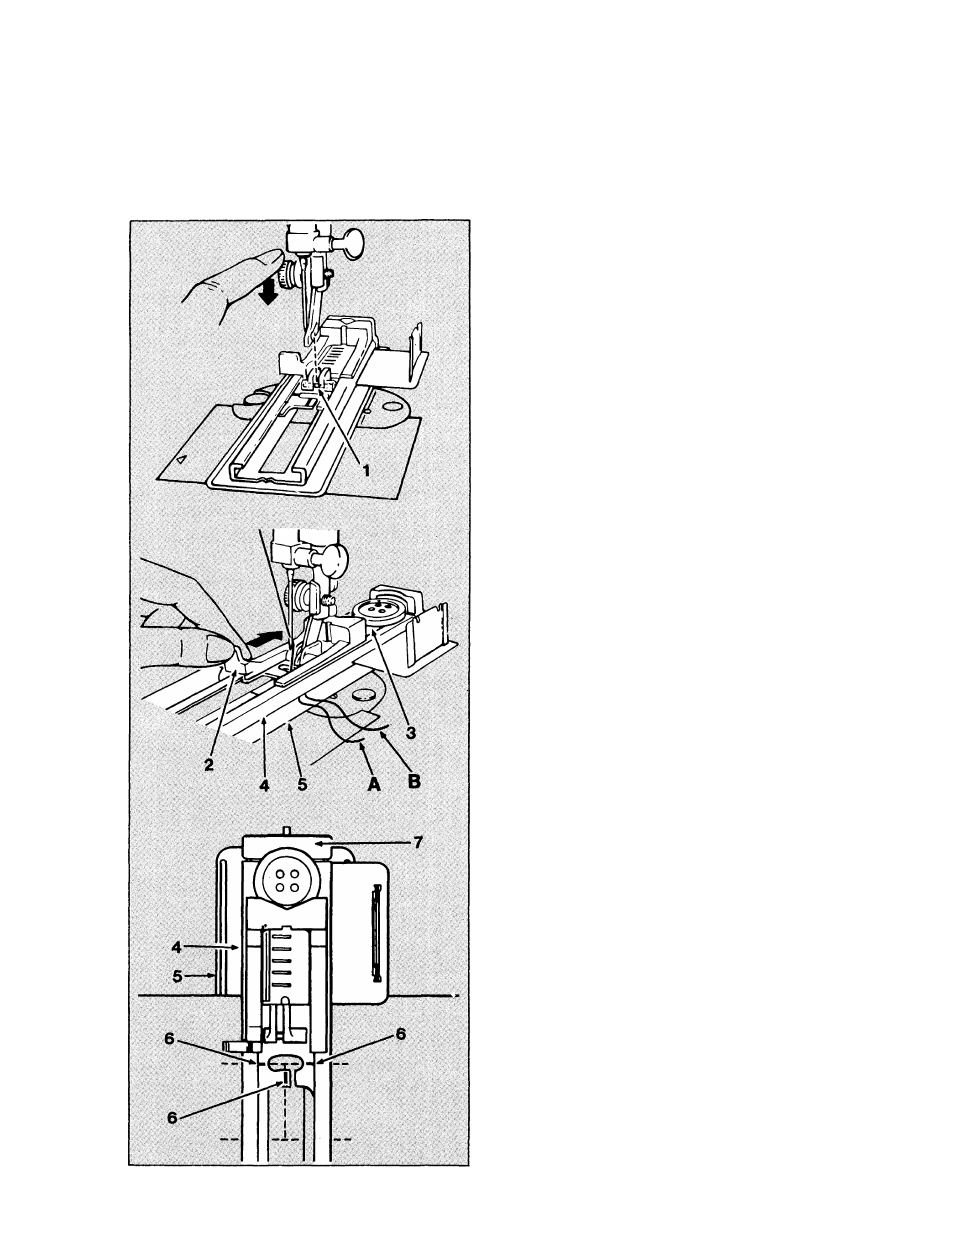
Fastening the Buttonhole Attachment
•
Remove presser foot from shank.
• Place buttonhole attachment behind
shank and guide it forward.
• Center pin (1) in attachment under
shank, and lower presser foot lifter.
• Press presser foot screw down firmly
until shank snaps into place.
Setting the LengOt of Buttonhole
•
Open button clamp (2) and place but
ton on carrier (3).
• Slide clamp (2) back to hold button in
place.
• Raise foot lifter and draw needle thread
(A) and bobbin thread (B) between upper
(4)and lower (5) plates of button attach
ment, and to the back of machine.
• Place fabric between upper and lower
plates.
• Center 3 red guidelines (6) of attach
ment around beginning line of button
hole.
• Lower presser foot lifter.
• Push foot from back of button carrier
(7), toward you to i nsure proper button
hole length.
37