Carrier WEATHERMASTER III 38HQ User Manual
Page 6
Attention! The text in this document has been recognized automatically. To view the original document, you can use the "Original mode".
Compatible Fitting coupler is used for liquid line
connection. See accessory coupler, Fig. 6.
Connect vapor line from outdoor coil section to
indoor compressor section, and from compressor
section to indoor fan-coil. Section vapor line as
required (Fig. 5). Use correct compressor section
vapor line connection to indoor and outdoor coils.
Unit Compatible Fittings permit mechanical or
sweat connection as described below.
When a 1-1/8 in. field-supplied vapor line is used
on 38HQ234, four field-supplied 3/4-in. to 1-1 / 8 in.
vapor line adapters must be provided.
fitting on unit liquid line connection. Connect liquid
line to Compatible Fitting using mechanical or
sweat connection. When mechanical connection is
made, use 2 wrenches to tighten Compatible Fitting
nut — one to hold coupler and one to tighten nut.
Insulate Refrigerant Lines — After making tubing
connections, the compressor section fittings must be
insulated. Butt the Armaflex tubing insulation (pro
vided in tubing package) against the Compatible
Fittings. Secure the insulation with Prestito or an
equivalent material which provides both adhesion
and insulation. Also wrap the Compatible Fittings
with Prestito to prevent sweating.
Mechanical
Connection-to-Compatible
Fitting
(Mate one set of connections at a time.)
1. Loosen nut on Compatible Fitting one turn. Do
not remove.
2. Remove plug and be sure 0-ring is in the groove
inside the Compatible Fitting.
3. Cut tubing to correct length.
4. Insert tube into Compatible Fitting until it
bottoms.
5. Tighten nut until it bottoms on back coupler
flange. Keep tube bottomed in Compatible
Fitting while tightening nut.
Sweat
Connection-to-Compatible
Fitting
(Use
refrigerant grade tubing.)
1. Remove locking nut, rubber O-ring and Schrader
core from valve.
2. Cut tubing to correct length.
3. Insert tube into Compatible Fitting. Wrap top
and bottom of service valves in wet cloth to pre
vent damage by heat. Solder with low tempera
ture (430 F) silver alloy solder.
4. Replace Schrader core.
5. Evaeuate or purge system with field-supplied
refrigerant.
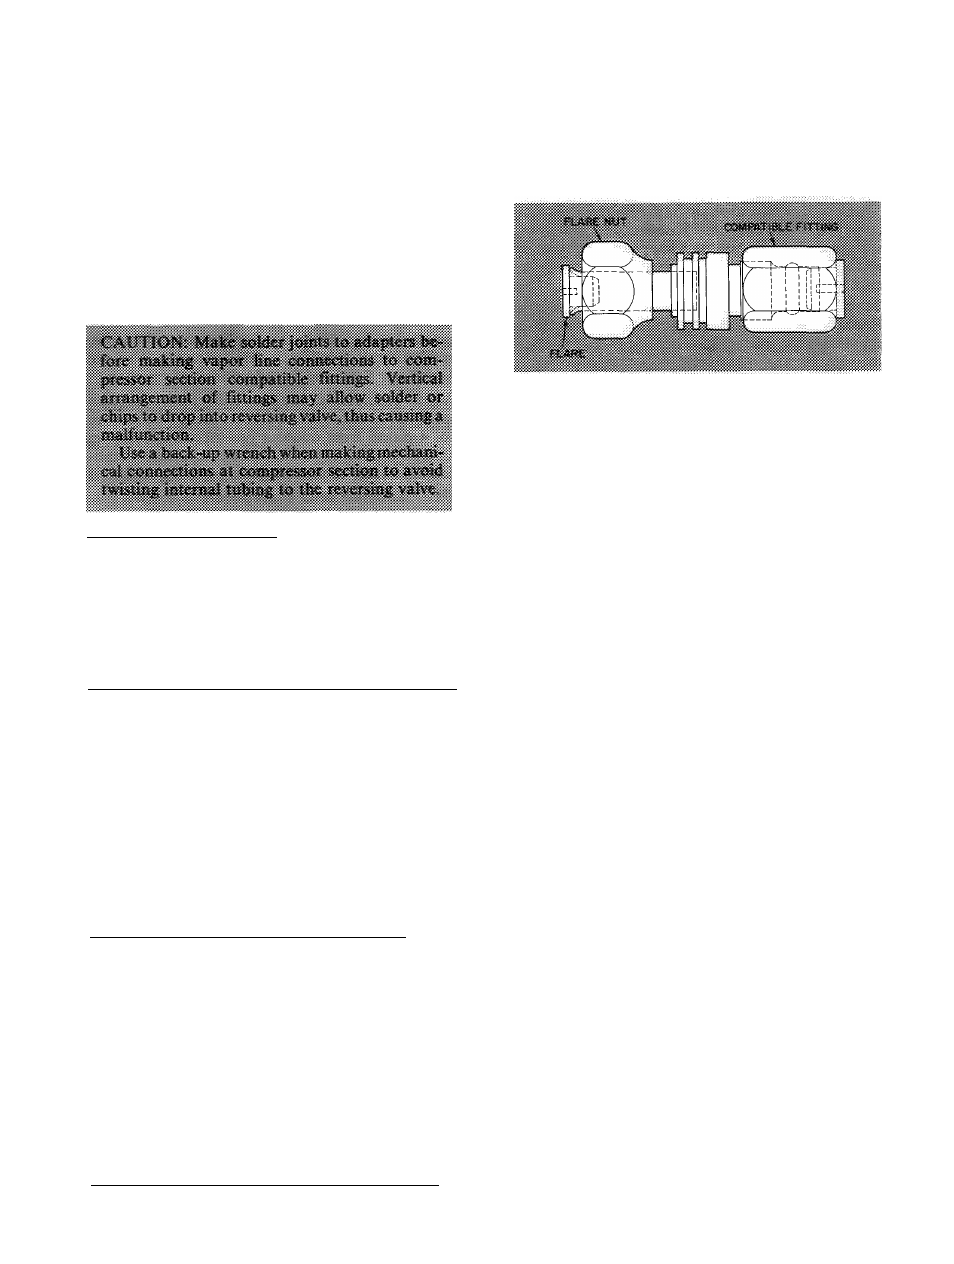
Accessory Flare-to-Compatible Fitting Coupler is
shown in Fig. 6. Attach flare nut on coupler to flare
Fig. 6 — Accessory Coupler
Step 6 — Install Fan Control Package
(factory
supplied; packaged separately inside indoor com
pressor section) — This control, consisting of a
transformer and a relay, provides high-speed fan
operation when both compressors are energized.
Refer to connection diagram in Fig. 7 for wiring
details. Install control as follows:
1.
Remove factory-installed transformer from
indoor fan-coil unit electric heater package.
Refer to 40FS service instructions as required.
2. Install fan control package in upper right-hand
corner of the 40FS.
3. Route wires from controls to heater package thru
knockouts provided. Restore transformer wiring
connections including ground wire.
4. Connect black wire from indoor fan relay (IFR)
terminal no. 4 (or no. 6) to black wire from
indoor fan relay no. 2 (IFR-2) terminal no. 3.
(Cut off male connector from IFR wire; supply
wire nut to splice wires.)
5. Connect black wire from IFR-2 terminal no. 6 to
fan speed selector block terminal no. 1 (high
speed).
6. Connect blue wire from IFR-2 terminal no. 1 to
fan speed selector block terminal no. 3 (low
speed).
7. Connect low-voltage field control wires between
indoor compressor section and indoor fan relay
(IFR-2) orange pigtails (TB OA to OFR-2, ter
minal no. 4; contactor C-2, terminal C to IFR-2,
terminal no. 5). Field-supplied, 24-gage, NEC
Class 2 thermostat wire may be used.
Step
7
—
Install
Outdoor
Ambient
Switch
(OA)
(factory-supplied; packaged separately inside
indoor compressor section) — This switch activates
compressor no. 2 when the first heating thermal
balance point is reached. The switch is installed in
the same manner as the outdoor thermostat (step 8),
except refer to Fig. 7 for correct wiring.