Build the tail surfaces – Top Flite Sierra 40 Trainer Kit User Manual
Page 7
7
NOTES ON SANDING
1. Use a block orT-barwhereever possible when
sanding. The flat block will "ignore" glue and
changing wood density and give you a true and
even shape.
2. Always use fresh, sharp sandpaper. Sharp
sandpaper will cut through glue and hard mate-
rials easily, giving an even surface. Older, dull
sandpaper will require more pressure and may
gouge the surface.
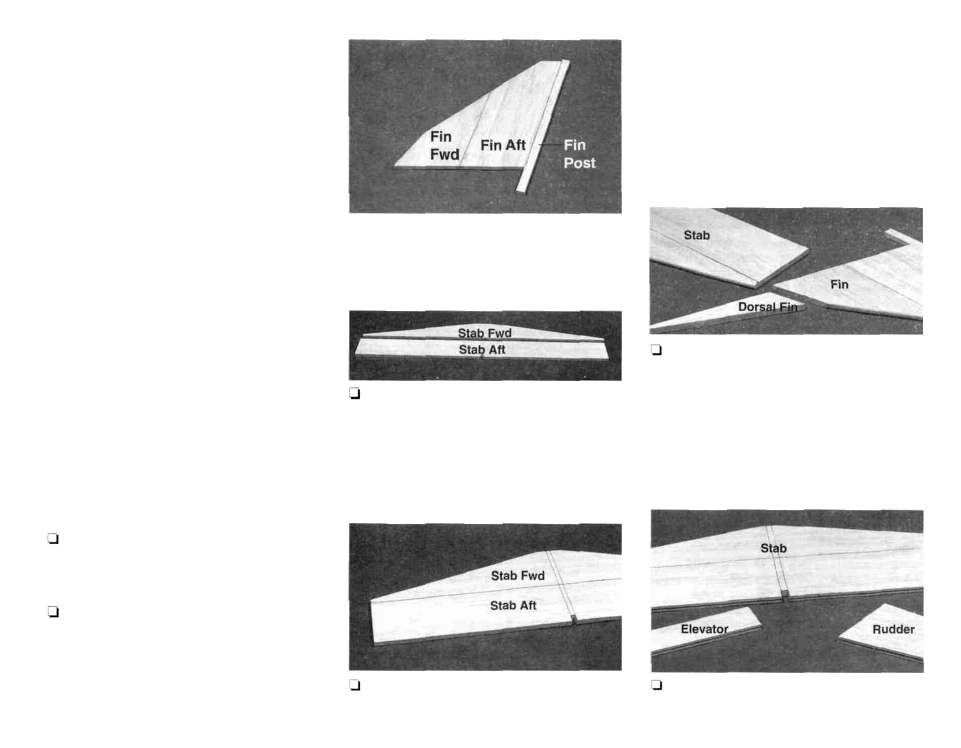
1/4" shaped balsa fin fwd
1/4" shaped balsa fin aft
1/4" shaped balsa rudder
1/4" shaped balsa stab fwd
1/4" shaped balsa stab aft
Tapered balsa elevator
1/8" bent wire elevator joiner
BUILD THE TAIL
SURFACES
To build the tail surfaces, you will need the following:
of a paper towel to make sanding easier. Flip the
parts over and apply some thin CA to the other side
of the joint.
3. The notch in the shaped 1/4" balsa stab aft
piece is positioned at the back edge of the stab so the
fin post can protrude through the notch later when
you are told to attach the tail surfaces to the fuselage.
Glue the shaped 1/4" balsa stab (stabilizer) fwd to
the stab aft in the same manner as the fin parts.
150 grit sandpaper to smooth out any unevenness.
Carefully block sand the edges and ends to correct
any slight bumps or mismatches. Align the notch at
the back edge of the stab and the stab TE with the
plans. Mark the fin location on the front edge of the
stab. Draw two lines from these marks to the notch
in the aft edge of the stab.
5. Refer to the cross section on the plans. Use
a sanding block to round the stab leading edge
(except the flattened center portion). Mark the
location of the dorsal fin on the forward edge of the
fin using the plans as a guide and round the fin only
above the dorsal fin. The fin, rudder, and stab should
have their tip edge corners rounded slightly for
easier covering (see the cross sections on the fuse-
lage plans).
1. Work on a flat surface covered with waxed
paper. Refer to the plans to identify the parts and
their locations.
2. Put the shaped 1/4" balsa fin fwd, fin aft, and
the 1/4" x 3/8" x 8-7/8" balsa fin post together and
check how the parts fit. Block sand the mating
surfaces until they fit well. Hold the parts together
tightly and glue them together with thin CA. Imme-
diately wipe off any excess glue with a quick stroke
4. Block sand the surfaces of the fin and stab with
6. Use a smooth ball point pen to draw a