Do steps 51 - 62 if installing ailerons – Top Flite Sierra 40 Trainer Kit User Manual
Page 22
22
48. Test the fit of the die-cut 1 /8" plywood R-
1 B's (1 B) against the R-1 A's. Trim the Ft-1 B's
if necessary for a good fit. The dowel may also
need to be flattened slightly with a sanding block
to allow the R-1 B's a good fit.
49. Glue in the R-1 B's with 15-minute epoxy.
50. For rubber band on wings, glue the die-cut
1/8" plywood R-1 B's to the R-1 A's, forward center
brace (F), and dihedral brace with epoxy.
DO STEPS 51 - 62 IF
INSTALLING AILERONS
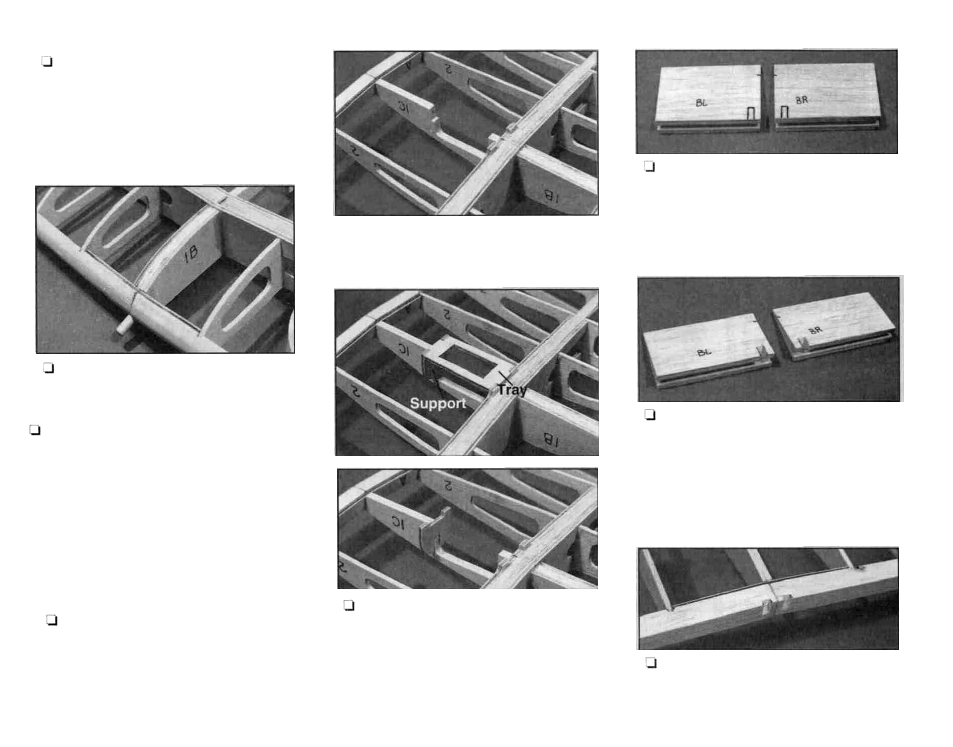
51. Cut out and remove the remaining
piece of balsa from across the servo bay in the
bottom side of R-1 C using a knife or razor saw
(see photo at top of next column).
Photo for Step 51
52. Snap the die-cut 1/8" plywood aileron
servo tray and servo tray support in place as
in the photo. Use medium CA to glue in the
servo tray support while using the servo tray to
hold it in position. Do not glue the servo tray in
at this time.
53. Sand the root ends of the tapered and
grooved balsa trailing edge center pieces so
they will meet properly when they are held
together against the TE. Mark the parts so you
can identify the bottom of the left and right parts.
54. Hold the trailing edge center pieces over
the right wing panel plan. Mark where the
torque rods will exit the bottom of the trailing
edge. The root cross-section gives a view of the
cut-out. Cut a notch in the trailing edge center
pieces to allow the torque rod to exit.
55. Hold the trailing edge center pieces up
to the wing. Transfer the notch locations onto