Do these steps for bolt on wings – Top Flite Sierra 40 Trainer Kit User Manual
Page 25
25
trailing edge plate. Use a knife and a straightedge
to cut about 1/2 way through the plate on the center-
line. Bend the plate away from the cut until it starts
to break. Place the plate on top of the wing, and
adjust if necessary. Glue the plate to the wing with
medium CA.
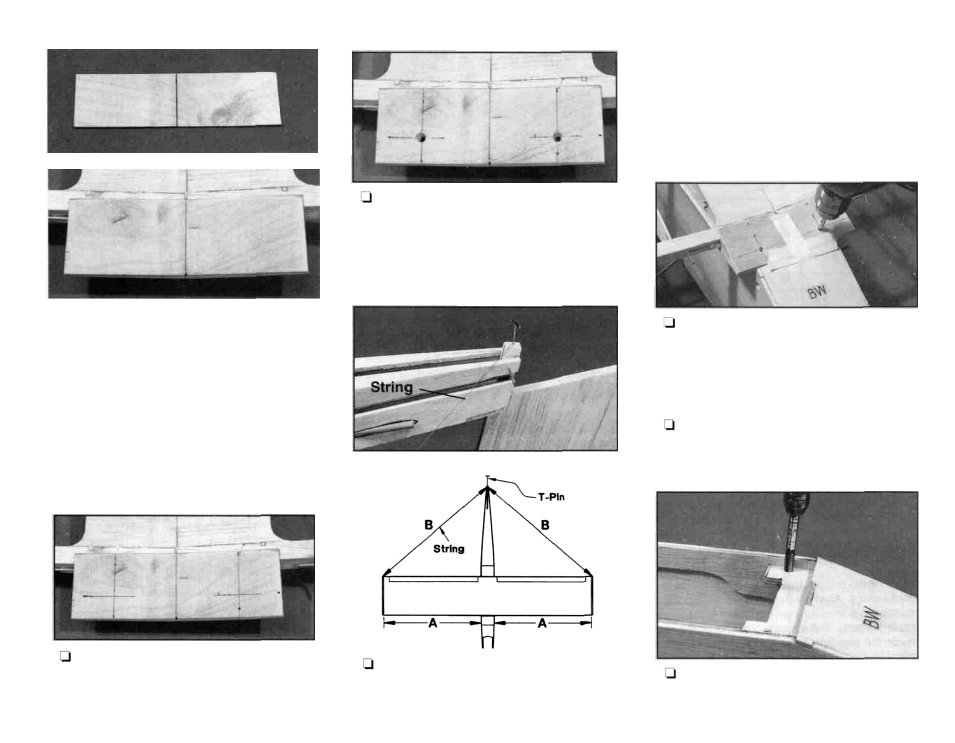
DO THESE STEPS FOR
BOLT ON WINGS
3. Referring to the right wing plan. Mark a
line 5/8" from the trailing edge. Mark two lines
1-3/8" from the wing centerline as shown.
4. Drill two 3/16" pilot holes through the
trailing edge plate and wing TE at the intersec-
tion of the lines. Be sure to drill perpendicular
to the surface of the trailing edge plate.
Both distances must
be equal!
A=A
B=B
piece of scrap 1 /4" balsa (or the fin as shown in
the photo) in the slot at the back end of the fuse.
Put a pin vertically into the piece on the fuselage
centerline. Attach a length of string to the pin.
Use the string to check if the wing is on straight
(see diagram).
6. Once the wing is straight, use some
masking tape hold it in place. Drill through the
3/16" pilot holes perpendicular to the trailing
edge plate and through the wing bolt plate in
the fuselage with a #10 (or 13/64") drill.
7. Remove the wing and re-drill the holes in
the wing only to 1/4" or 17/64".
8. Use a 1/4-20 tap and a tap wrench to cut
threads in the plywood wing bolt plate.
5. Place the wing on the fuselage. Pin a