Do steps 40 - 49 for bolt on wings – Top Flite Sierra 40 Trainer Kit User Manual
Page 21
21
section. If you are using rubber band on wings, glue
it with CA. If you are using bolt on wings, transfer the
marks from R-1A onto the forward center brace (F)
and remove R-1A.
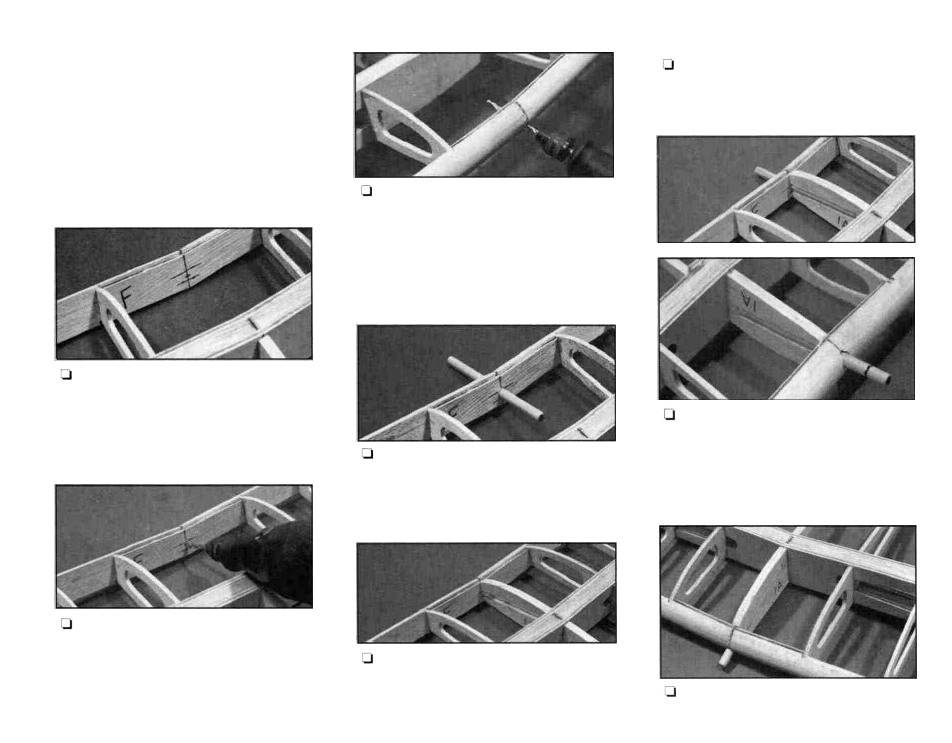
DO STEPS 40 - 49 FOR
BOLT ON WINGS
40. Draw a vertical center line on the forward
center brace.
41. Drill a 1/8" pilot hole into the forward
center brace (see the photo). The angle of this
hole will obviously not be correct, so you need
not go all the way through the balsa leading
edge. Just go through the plywood.
42. Use the R-1 cross section on the wing
plan to determine where the dowel will exit the
leading edge, and mark this location. Drill a 1/
8" pilot hole from the front of the wing through
this mark, then through the previously drilled
pilot hole in the forward center brace.
43. Gradually increase the size of the drill
until you reach 1/4". Test fit a 1/4" wing dowel
through the hole.
44. Replace R-1 A and glue with medium CA.
Remember that it is centered vertically to allow
for the 1/16" sheeting.
45. Cut away the material in front of the slot
in R-1A to allow the dowel to pass through the
front of the wing into the slot.
46. Insert a 1/4" dowel into the leading edge
and push it all the way into the slot. Put a mark
on the dowel 1/2" ahead of the leading edge of
the wing. Remove the dowel and cut it at the
mark. Round the end of the dowel slightly to
allow easy wing mounting.
47. Glue the dowel in place with thin CA.