Top Flite Sierra 40 Trainer Kit User Manual
Page 36
36
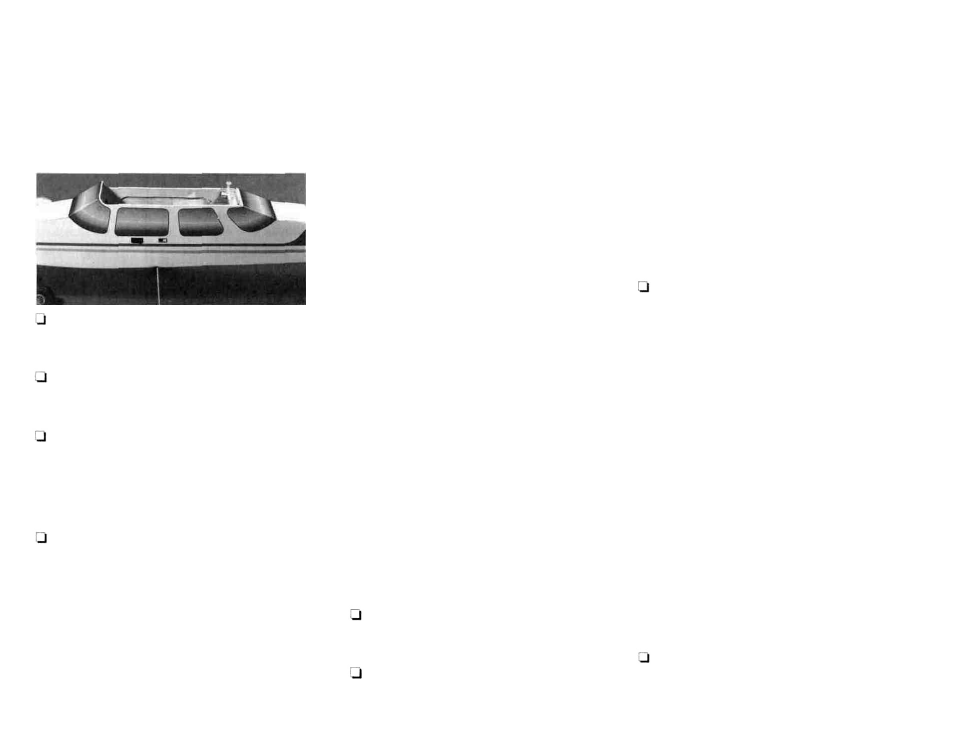
APPLY DECALS
NOTE: The decal sheet does not give you
everything you need to completely trim your
model, but it does provide all the difficult items.
1. Study the plans and the photos on the box to
determine where to place the decals.
ing decals.
3. Cut out the individual decal items and apply
them in the appropriate locations. NOTE: Certain
decals are provided which you may use at your
discretion, such as the "TOP FLITE" logo and the
small "SIERRA" decals.
4. The following sequence is recommended for
applying the window decals:
2. Thoroughly clean your airplane before apply-
B. Use a couple of small pieces of masking tape
to hold the side windows in their position on the
fuselage.
C. Use a permanent fine tip marker, such as a
"Staedtler Lumocolor 313 Permanent" avail-
able at art and drafting stores, to lightly mark
the location of the front window. Mark the
location of the aft edge of the side windows for
future reference.
D. Remove the side windows. Peel the backing
off the front window and stick it to the fuselage,
aligning it with the marks you made at the front
window location.
E. Peel the backing off the side windows.
Carefully align them with the front windows and
the marks you made for the aft edge of the side
windows.
F. When both side windows are in place, peel
the backing off the back window. Align it with
the side windows and stick it in place.
HINT: Use a fine tipped permanent marker to
blend away any slight mismatches or gaps.
HINT: You may carefully apply some thin CA
to the window lap joints with a toothpick to
prevent them from peeling up.
INSTALL THE RECEIVER
AND BATTERY
NOTE: These were put under the fuel tank in the
prototypes as shown on the plans. Additional
foam was put between them and the fuel tank to
hold the fuel tank at the proper height. The
position of the battery and receiver may be
changed to balance the aircraft. There is plenty
of room under the wing ahead of the servos for
the receiver and battery if necessary.
NOTE: If it is necessary to install the receiver
and/or battery in the compartment under the
wing, glue a piece of scrap balsa over the top of
their foam padding to keep them securely in
place.
4. Route the receiver antenna in one of the fol-
lowing ways:
A. Route the antenna along the inside of the
fuse side and out of the fuse top, just behind
the wing. Anchor the antenna to the top of the
fin with a rubber band.
B. Install another "pushrod guide tube" along
the inside of the fuse, along the bottom,
exiting just ahead of the rudder. Insert the
antenna through the tube, and leave the
excess length trail behind.
NOTE: DO NOT EVER CUT YOUR RECEIVER
ANTENNA OR ATTEMPTTO FLY A MODEL WITH
THE ANTENNA FOLDED OR COILED UP. THESE
CONDITIONS WILL DRASTICALLY REDUCE THE
RANGE OF YOUR RADIO.
A. Carefully cut out the windows with a sharp
knife allowing about a 1/16" border. Use a
sharp X-acto knife and a straight edge to trim
the decal edges that will lap together at the
fuselage corners exactly at their edges.
NOTE: Do not cut the side windows apart.
Applying them as a single piece will allow
you to keep them lined up with each other.
1. Wrap your receiver and battery in plastic
bags, followed with foam rubber.
2. Install the battery and receiver in the
fuselage.
INSTALL THE FUEL TANK
1. Assemble the fuel tank as per the manufacturer's
instructions. Be sure the "clunk" cannot contact the
back wall of the tank and interrupt the fuel flow.