Top Flite Sierra 40 Trainer Kit User Manual
Page 17
17
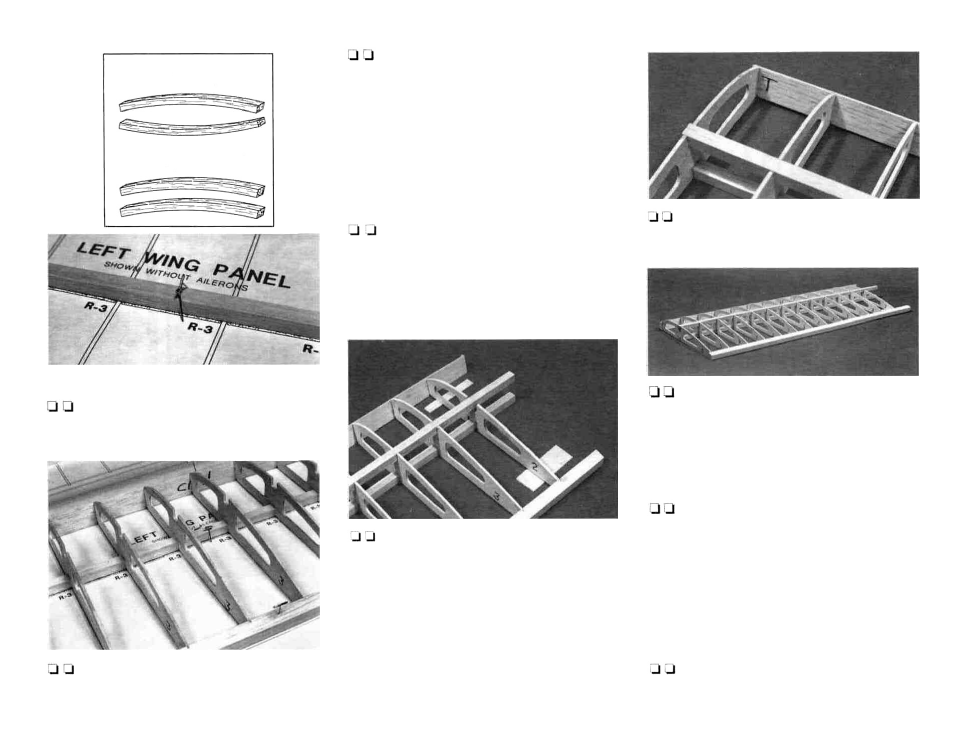
TWO WARPED SPARS INSTALLED
THIS WAY WILL RESULT IN A
STRAIGHT WING
TWO WARPED SPARS INSTALLED
THIS WAY WILL RESULT IN A
WARPED WING
Photo for Step 5
6. Remove the wing ribs R-1's, R-2's, and
R-3's from the die-cut sheets. Slide twelve 3/32"
balsa R-3 ribs into place on the bottom spar.
8. Insert the back of the ribs into the notches
in the trailing edge.
NOTE: The plans may shrink or expand slightly
due to humidity. Do not worry if the parts are not
exactly the same size as the plans.
9. Adjust the positions of the leading and
trailing edges left or right until the ribs line up with the
plans. Pin the leading and trailing edges tothe board
so they won't move.
10. Lay two pieces of scrap 1 /16" balsa (from
the die-cut center section sheeting SIE4W05 or
SIE4W06) near the leading and trailing edges under
the location of rib R-2 (this will shim up the rib to allow
for the sheeting later). Push rib R-2 into place as
shown on the plans. Make sure the ends of the rib
engage the notches in the leading and trailing edges.
11. Insert the 3/8" x 3/8" x 30" top spar into the
notches in the ribs.
12. Make sure all the R-3 ribs and the leading
and trailing edges are resting on the flat work sur-
face. Make sure the ribs are inserted all the way into
the notches. The "guide tool" is used to check that
the ribs are vertical.
13. Apply thin CA to all the joints involving the
ribs, spars, leading edges, and trailing edges.
NOTE: When gluing the spars to R-2, make sure
the spars are centered between the dihedral
brace notches in R-2.
7. Insert the front of the ribs into the notches
14. Remove the pins holding the spar in place
in the leading edge. Remember to orient the LE with
the "T" at the tip.
but leave the panel pinned flat on the board by the
leading and trailing edges.