Top Flite TOPA0950 User Manual
Page 9
knife to slightly enlarge the slots. Push a pin (T-pins
work well for this) through the middle of each hinge to
keep them centered.
❏ ❏
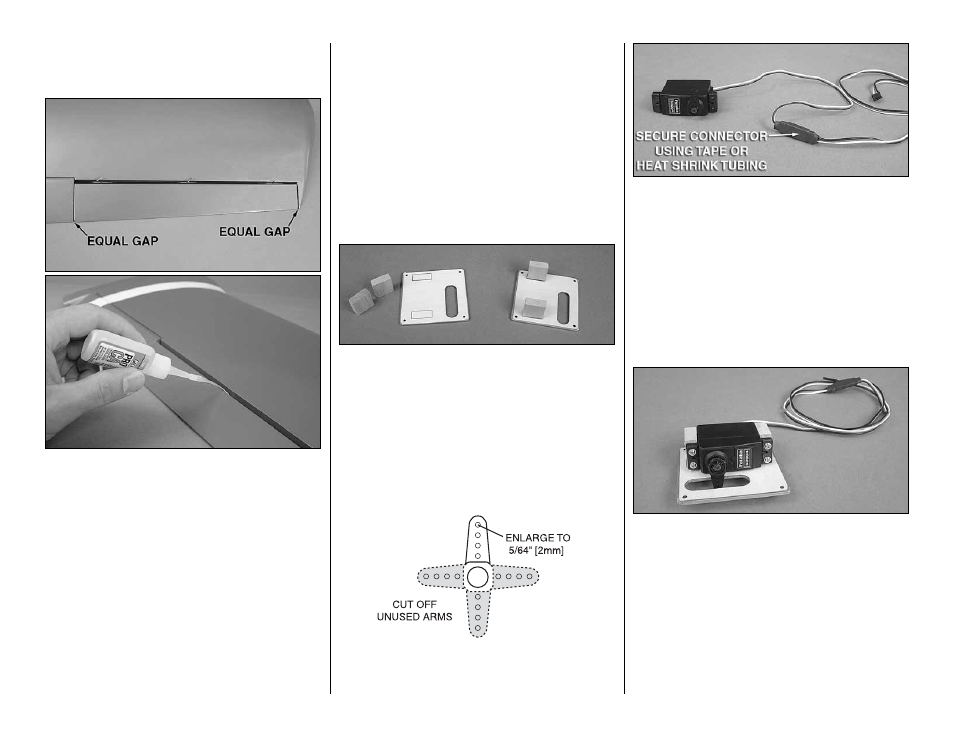
10. Fit the aileron to the hinges and center it
between the wing tip and the fl ap. Remove the pins
from the hinges and position the aileron against the
TE of the wing panel. The hinge gap between the
aileron and wing should only be wide enough to allow
a small line of light through. When satisfi ed, apply 6
drops of thin CA glue to the center of each hinge on
both sides. When the CA has dried, gently pull on the
aileron to confi rm that it is securely glued in place.
❏
11. Repeat steps 1-10 for the left wing panel.
MOUNT THE SERVOS
Before completing this section, confi rm that the
servos that you will be using will properly fi t between
the servo mounting block locations on the aileron
and fl ap servo hatch covers. Make adjustments as
necessary for your brand servos. The block locations
shown in this section will fi t a standard size Futaba
brand servo.
❏ ❏
1. Use epoxy to glue the 5/16" x 3/4" x 3/4"
[8 x 19 x 19mm] hardwood servo mounting blocks
to the inside of the aileron servo hatch cover. Be
sure that the blocks are aligned over the rectangles
with the grain direction perpendicular to the covers
as shown. Allow the epoxy to cure undisturbed.
❏ ❏
2. Cut three arms from a four-armed servo arm
included with the aileron servo. Enlarge the outer hole
of the remaining arm with a 5/64" [2mm] drill bit.
❏ ❏
3. Attach a 24" [610mm] servo extension to
each aileron servo and secure the connector using
tape or heat shrink tubing (not included). Center the
servos with your radio system and install the servo
arm to the servo perpendicular to the servo case as
shown. Be sure to reinstall the servo arm screw into
the servo.
❏ ❏
4. Place a piece of paper folded several times,
between the servo and the servo hatch cover to raise
the servo off of the servo hatch. Position the servo
against the underside of the aileron servo hatch cover
between the mounting blocks. Drill 1/16" [1.6mm]
holes through the mounting tabs on the servo case
into the blocks. Thread a servo mounting screw
(included with the servo) into each hole and back it
out. Remove the piece of paper and apply a drop of
thin CA to each hole to harden the wood. When the
CA has dried, install the servo onto the hatch cover
using the hardware supplied with the servo.
9