Top Flite TOPA0950 User Manual
Page 14
❏
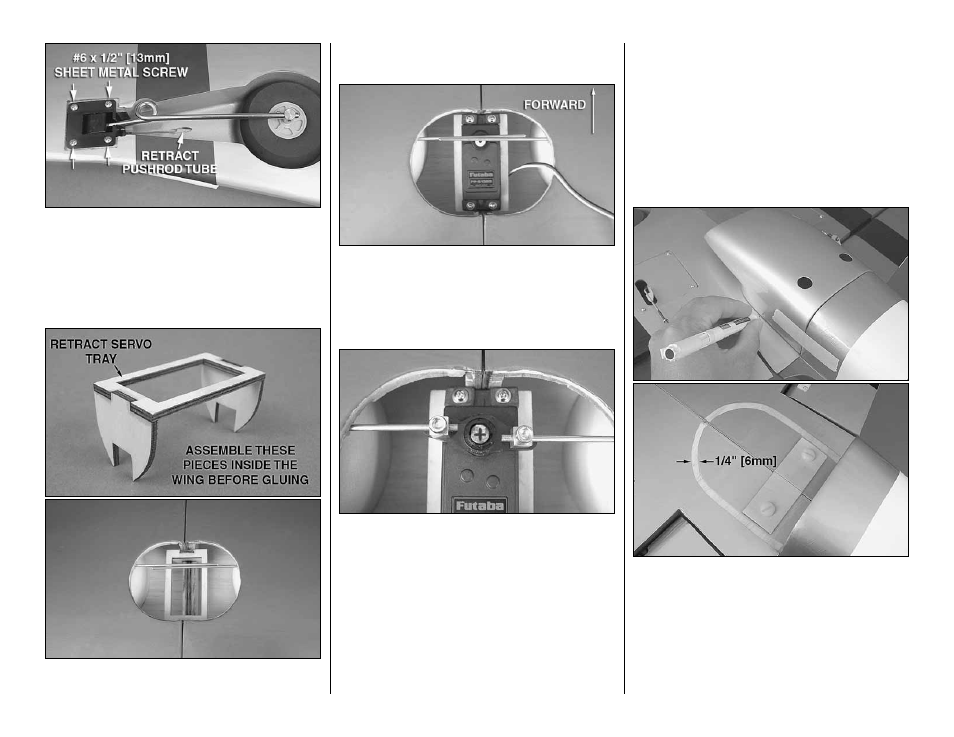
7. Insert the retract wire in the retract pushrod
tube. Position the retracts on the retract rails. Secure
the retracts to the rails using four #6 x 1/2" [12.7mm]
sheet metal screws. Operate the retracts by pushing
and pulling the retract wire.
INSTALL THE RETRACT SERVO
❏
1. Glue the retract servo tray pieces together
inside the retract servo bay as shown. The pieces
must be glued together after being inserted into place
in the servo bay.
❏
2. Install the retract servo onto the servo tray with
the servo spline facing forward using the hardware
included with the servo. Be sure to reinforce the servo
screw holes with thin CA glue. Use your radio system
to bring the retract servo into the counterclockwise
locked position (raising the retracts).
❏
3. Cut four arms from a six-arm servo arm, leaving
two arms opposite each other. Attach a brass screw-
lock pushrod connector to each arm in the outer holes
using a nylon retainer to secure them. Loosely thread
a 4-40 x 1/8" [3.2mm] SHCS into each screw-lock
pushrod connector. Slide the retract pushrod wires
through the screw-lock pushrod connectors and
press the arm onto the servo spline in the orientation
shown. With the retract pushrods all the way in the
retracted position, tighten the SHCS in the screw-
lock pushrod connectors against the pushrods. Test
the operation of the retracts with your radio system.
Confi rm that the servo does not bind and that the
retracts fully raise and lower to the locked positions.
Make any adjustments necessary with the screw-
lock pushrod connectors and servo arm position. If
the pushrod length interferes with the rotation of the
servo, cut them shorter as necessary. When satisfi ed,
secure the servo arm to the servo using the servo
arm screw included with the servo.
FINISH THE WING
❏
1. Temporarily install the wing onto the fuselage
using two 1/4-20 nylon wing bolts. The wing dowels
will fi t into receiving holes in the former at the LE edge
of the wing. Align the fi berglass air scoop onto the
underside of the wing in line with the fuselage and
tape it into position. Use a felt-tip pen to trace around
the air scoop onto the wing. Remove the scoop and
trim a 1/4" [6mm] strip of covering from the underside
of the wing just inside the line you drew.
14