Top Flite TOPA0950 User Manual
Page 7
PREPARATIONS
❏
1. If you have not done so already, remove the
major parts of the kit from the box and inspect for
damage. If any parts are damaged or missing, contact
Product Support at the address or telephone number
listed in the “Kit Inspection” section on page 5.
❏
2. Carefully remove the tape and separate all the
control surfaces. Use a covering iron with a covering
sock on medium/high heat to tighten the covering
if necessary. Apply pressure over sheeted areas to
thoroughly bond the covering to the wood.
ASSEMBLE THE WING
HINGE THE AILERONS & FLAPS
You can do the right wing fi rst so your work
matches the photos the fi rst time through, or you
can work on them together.
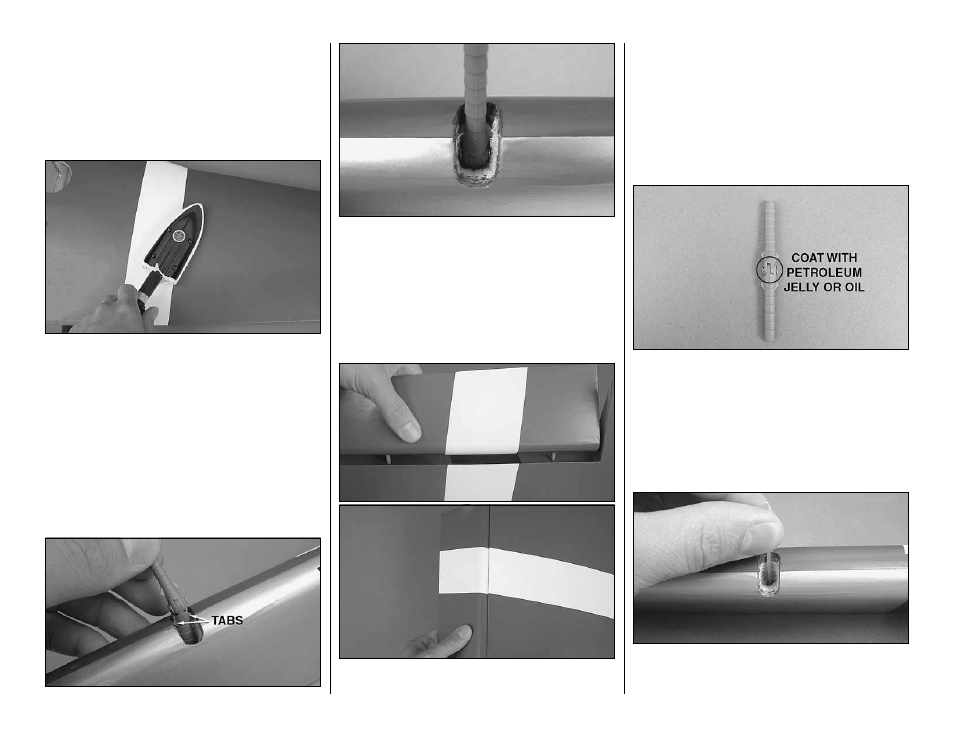
❏ ❏
1. Test fi t the included hinge points into the pre-
drilled pockets in the fl ap. Press the hinge points into
the pockets with the tabs on the hinge points aligned
parallel with the hinge line on the fl ap. Push the hinge
points as far deep as they can fi t into the pockets in
the fl ap. Work the hinge up and down in the pocket. Be
sure that the hinges move freely inside the pocket. If
there is any interference, use a hobby knife to slightly
enlarge the pocket as necessary.
❏ ❏
2. Fit the fl ap to the wing panel by inserting
the other ends of the hinge points into the pockets
in the wing TE. Push the fl ap up against the wing
so that the fl ap LE and the wing TE edge touch. If
the two surfaces cannot touch, carefully deepen the
hinge point pockets in the wing panel with a 3/16"
[4.8mm] drill bit as necessary. When satisfi ed, defl ect
the fl ap down at least 1-1/4" [32mm] which will cause
the pivot pins in the hinge points to align themselves
in the center of the fl ap LE radius. Work the fl ap up
and down to ensure smooth movement.
❏ ❏
3. Remove the fl ap from the wing panel and pull
the hinge points from the pockets. Coat the center of
each hinge point with petroleum jelly or oil. This will
prevent epoxy from sticking to the pivoting portion of
the hinges.
Before performing steps 4 and 5, have denatured alcohol
and some paper towel pieces ready for epoxy cleanup.
❏ ❏
4. Mix up a batch of 30-minute epoxy. Use a
toothpick or something similar to coat the insides
of the hinge point pockets in the fl ap and the wing
7