Top Flite TOPA0950 User Manual
Page 10
❏ ❏
5. Use the string taped inside the aileron servo
hatch to pull the servo lead through the wing ribs.
❏ ❏
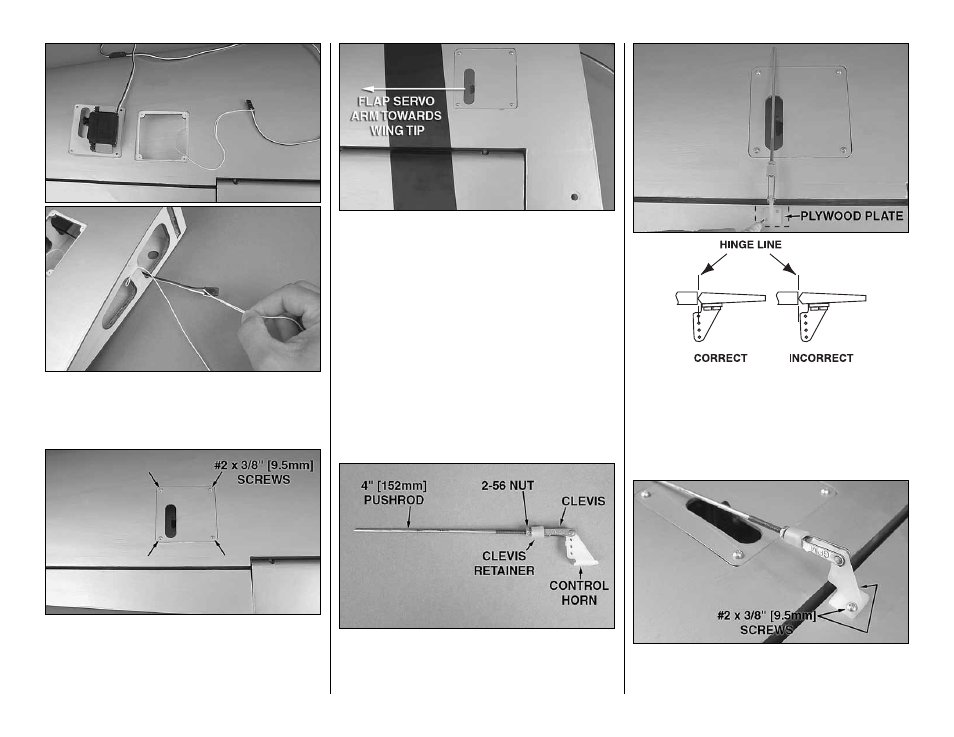
6. Thread a #2 x 3/8" [9.5mm] self-tapping screw
into each hatch mounting hole and back it out. Apply
a drop of thin CA to each hole to harden the wood.
Install the aileron hatch cover to the wing as shown
using four #2 x 3/8" [9.5mm] self-tapping screws.
❏ ❏
7. Mount the fl ap servo and hatch cover in the
same way. The fl ap servo does not require a servo
lead extension.
❏
8. Repeat steps 1 to 7 for the left wing panel. Make
note that the fl ap servo arm will be mounted on the
root rib side of the left wing panel so that when the
fl ap servos are joined together using a Y-harness,
they will both move in the same direction.
INSTALL THE AILERON & FLAP PUSHRODS
❏ ❏
1. Thread a 2-56 nut and a metal clevis 15
complete turns onto a 4" [152mm] pushrod. Slide a
silicone clevis retainer onto the clevis and connect
the clevis to the outer hole of a nylon control horn.
❏ ❏
2. Position the control horn over the plywood
plate in the aileron (if you cannot see it, hold the aileron
at a shallow angle in good lighting or use a small pin
to puncture the covering) using the position of the
servo arm as a guide. Align the holes in the control
horn directly over the aileron hinge line and mark the
location of the control horn mounting holes.
❏ ❏
3. At the marks, drill 1/16" [1.6mm] holes through
the plywood plate. Do not drill all the way through
the aileron! Thread a #2 x 3/8" [9.5mm] self-tapping
10