Top Flite TOPA0950 User Manual
Page 11
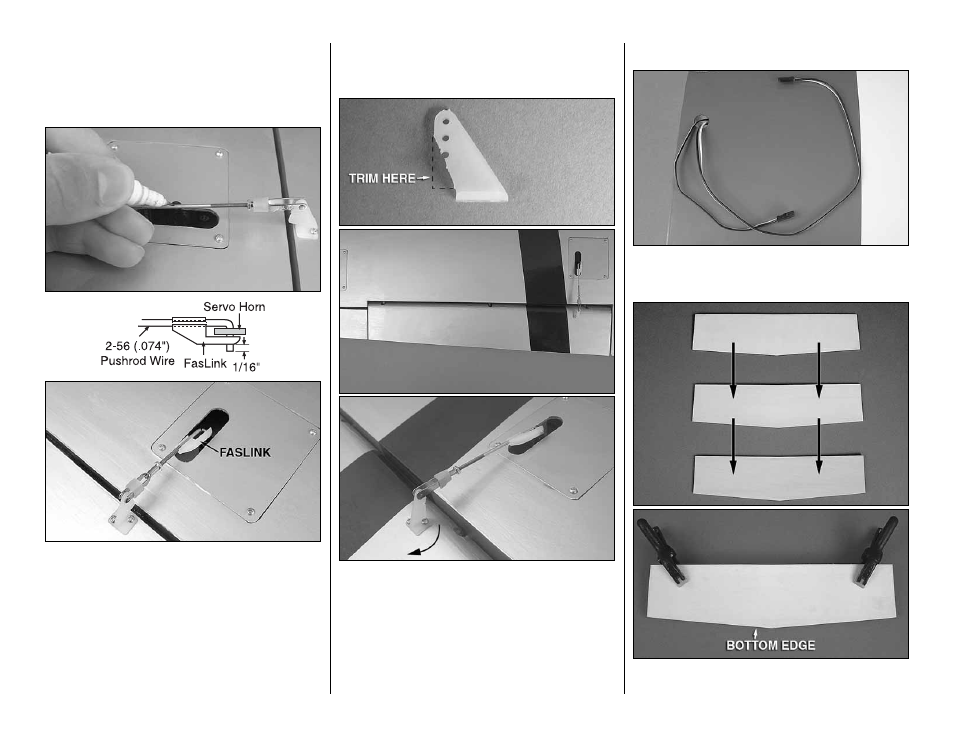
screw through each hole and back it out. Apply a
couple drops of thin CA glue to each hole to harden
the wood. When the glue has dried, install the control
horns onto the aileron using two #2 x 3/8" [9.5mm]
self-tapping screws.
❏ ❏
4. Use tape or a small clamp to hold the aileron
in the neutral position. Make a mark on the pushrod
where it crosses the outer hole in the servo arm.
Make a 90° bend at the mark on the pushrod and
cut off the excess pushrod 1/4" [6mm] beyond the
bend. Attach the pushrod to the servo arm using a
nylon FasLink. Thread the clevis up or down on the
pushrod as necessary to center the aileron with the
servo arm centered. When satisfi ed, apply a drop of
threadlocking compound onto the threads behind
the clevis and tighten the 2-56 nut against it. Slide
the silicone clevis retainer to the end of the clevis to
secure it.
❏ ❏
5. The fl ap pushrod is installed in the same
manner. The control horn must be trimmed as shown
to clear the TE of the wing when the fl ap is defl ected
down. Also, use the aileron hinge line as a guide to
position the control horn onto the fl ap (as described
in step 2)
❏
6. Repeat steps 1-5 for the other wing panel.
JOIN THE WING PANELS
❏
1. Route the fl ap and aileron servo leads through
the holes on the top of the wing near the root of each
wing panel.
❏
2. Locate the three plywood wing joiners. Glue
the pieces together with 30-minute epoxy, being sure
11