Top Flite TOPA0950 User Manual
Page 24
24
❏
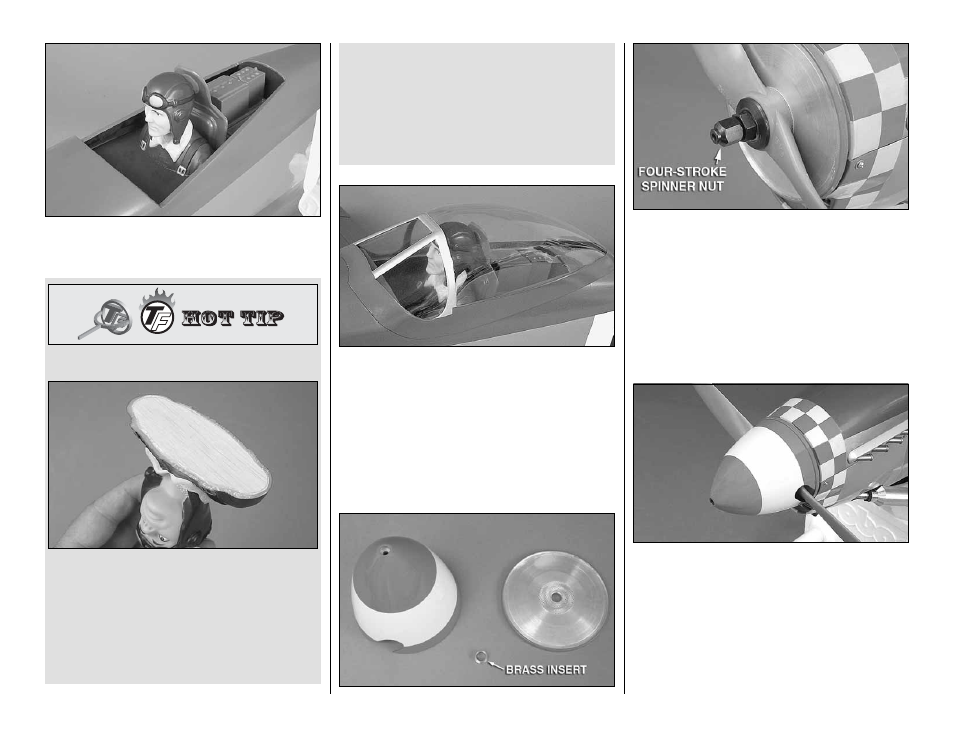
8. Glue the pilot fi gure and seat back to the cockpit
fl oor. For ease of installation, we recommend gluing the
seat back to the pilot before installing them into position.
Pilot Figure Base
To provide a larger surface for gluing, install a
plywood base inside the pilot fi gure. To do this,
trace the outline of the base of the pilot onto a piece
of paper. Sketch another line 1/8" [3mm] inside
the traced line. Tape the paper to a scrap piece of
plywood (not included) and cut out the piece along
the inside line you drew. Test fi t the piece into the
base of the pilot and sand as necessary. Roughen
the inside of the pilot fi gure near the base using
a rotary tool such as a Dremel with a sanding bit
or some 220-grit sandpaper. Glue the plywood
piece into the base with a mixture of epoxy and
Microballoons. When the epoxy has cured, sand
away any excess epoxy for a smooth, fl at base.
A screw can be installed through the cockpit fl oor
and into the plywood piece for extra security after
the pilot fi gure has been glued into the cockpit.
❏
9. Glue the canopy to the fuselage using canopy
glue such as J&Z R/C 56 Canopy Glue (JOZR5007).
INSTALL THE PROPELLER & SPINNER
❏
1. The spinner backplate is drilled to fi t a 3/8"
[9.5mm] crankshaft. A brass insert is also included for
5/16" [7.9mm] crankshafts. Fit the spinner backplate
onto the crankshaft. A fl at bottomed spinner nut is
provided for use with a two-stroke engine, and a
spinner nut is also provided for use with the O.S.
.91 four-stroke engine. Install the propeller and prop
washer onto the crankshaft and tighten it down with
the appropriate spinner nut.
❏
2. The 4mm spinner bolt may need to be cut shorter
depending on your choice of engine installation. Test
fi t the spinner cone onto the backplate and determine
how short the spinner bolt will be. Thread one of the
spinner nuts onto the bolt before cutting it shorter in
order to straighten any damaged threads that may
occur from the cutting process. When satisfi ed,
double check the tightness of the spinner nut, and
install the spinner cone onto the backplate using the
4mm spinner bolt.