Top Flite TOPA0708 User Manual
Page 22
22
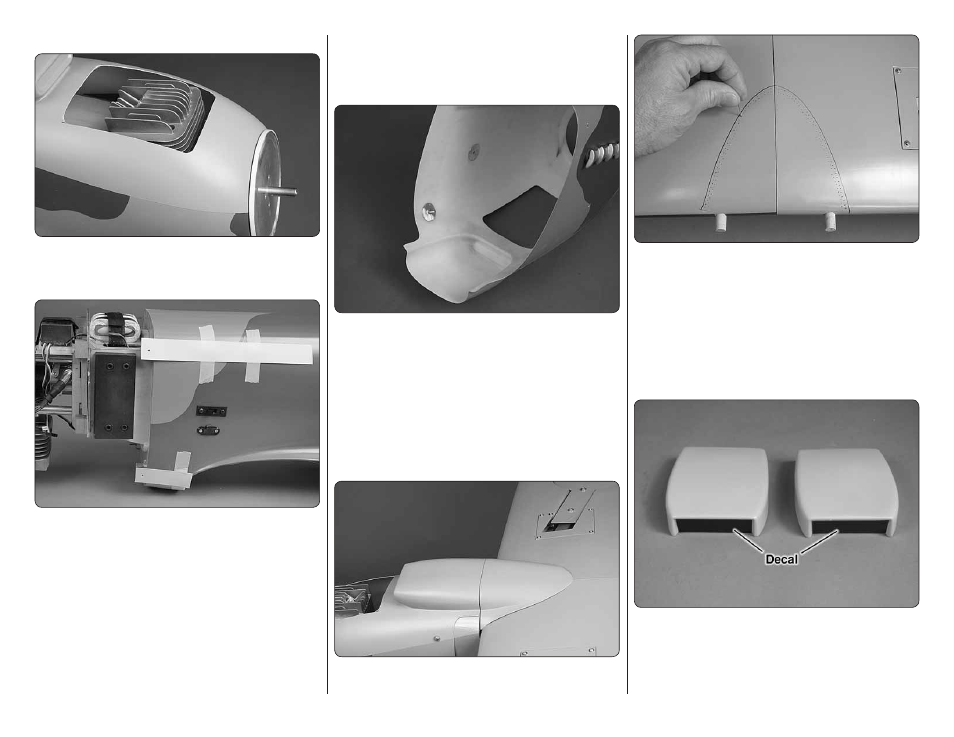
INSTALL THE COWL
❏
1. Test fi t the cowl over the engine. The bottom of the
cowl will need to be trimmed to fi t over the engine head
and the exhaust. Use the spinner to center the cowl.
❏
2. Cut and tape pieces of paper or card stock to the
side of the fuselage to mark the location of the center
of the cowl mounting blocks. Position the cowl back on
the fuselage. Mark and drill a 3/32" [2mm] pilot hole at
each location.
❏
3. Remove the cowl and enlarge the holes in the
cowl to 1/8" [3mm].
❏
4. Secure the cowl to the fuselage with eight #4 x
½" [12.5mm] sheet metal screws and #4 fl at washers.
Remove the screws and cowl. Use thin CA to harden
the screw holes.
❏
5. Use 320 grit sandpaper to sand the inside of the
cowl at the eight screw hole locations. Also, sand one
side of the eight aluminum discs. Clean the disc and
the inside of the cowl with denatured alcohol.
❏
6. Use 6-minute epoxy to glue the aluminum disc to
the inside of the cowl, aligned with the mounting holes.
A 4-40 x ½" [12.7mm] machine screw, #4 fl at washer
and 4-40 nut have been provided to hold the disc in
position while the epoxy cures.
❏
7. After the epoxy has cured, reinstall the cowl on
the fuselage.
APPLY THE FINAL DETAILS
❏
1. Position the aft air intake behind the cowl and slide
the wing into position. Bolt the wing on the fuselage.
❏
2. Mark the outline of the aft air intake on the bottom
of the wing. Remove the wing and use a T-pin to poke
holes inside the outline of the aft air intake.
❏
3. Wipe off the outline. Use sandpaper to roughen
the bottom of the aft air intake. Clean the area with
denatured alcohol.
❏
4. Use epoxy to glue the aft air intake to the bottom
of the wing.
❏
5. Apply the radiator intake decal on both radiators.
❏
6. Sand the bottom of both radiators to roughen
the surface. Clean the bottom of the radiators with
denatured alcohol.