Top Flite TOPA0965 User Manual
Page 7
7
❏
❏
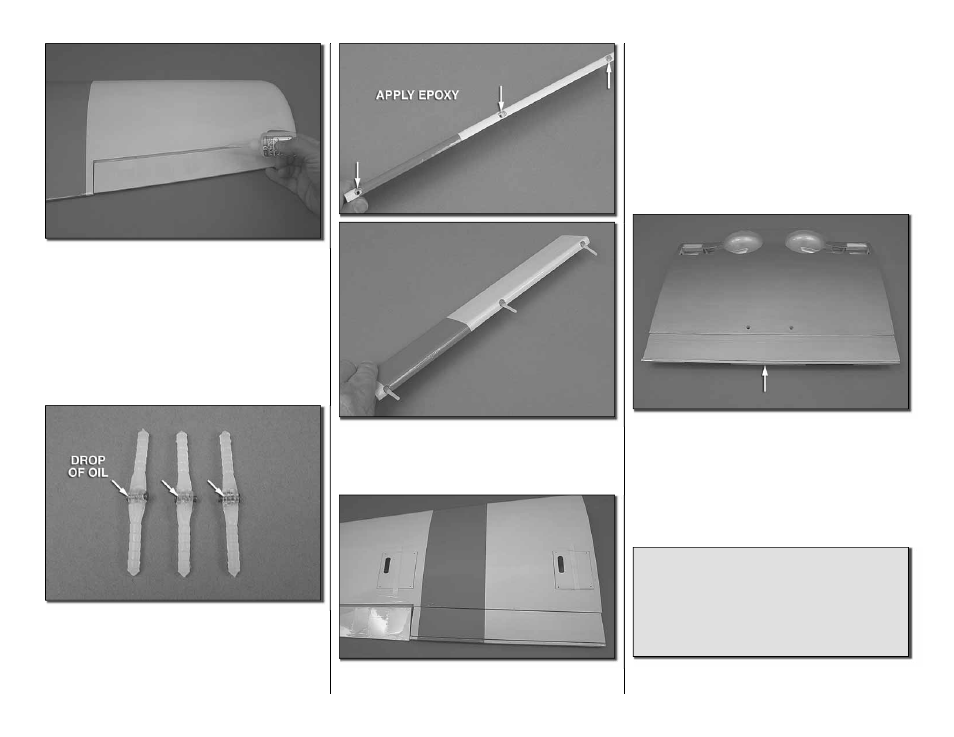
6. Apply six drops of thin CA to the top and
bottom of each hinge. Do not use CA accelerator.
After the CA has fully hardened, test the hinges by
pulling on the aileron.
❏ ❏
7. Locate three hinge point hinges. Apply a
drop of oil or apply a small amount of Vaseline into
the hinge pin. This will keep glue from getting into
the hinge and preventing it from moving freely. Be
careful not to get oil on the hinge point. If you do,
clean it with a cloth and alcohol.
❏
❏
8. Apply 30-minute epoxy to one side of each
hinge and using a toothpick work a small amount of
epoxy into each of the holes for the hinge in the leading
edge of the fl ap. Insert one hinge into each hole.
❏
❏
9. Clean excess epoxy from the hinge and
fl ap. Apply epoxy to the other end of the hinge and
the holes in the trailing edge of the wing. Insert the
fl ap into the wing. Align the hinges with the pivot
point in the hinge pocket and so the hinge pivots
perpendicular to the leading edge of the fl ap. Be sure
the fl ap is pushed close enough to the trailing edge
of the wing so the fl ap sits completely fl ush with the
bottom of the wing.
❏
❏
10. Set the assembly aside until the glue cures.
❏
11. Repeat steps 1- 10 for the left wing panel.
❏
12. Using the same technique used for the wing
fl aps, install four hinges into the fl ap of the wing
center section.
❏
13. After the glue has completely cured work the
fl ap hinges until they move smoothly.
Did you know…The AT-6 advanced trainer was
one of the most widely used aircraft in history.
Most AAF fi ghter pilots trained in AT-6s prior
to graduation from fl ying school. Many of the
“Spitfi re” and “Hurricane” pilots in the Battle of
Britain trained in Canada in “Harvards,” the British
version of the AT-6.
7