Top Flite TOPA0965 User Manual
Page 11
11
❏
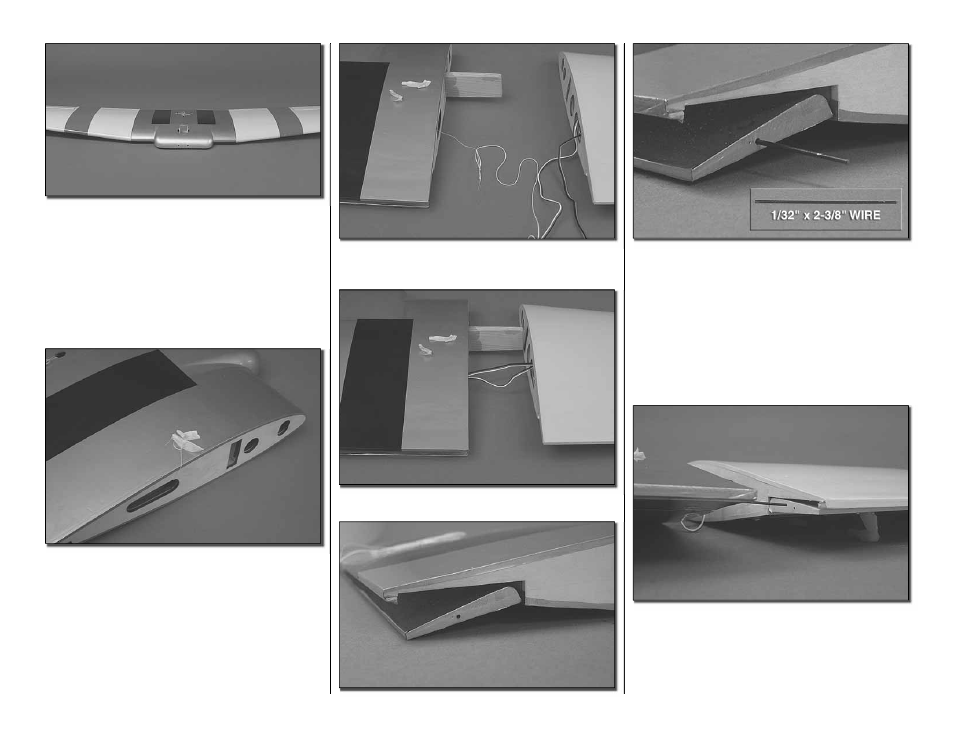
2. Slide the wing panels in position, making sure
that they fi t the joiner properly and are fl ush to the
center section.
❏
❏
3. Once you have a good fi t, remove one wing
panel and mark the joiner so you will have the proper
orientation when you permanently glue it in place.
❏
4. Repeat step 3 for the other joiner.
❏
5. On each outer rib of the center section there is a
string taped. Remove the tape and re-apply the tape
and string onto the top of the center section.
❏
❏
6. Liberally apply 30 minute epoxy to the end of
the wing joiner that fi ts into the wing center section
and into the joiner pocket of the wing center section.
Slide the joiner into the pocket. Any excess glue that
may come out when the joiner is inserted can be
spread onto the outer rib of the wing center section.
❏
❏
7. Tie the aileron and fl ap servo lead string from
the wing to the string from the wing center section.
❏ ❏
8. Pull the servo leads into the wing center section
❏
❏
9. Locate one of the 1/32" x 2-3/8" [1 x 61mm]
piano wires. On the end of the fl ap there is a small
hole. Insert the wire into the hole. No glue is used
on this wire!
❏
❏
10. Apply epoxy to the other end of the wing
joiner, the joiner pocket in the outer wing panel, the
rib of the wing center section and the rib of the outer
wing panel.
❏ ❏
11. Slide the wings together, making sure you
pull the servo leads into the center section. The wire
needs to be slid into the hole in the outer wing panel
fl ap. Once you are sure the wire is in the hole of both
the center and outer wing panel fl aps, slide the two
panels together.