Top Flite TOPA0965 User Manual
Page 17
17
❏
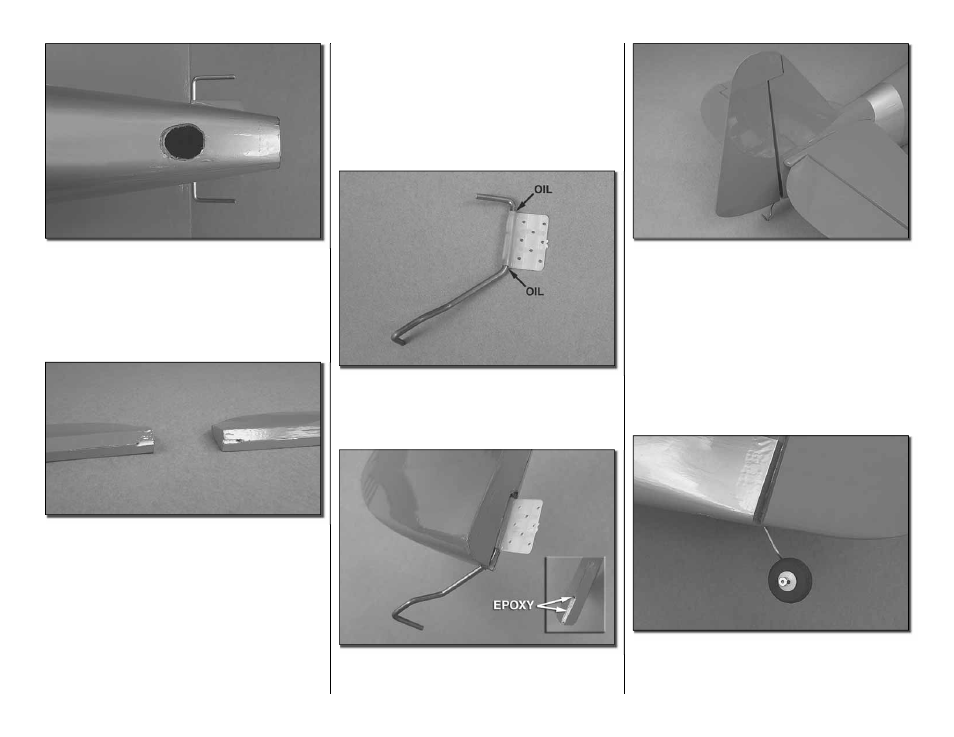
13. On the bottom of the fuselage there is a hole
that is large enough to get a forceps or small pliers up
to the clevis. Should you ever need to make additional
adjustments to the clevis, you can cut the covering
away to reveal the hole. The hole can be covered over
with the small piece of silver MonoKote included in
the kit.
❏
14. Apply a small amount of epoxy into the slot and
hole for the joiner wire in each elevator half.
❏
15. Cut nine 1" x 1" [25 x 25mm] hinges from a
CA hinge strip. Insert three hinges into the elevator. If
the hinges don’t remain centered, stick a pin through
the middle of the hinge to hold it in position. Slide the
hinges into the elevator.
❏
16. Remove any pins you may have inserted into
the hinges. Adjust the elevator so there is a small gap
between the LE of the elevator and the stab. The gap
should be small, just enough to see light through or to
slip a piece of paper through. Apply six drops of thin
CA to the top and bottom of each hinge. Do not use
CA accelerator. After the CA has fully hardened, test
the hinges by pulling on the elevator. Do this for both
elevator halves.
❏
17. Apply a couple of drops of oil into the nylon
bearing. This will prevent glue from getting into the
joint and causing the rudder to bind.
❏
18. Apply a small amount of epoxy into the hole and
the slot in the rudder. Insert the tail wheel assembly
into the rudder and allow the glue to cure.
❏
19. Install three hinges into the rudder the same as
done with the elevator. Test fi t the rudder to the fi n. If
necessary, use your modeling knife to adjust the hinge
slot for the nylon bearing. When installing the rudder,
the nylon bearing from the tail wheel assembly must
also fi t into the fi n. Once satisfi ed with the fi t, remove
the rudder. Put some epoxy onto each side of the
nylon bearing. Then re-insert the rudder back onto
the fi n. When you are satisfi ed with the fi nal fi t apply
six drops of thin CA to both sides of each hinge.
❏
20. Slide the tail wheel onto the tail wheel wire.
Secure it in place with a 1/8" [3mm] wheel collar
and 2-56 set screw. Be sure to use threadock on the
set screw.