Top Flite TOPA0135 User Manual
Page 32
❏ ❏
30. Use a sanding block and 150-grit
sandpaper to blend the upward facing surfaces of
the wing ribs and spars.
❏ ❏
31. Use the patterns provided on the plans to
make the Upper and Lower Flap Skins and the
Aileron Skins from four 1/16" x 3" x 36" balsa
sheets. Use the bevel gauge (assembled during
elevator construction) to mark the bevel line and
the rib end line on the inside surfaces of the skins,
then sand the bevel just as you did for the elevator
and rudder skins.Note: Be sure you make a right
and left set.
❏ ❏
32. Draw a line on the inside surface of the
upper flap skin 3/32" from the outboard tip. This will
indicate exactly where to position the skin over W-7
so you do not glue it to W-7B. Glue the upper flap
skin to the ribs. Hint: Refrain from using
accelerator during this step so that the CA you
use to glue on the
bottom flap skin will not
prematurely cure.
❏ ❏
33. If building flaps, push a pin between W-2B
and W-2 through the Upper Flap Skin about 1/8"
from the end of the ribs. This “point” will be used
later as a reference of where to cut the flap root
away from the wing.
❏ ❏
34. Glue the lower flap skin to the wing
and the trailing edge of the upper flap skin with
thick CA.
❏ ❏
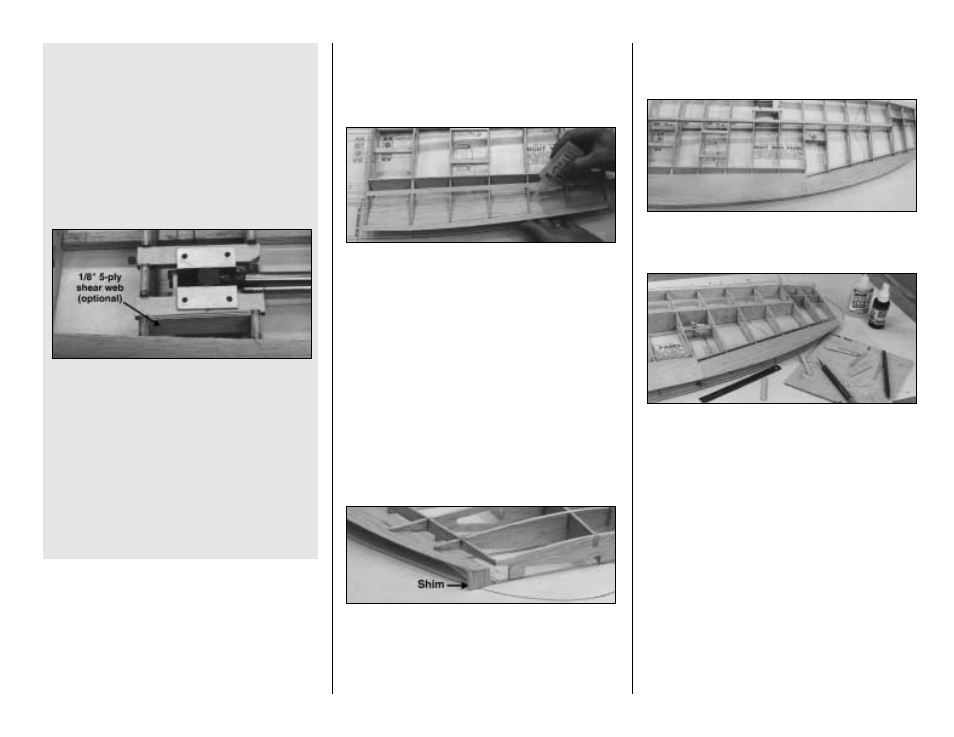
35. Wet the outside surface of the top aileron
skin. Position it on the wing and glue it only to ribs
W-7B - W-10. Cut a piece of scrap balsa so that
when inserted in between the skin and the building
board it raises the skin in alignment with the tip of
the aft outer spar. Insert the shim, then glue the
aileron skin to the rest of the ribs. Leave the shim
in place until the wing is removed from the
building board.
❏ ❏
36. Wet the outside surface of the other
aileron skin and glue it to the upper skin
and ribs.
❏ ❏
37. Custom fit, then glue eight 1/16" balsa
Vertical Grain Shear Webs to the rear of the main
spars between all ribs except W-1 and W-2, and
W-2 and W-3. NOTE: It’s still important to keep the
wing on your flat building board. When you remove
two crossed pins to glue in a shear web, replace
one pin by pushing it through the shear web and
spar into the building board.
❏ ❏
38. Remove the wing from the building board.
Carefully trim off all jig tabs except the jig tabs on
W-1 and W-11. Sand the ends of the spars and the
flap sheeting flush with W-1.
Return to step 1 to build the other wing panel.
Use the other half of the wing plan and
remember to build a right and a left wing panel.
- 32 -
wheels will retract fully into the wheel well. With
the CJM retracts and the modifications to the rib
doublers shown in the sketches, the strut
protrudes outside the wing skin about 1/16" to
1/8". It may be possible to fully enclose the wheel
and strut inside the wheel well by deepening the
notches in the plywood rib doublers W-5R but
this is not recommended as it will weaken the
structure.
❏ ❏
28. Make adjustments to the notches in the
doublers if required, then use 30-minute epoxy to
glue the retract rails in position.
❏ ❏
29. (Optional) Make a Front Retract Rail
Sheer Web from a 2-1/2" wide piece of 5-ply
aircraft plywood (not supplied). Glue it to the
front retract rail and the rib doublers with
30-minute epoxy. NOTE: This front retract rail
sheer web is recommended for solid strut type
retracts or flyers who fly off of rough grass fields
but is optional and not required for coil type
wire struts.
Retract installation will be completed after
the wing panels are joined. This will allow you to
insure that both installations are identical by
comparing the two and making small
adjustments if required.