Installing on a wall – Toa HY-1500HW User Manual
Page 10
10
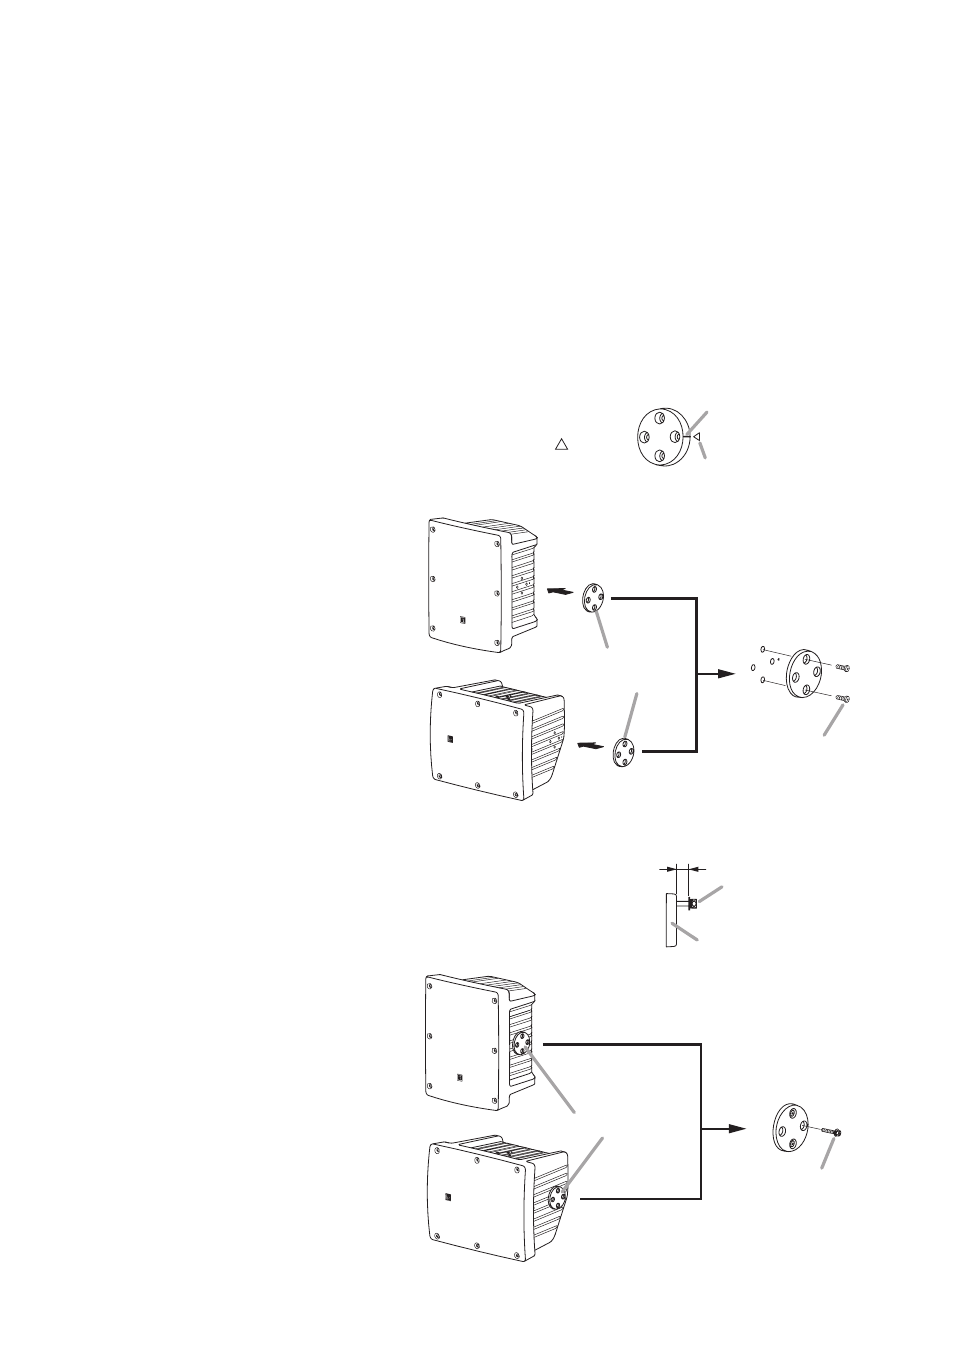
Step 2. Screw the supplied hex bolt loosely into the bracket holder.
Leave the bolt head out about 4 mm (0.16") to allow the
mounting bracket to be inserted.
Follow the same installation procedure to the other side.
2-1. For vertical speaker installation
(V-Series Mounting Bracket)
2-2. For horizontal speaker installation
(H-Series Mounting Bracket)
5. INSTALLING ON A WALL
The brackets to be used are as follows.
For vertical speaker installation:
V-Series Mounting Brackets (HY-1200VB, HY-1200VW, HY-1500VB and
HY-1500VW)
For horizontal speaker installation: H-Series Mounting Brackets (HY-1200HB, HY-1200HW, HY-1500HB and
HY-1500HW)
The example here shows the installation procedure of the mounting bracket using the HS-1200 series speaker
system.
5.1. Using the H- or V-Series Mounting Bracket Only
The speaker direction angle is within the range of 15° upward to 60° downward for both the vertical and
horizontal speaker installations.
The angle is given with reference to the horizontal axis (0°).
Step 1. Attach the supplied bracket holder to the speaker.
Fix the bracket holder using the supplied 2 screws (M6 x 20)
after aligning its datum line with the positioning mark (
) on
the speaker system.
Follow the same installation procedure to the other side.
1-1. For vertical speaker installation
(V-Series Mounting Bracket)
1-2. For horizontal speaker installation
(H-Series Mounting Bracket)
Positioning mark
(on the speaker system)
Datum line
(on the bracket holder)
Bracket holder
(accessory)
Machine screw
M6 x 20 (accessory)
Bracket holder
Hex bolt M6 x 30
(accessory)
Bracket holder
Hex bolt M6 x 30
(accessory)
About 4 mm (0.16")