Paging settings, Paging settings" on – Toa M-9000M2 CE-AU User Manual
Page 47
47
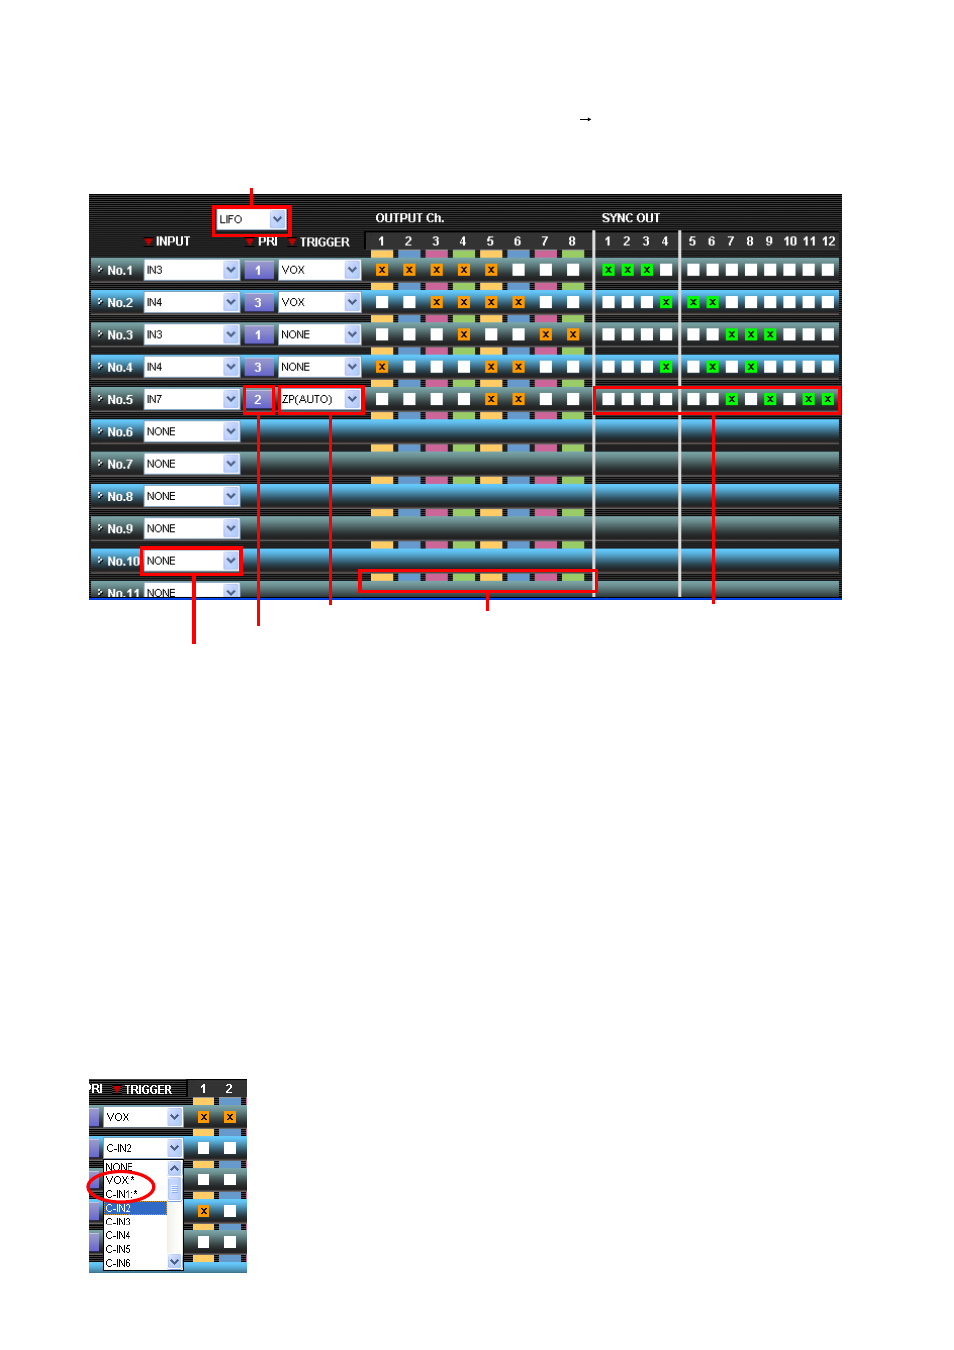
7.6. Paging Settings
Clicking the "PAGING" button on the main view or selecting "Setting
Paging Setting" from the menu on the
main screen causes the "Paging Setting" screen to be displayed. This screen is also displayed if priority 1 - 3
of "Pri" on the Main view is clicked.
Step 1. Select the input channel from the "INPUT" selection pull-down menu. Only the channels set in the
"Input Paging Priority Setting" dialog window (
Selecting the "INPUT" displays the set priorities in the "PRIORITY" indication box.
Step 2. Select the activation trigger from the "TRIGGER" selection box. Only those triggers that can be set
are displayed.
Step 3. Check the output channels to be used for paging calls.
Step 4. Check the “SYNC OUT” checkbox for the output contacts to be closed in synchronization with the
paging calls.
The number of contacts that can be set: Up to 12 (up to 4 when the C-001T is not used, or up to 12
when used)
Step 5. Repeat Steps 1 - 4 for all required paging numbers. Up to 32 types of paging can be set.
Step 6. Select "LIFO," "FIFO" or "MIX" from the Same Priority Operation setting box.
Step 7. Switching the setting screen to another screen without completing the current settings causes a
confirmation dialog box to appear.
The (*) suffix is added to triggers already in use.
Same priority operation setting
Input selection
Priority indication
Trigger selection
Output channel selection
Interlocked output
contact