Removing the inverter board, Removing the inverter board -17 – Clevo M860TU User Manual
Page 43
Disassembly
Removing the Inverter Board 2 - 17
2.Disassembly
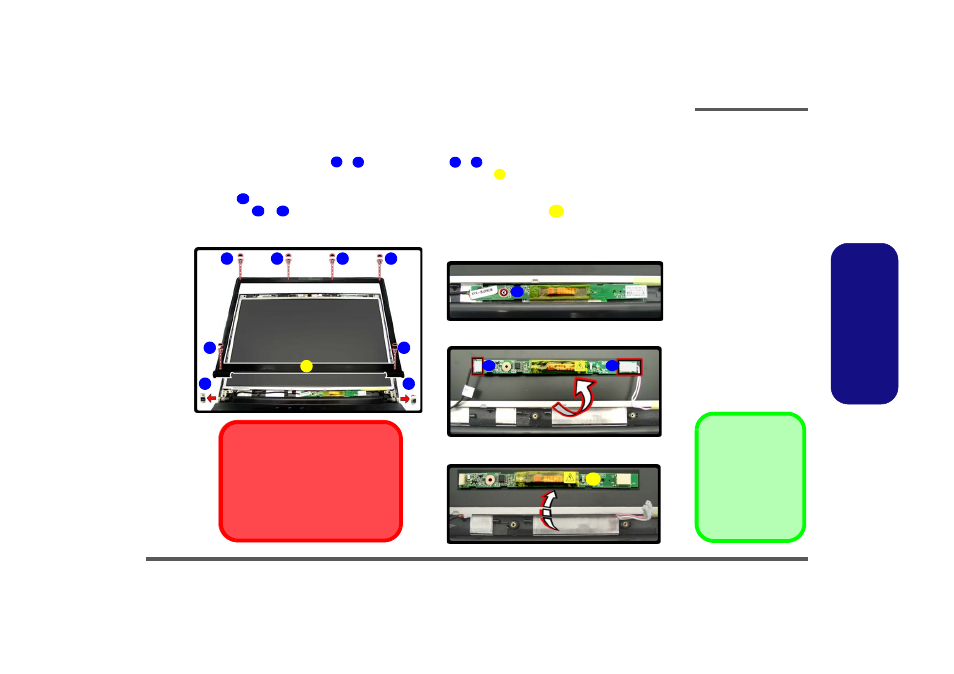
Removing the Inverter Board
1. Turn off the computer, and remove the battery (
2. Remove any rubber covers, screws
-
and hinge covers
-
(
Figure 13
a
), then run your finger around
the middle of the frame to carefully unsnap the LCD front panel module
from the back.
3. Discharge the remaining system power (see
below).
4. Remove screw
(
Figure 13
b
) from the inverter, and carefully lift the inverter board up slightly.
5. Disconnect cables
&
(
Figure 13
c
) from the inverter, then remove the inverter
(
Figure 13
d
) from the top
case assembly.
Figure 13
Inverter Board
Removal
a. Remove the 6 screws
and unsnap the LCD
front panel module from
the back.
b. Remove the screw from
the inverter board and lift
the board up slightly.
c. Disconnect the cables
from the inverter.
d. Remove the inverter.
1
6
7
8
9
10
11
12
13
9. LCD Front Panel
13. Inverter Board
• 6 Screws
a.
b.
8
13
Inverter Power Warning
In order to prevent a short circuit when re-
moving the inverter it is necessary to dis-
charge any remaining system power. To do
so, press the computer’s power button for a
few seconds before disconnecting the in-
verter cable.
1
11
2
5
3
4
6
7
c.
d.
12
10
9